

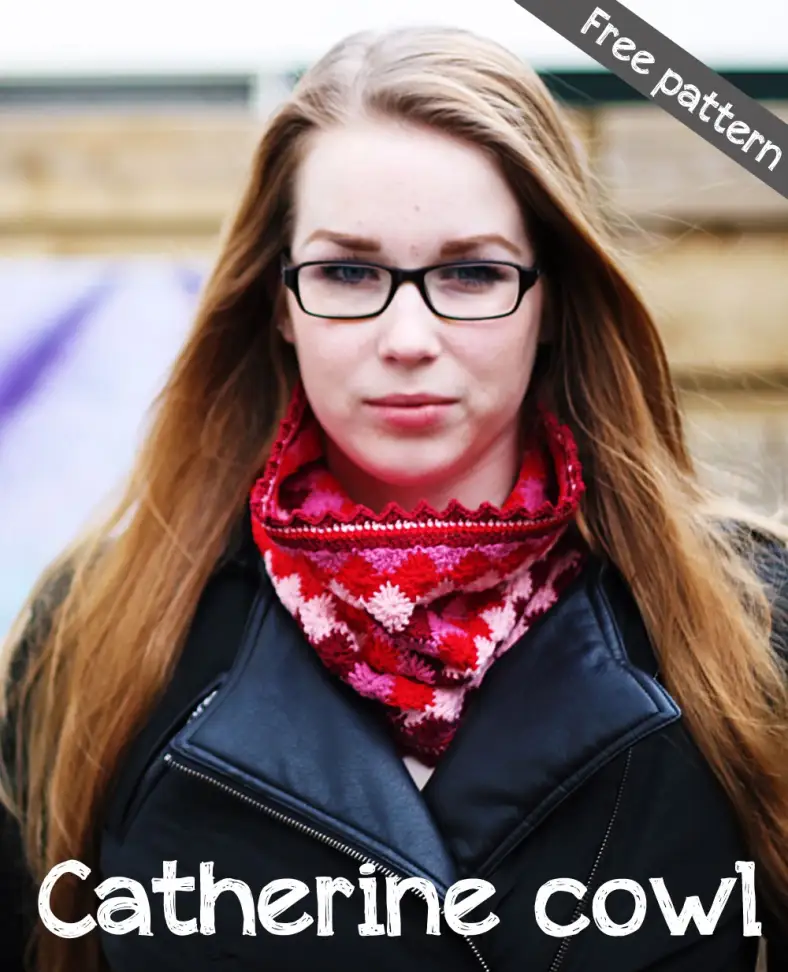
Materials and preparation
Yarn
| Label | Colour name | Code | Amount |
|---|---|---|---|
| Colour A | 717 | 1 ball | |
| Colour B | 653 | 1 ball | |
| Colour C | 510 | 1 ball | |
| Colour D | 654 | 1 ball |
Shop the yarn
You can get Cotton 8 from Retailers such as:
Crochet hook
3.5mm (US size E/4)
Measurements
20cm (8in) in diameter and 28cm (11in) in height.
Gauge/tension
Not critical
Abbreviations (US terms)
- ch
- chain
- ch-sp
- chain-space: the space below the chains
- dc
- double crochet
- dc3tog
- double crochet 3 stitches together (explained in pattern)
- dc7tog
- double crochet 7 stitches together
- hdc
- half double crochet
- sc
- single crochet
- ss
- slip stitch
- st(s)
- stitch(es)
Notes
- If you want to increase the size of the cowl, use a multiple of 8+1 for the starting chain. For example, 176+1=177 chains, or 200+1=201 chains. Each added 8 chains creates an extra Catherine wheel in the pattern.
- Please note that you do not weave in the ends after changing colours. The yarn ends are used to sew the cowl ends together. So make sure to leave a 20-25cm yarn end of each colour.
- The pattern is worked in rows. After finishing your cowl, sew the short edges together to create a cowl.
- Extra instructions to clarify the pattern are displayed in italic.
Crochet pattern
Cut Colour A. Keep in mind that you need long ends to stitch the sides together so leave a yarn tail of 20cm (8in).
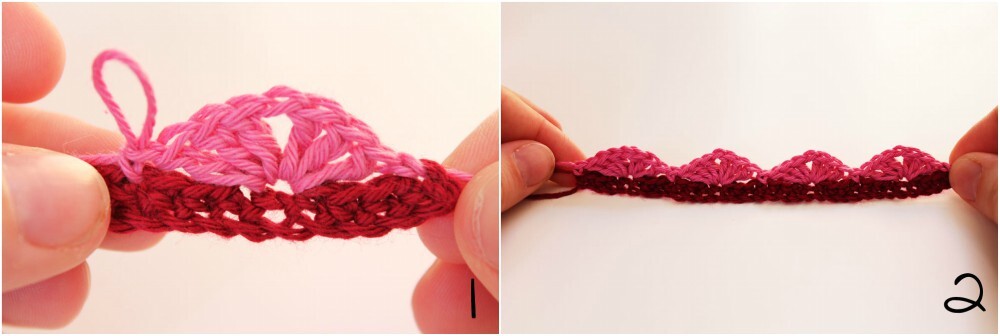
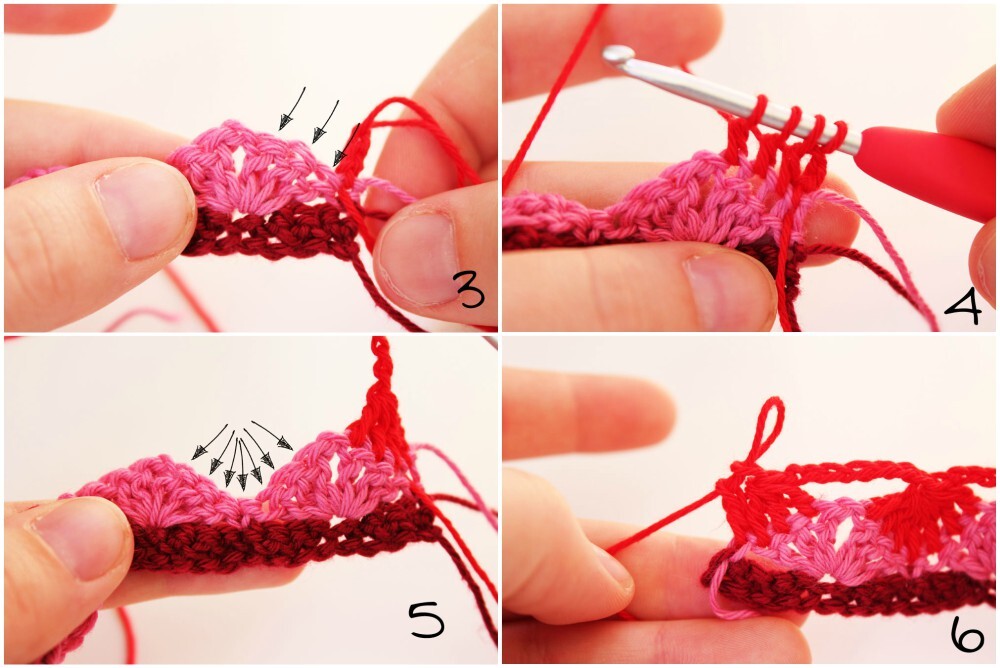
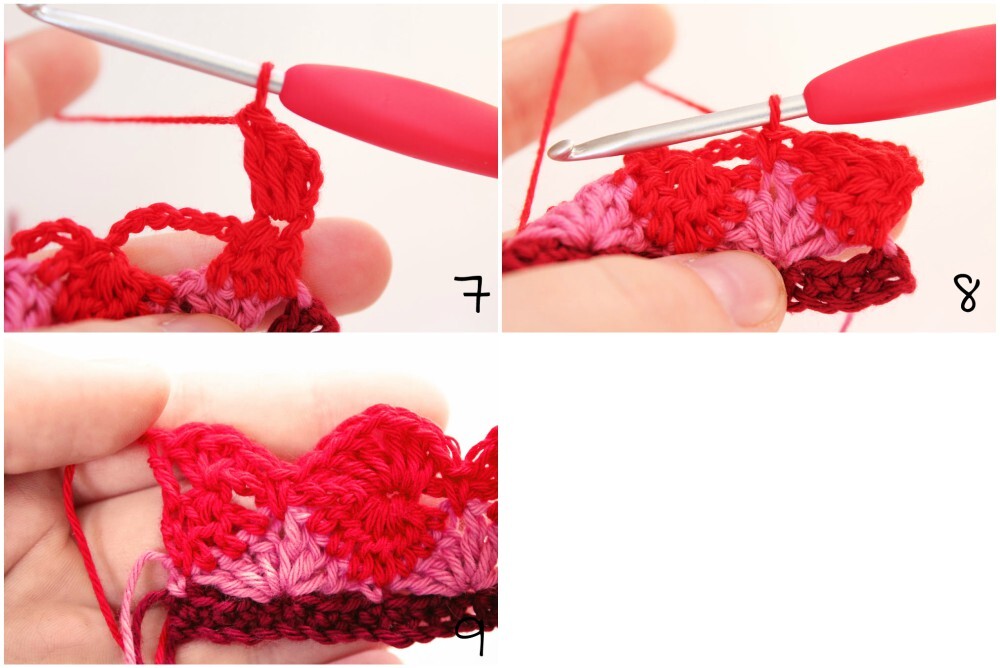
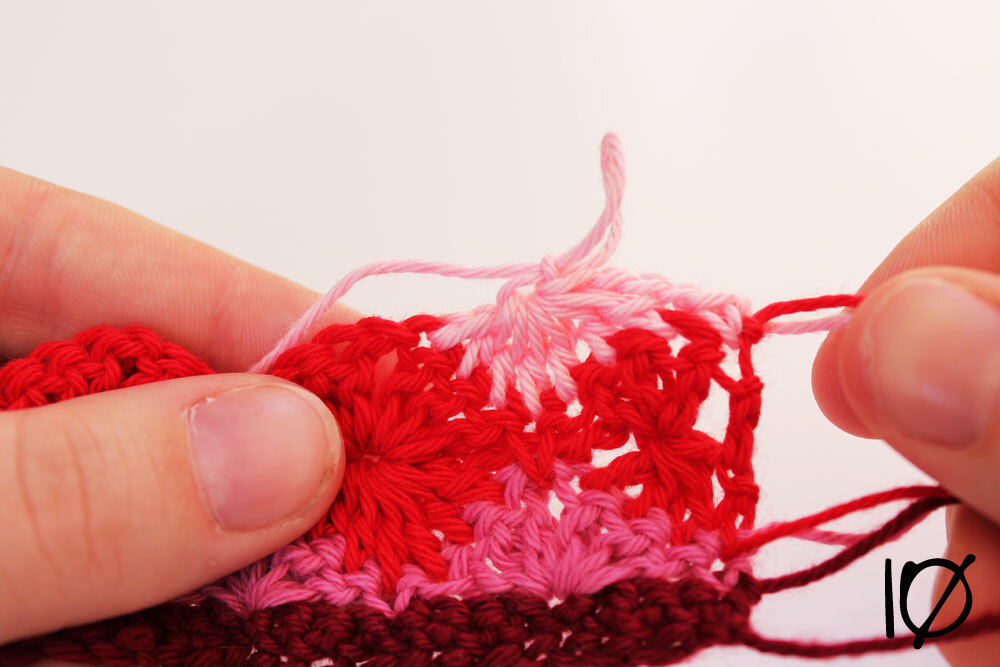
Rows 8-11 form the stitch pattern. Repeat the stitch pattern until you’ve made 31 rows in total, alternating Colour A, B, C and D or until your cowl has the desired height. When you’ve decided that your cowl is high enough, you need another row to straighten the top.
Edge
Now you have a large, rectangular cowl with straight edges! But since we’ve ended with two different colours on both sides, the colour schemes for the edging is different on each side.
Top edging (side we were already working on)
The edging consists of a few rows of sc and a picot edging. The picot edging works with a multiple of 4, so we need to decrease 1 stitch in the edging. Please note that we will only work from right to left in the edging, so don’t turn your work but cut your yarn after each row and join it on the right side again.
Bottom edging (side with the starting chain)
Please note that you also don’t turn your work while making the bottom edge so cut your yarn every row and join it on the right side. The bottom side is already made out of 160 chains, so you don’t have to decrease here.
You now have a similar edging on both sides.
Picots (final row of both top and bottom edging)
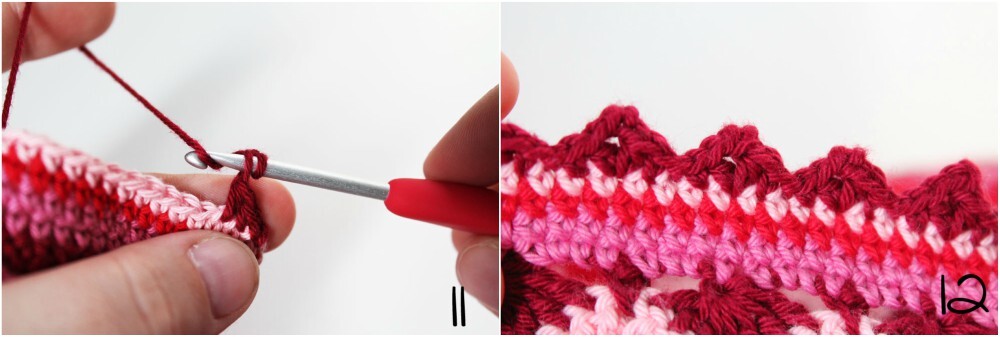
Make a picot as follows: ch2, put your hook through the 2nd ch from hook, yarn over (photo 11), pull the hook through all loops on hook.
Blocking
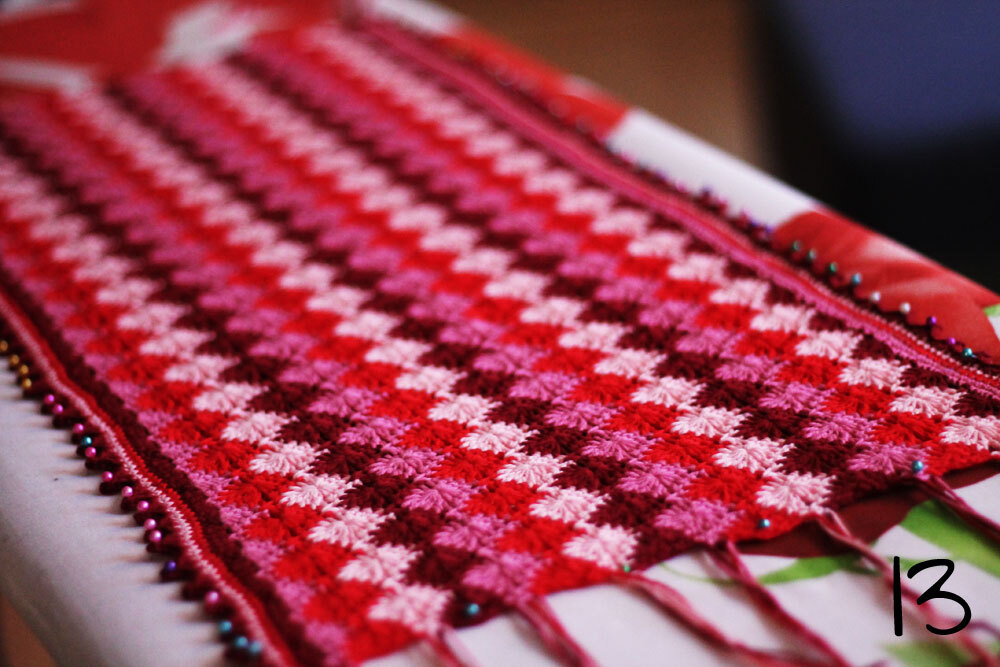
You’re done with the largest part already! Now we just need to block it before we start closing up the cowl. This yarn really benefits from blocking because a) it gets softer, b) the pattern definition is enhanced by it and c) the cowl will stay in shape. You might have noticed that the Catherine wheel is a tight stitch. When you start with 80cm of chains, the middle of cowl is only 65cm. Wet blocking will largely correct this. For blocking instructions, please check my blocking tutorial. Make sure to pay extra attention to the points of the picot, as you can see in the picture below.
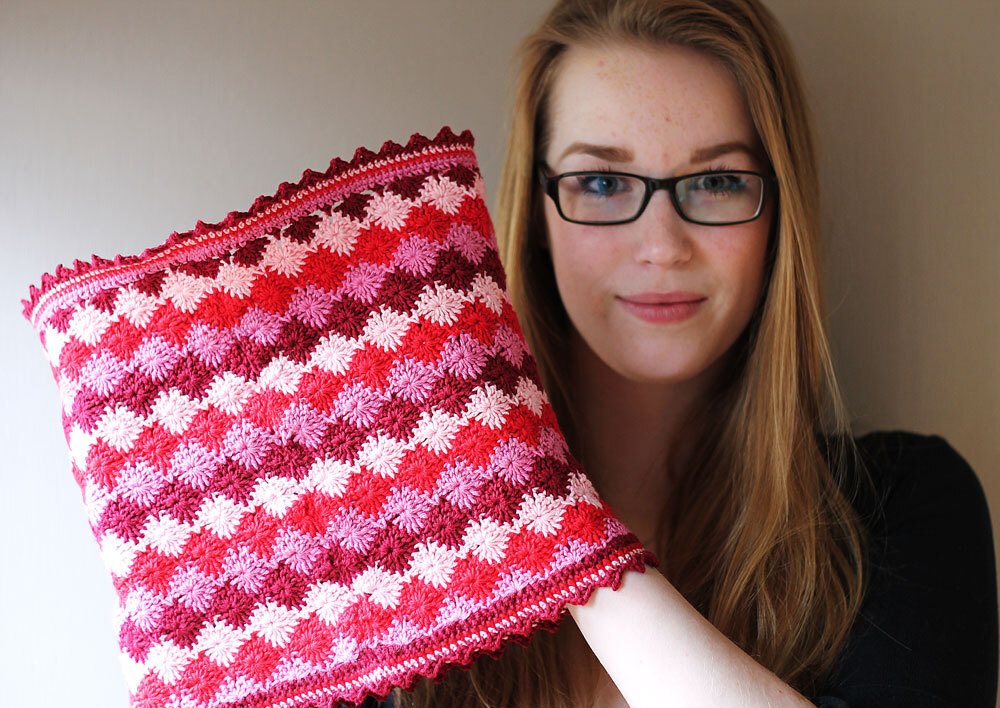
Now only the sewing remains! Place the short ends of the cowl next to each other, and using your yarn tails, sew the stitches of each row together. Weave your yarn end through the outermost part of the stitch on the other side of the row. It’s not the most exciting part of the pattern, but if you do it neatly you’ll be happy afterwards. You barely can see the seam this way (check the picture below)!
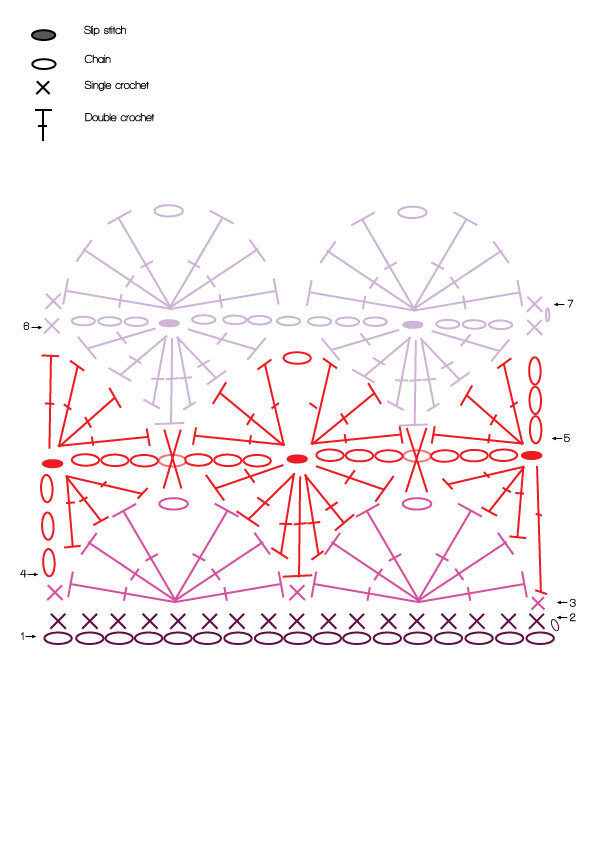
Diagrams
You might also like

Comments
Shelley
January 30, 2021 14:45