

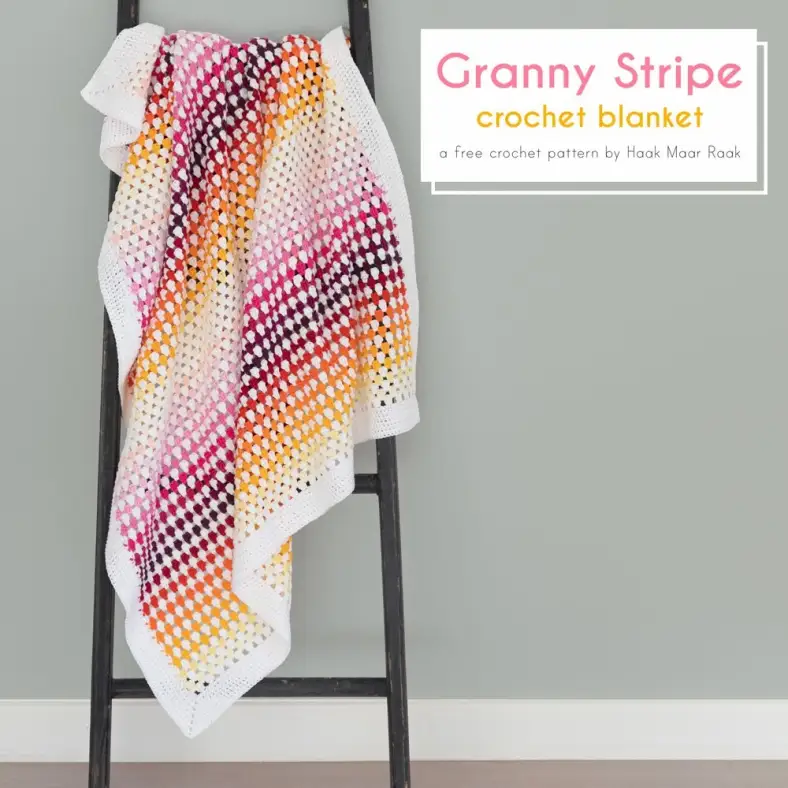
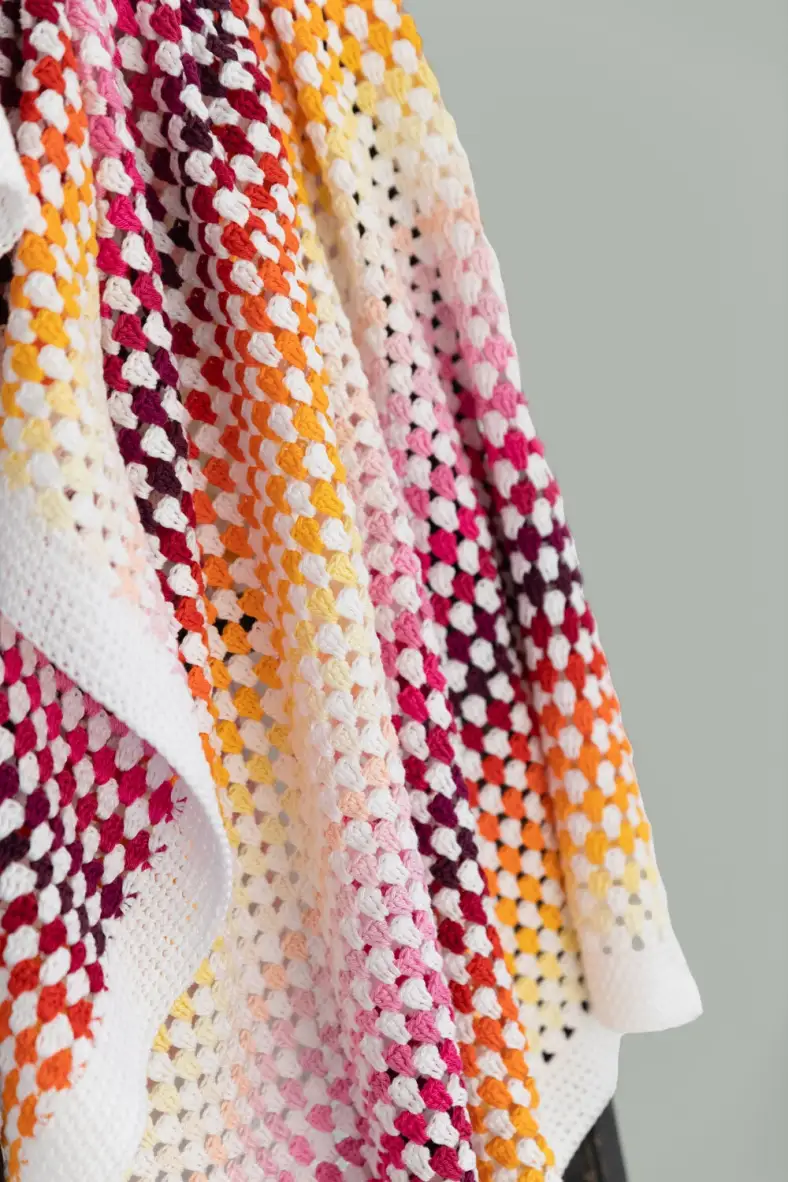
Are you a novice crocheter, ready for something bigger than a potholder? The beginner-friendly Granny Stripe Baby Blanket is easy to follow and perfect for tweaking to your preferences.
With plenty of step-by-step photos, you can create something beautiful. A cosy, colourful project that’s as fun to make as it is to gift!
Materials and preparation
Yarn
| Label | Colour name | Code | Amount |
|---|---|---|---|
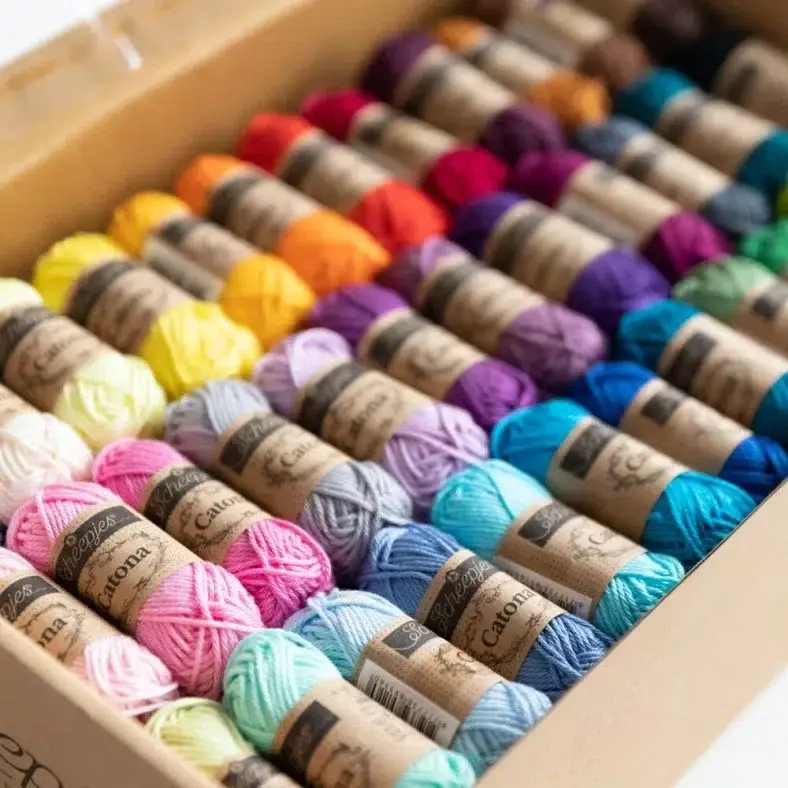
| Colour A | Snow White | 106 | 9 balls |
| Label | Colour name | Code | Amount |
|---|---|---|---|
| Colour B | Candle Light | 101 | 1 ball |
| Colour C | Lemonade | 403 | 1 ball |
| Colour D | Yellow Gold | 208 | 1 ball |
| Colour E | Sweet orange | 411 | 1 ball |
| Colour F | Tangerine | 281 | 1 ball |
| Colour G | Royal Orange | 189 | 1 ball |
| Colour H | Poppy Rose | 390 | 1 ball |
| Colour I | Scarlet | 192 | 1 ball |
| Colour J | Shadow Purple | 394 | 1 ball |
| Colour K | Tyrian Purple | 128 | 1 ball |
| Colour L | Cherry | 413 | 1 ball |
| Colour M | Shocking Pink | 114 | 1 ball |
| Colour N | Fresia | 519 | 1 ball |
| Colour O | Tulip | 222 | 1 ball |
| Colour P | Icy Pink | 246 | 1 ball |
| Colour Q | Powder Pink | 238 | 1 ball |
| Colour R | Sweet Mandarin | 523 | 1 ball |
| Colour S | Old Lace | 130 | 1 ball |
Shop the yarn!
You can find the cotton Catona that you need for this yarn at several retailers, such as:
Crochet hook
3.5mm (US size E/4)
Measurements
120 x 93cm (47 x 36.5in)
Gauge/tension
Not critical
Abbreviations (US terms)
- beg
- begin or beginning
- ch
- chain
- dc
- double crochet
- hdc
- half double crochet
- RS
- right side
- sp
- space
- st(s)
- stitch(es)
- ss
- slip stitch
Repeat formats
- *….; rep from * once/twice/3x — Crochet the instructions after * and then repeat that section a further number of times as indicated.
- (…) once/twice/3x — Crochet the instructions between brackets the total number of times indicated.
- […] — Indicates the amount of stitches at the end of a row or round.
Notes
- The pattern is worked on the RS only. For the body of this blanket, this means that you do not turn your blanket to the WS after you finish a row, but instead start on the right-hand side of your last row again (left if you’re a leftie).
- You have allowance in the yardage to add extra granny clusters to a row, or add some extra rows to the blanket. The pattern uses ~6g per row and each colour is used for three rows (~18g in total). In theory, you’d have enough of each colour to add an additional colour sequence to the length of the blanket, or make it slightly wider (don’t do both at the same time without getting more yarn, though!)
- Please note that you use 50g balls of the white colour, and 25g balls of the other colours!
Colour layout
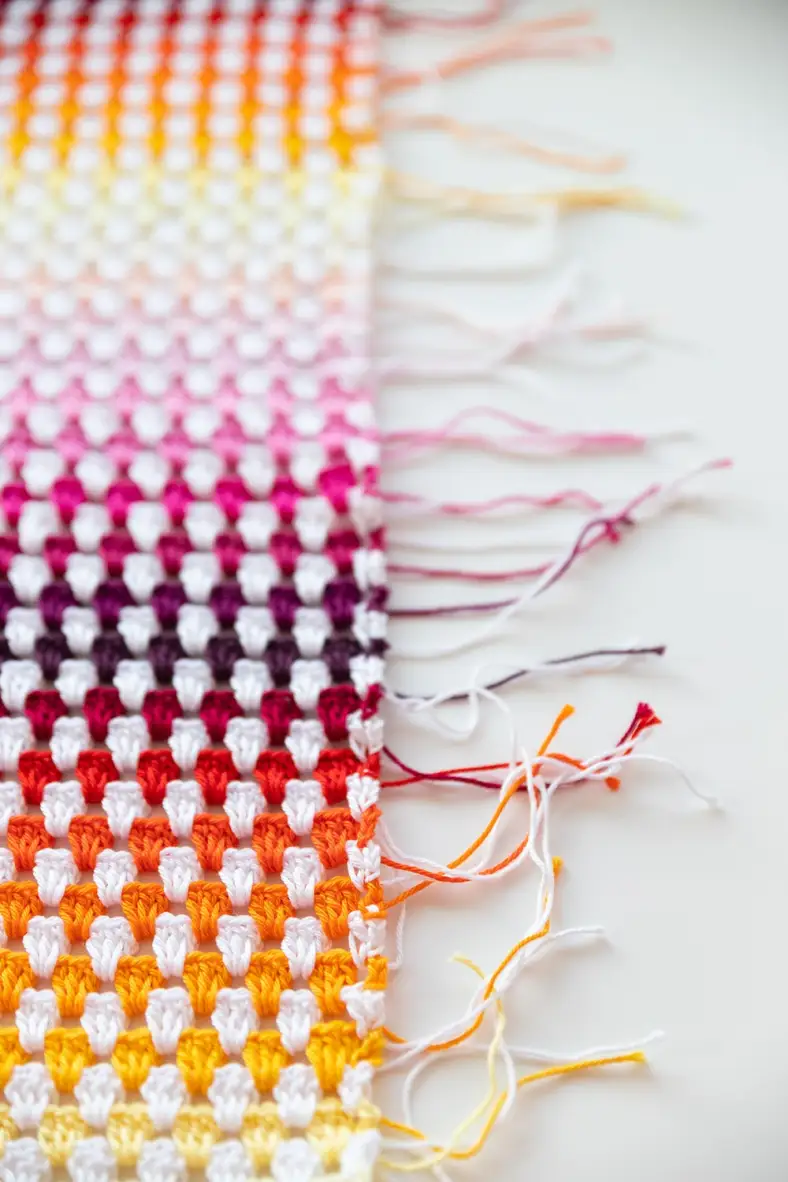
The colour layout is a simple repeat of 18 colours, alternated with a base colour (I’ve used white for this version). The entire sequence repeats three times.
Of course, if you have a different palette in mind or want to use fewer colours, it’s very easy to tweak! The pattern calls for about 6 grams of Catona per row, as written.
Techniques
Body of blanket
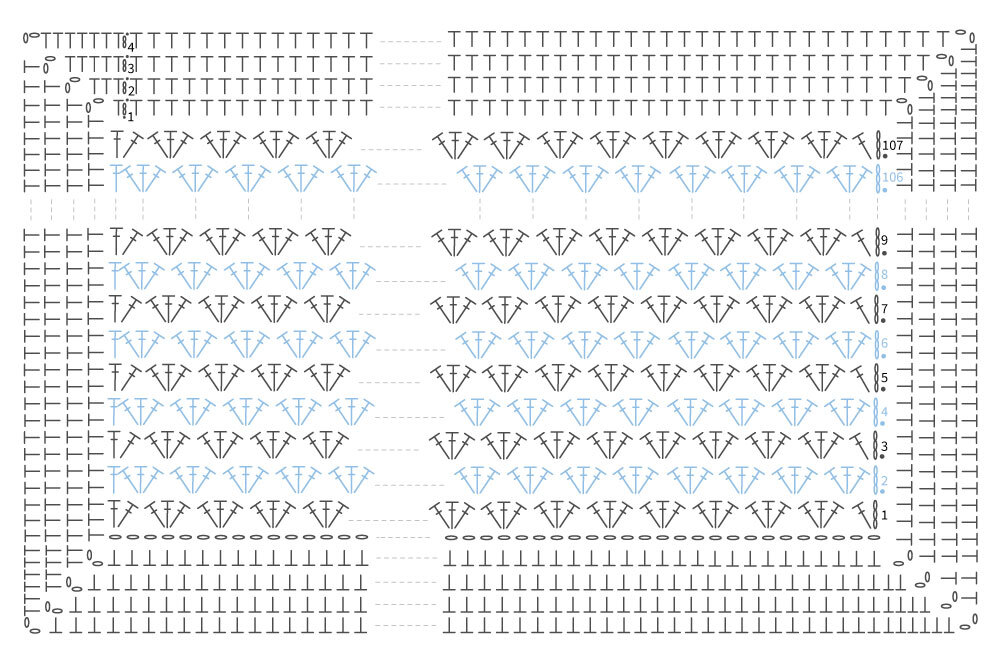
The body of this blanket is made up of "granny clusters": groups of three double crochets that create this basic stitch. To keep your edges nice and straight, we’ll work special clusters at the beginning and end of each row. Also, we won’t be turning our work! To get this specific look, cut your yarn at the end of every row and start again from the right side.
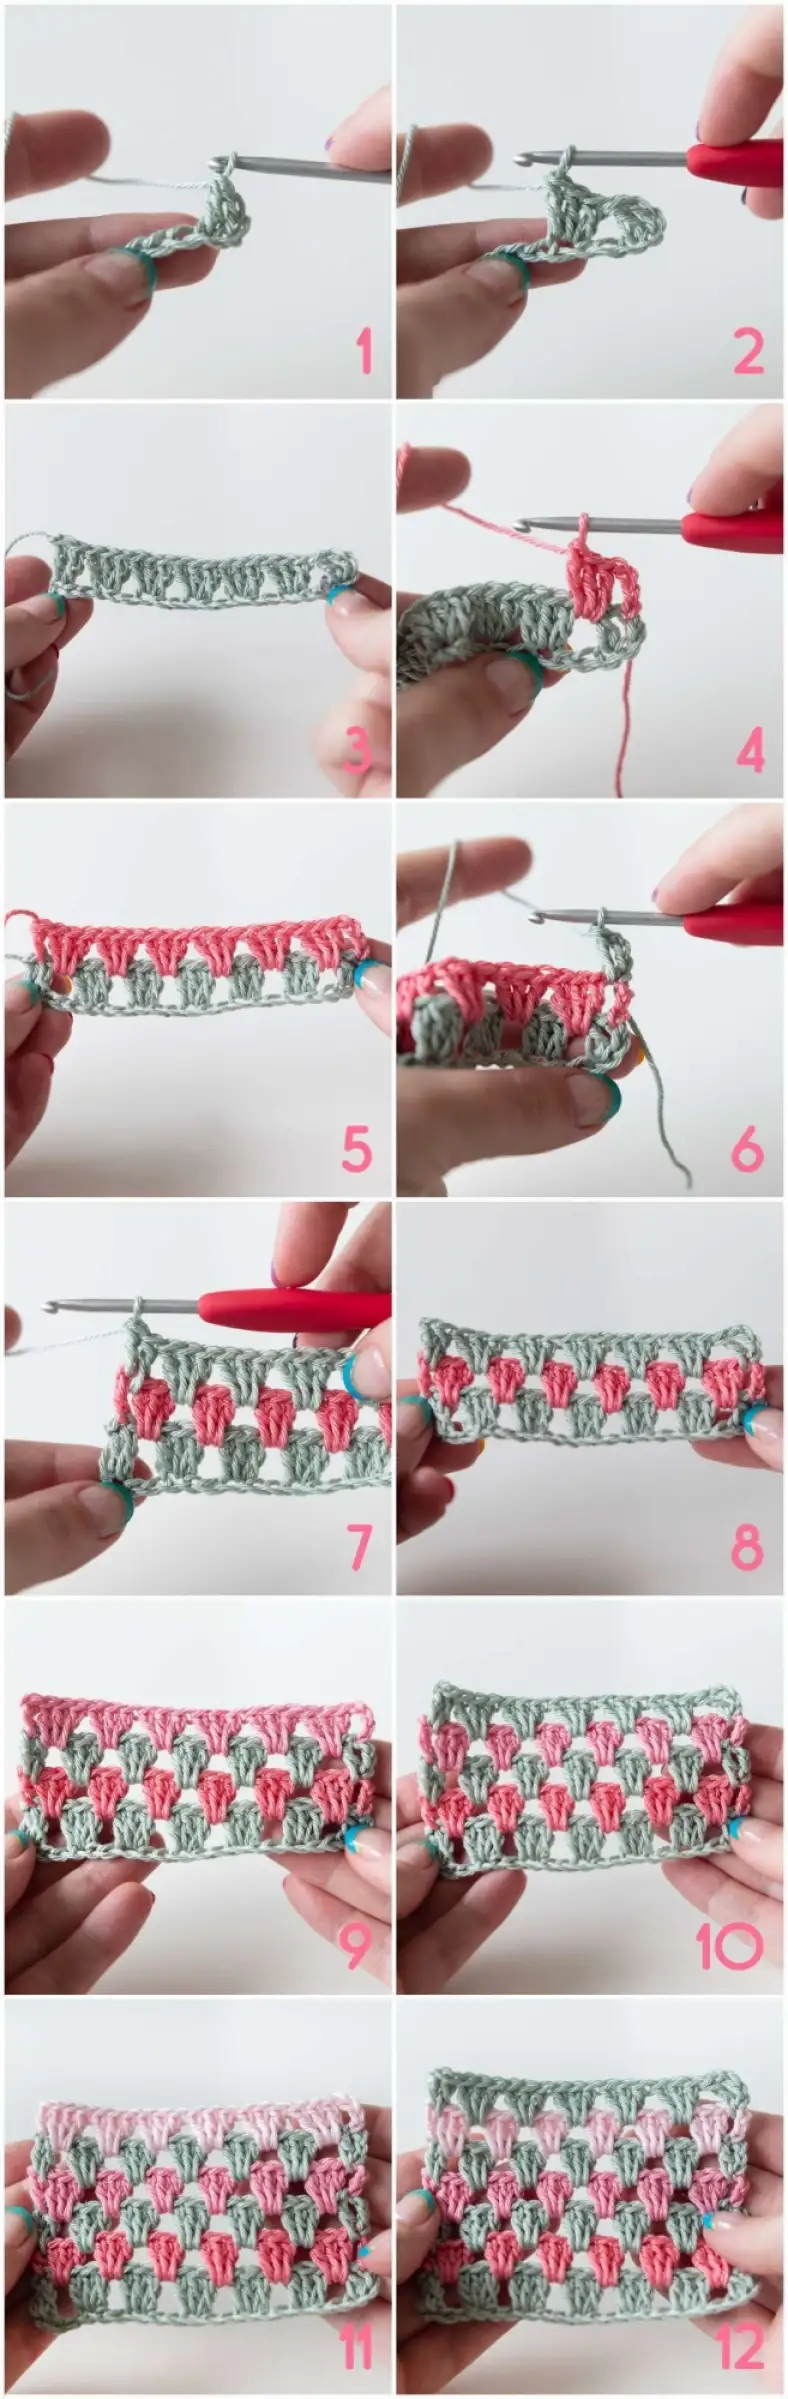
To begin, create your foundation chain. Your first three chains will count as your first dc for the row. Work 1dc into the fourth chain from your hook (photo 1). Now we’ll start on those granny clusters! Skip the next two ch of your foundation, and work 3dc into the next ch (photo 2). Continue making these 3dc clusters all along your beginning chain, skipping two ch between each one. This creates the little spaces for the clusters in your next row. When you reach the very last ch, work 2dc instead of 3 to mirror the beginning of your row (photo 3). Cut your yarn, but don’t turn your blanket. You’ll be working the entire project from the same side.
For the second row, join your next colour with a ss in the third ch of your begin-dc. Ch3, and then work 3dc into the space between your first two stitches and the first cluster (photo 4). Continue making 3dc clusters in each space all along the row, and finish with 1dc in the last dc of the previous row (photo 5). Cut your yarn.
Join your first colour again with a ss in the third chain of the previous row's begin-dc. Ch3, and work 1dc into the space between the begin-dc and your first cluster (photo 6). Next, work granny clusters all along the row in the spaces created by the previous row. When you’ve reached the final space, crochet 1dc between the last cluster and the last stitch, and then 1dc into the stitch itself (photos 7-8). Cut your yarn.
These last two rows set the pattern repeat for the rest of your blanket. Keep repeating them in your chosen colours until your blanket reaches its desired height. To give the piece a balanced look, I recommend ending the body with the same colour you used for Row 1, mirroring the start of your work (photos 9-12).
Video tutorial: Granny Stripe
Border
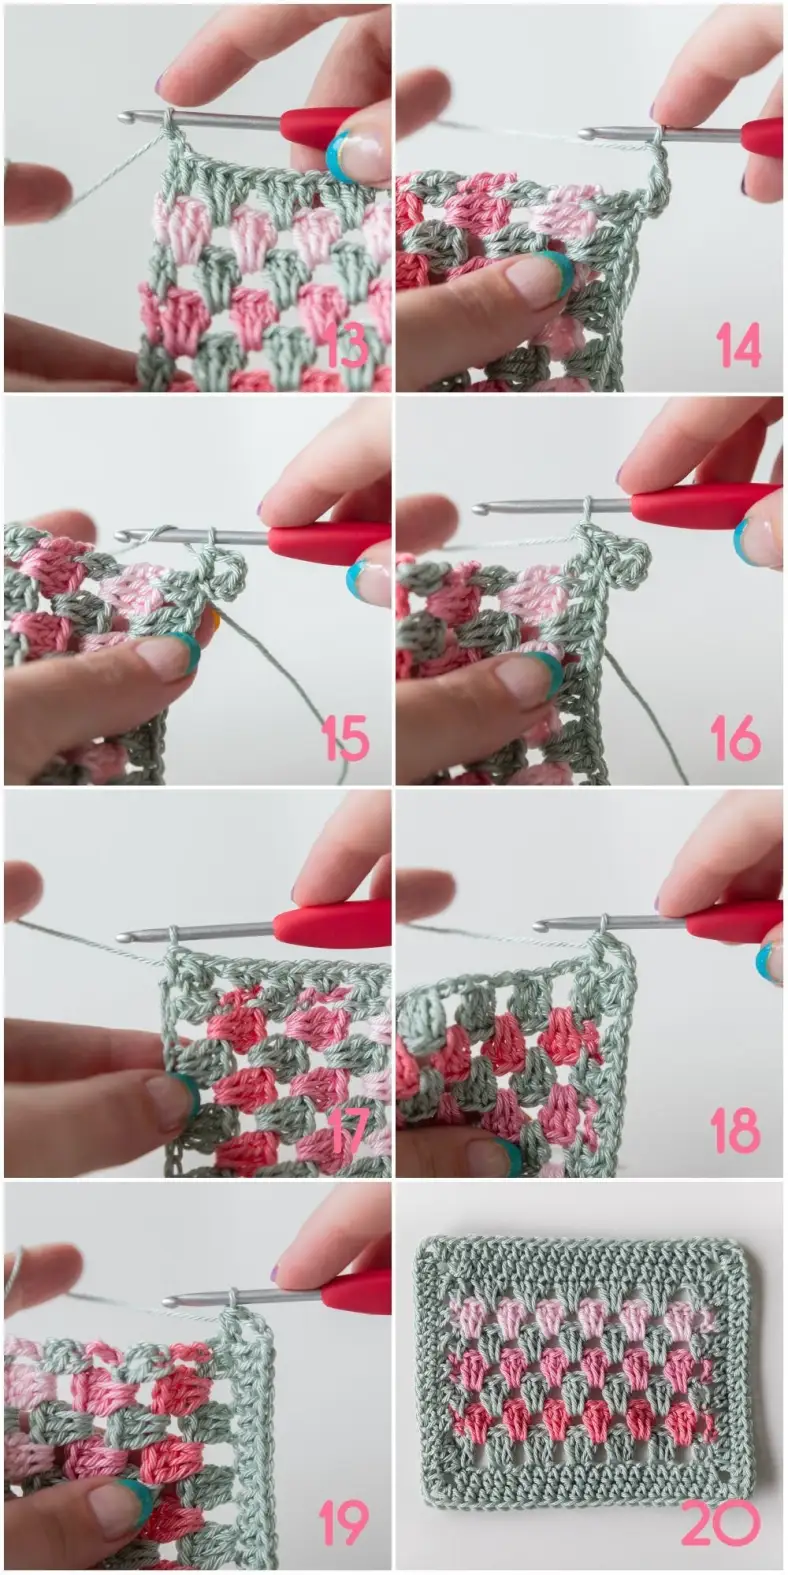
To start, join your yarn with a ss in the top-left stitch of your final row. Ch2 (photo 13), keep in mind that these chains don’t count as a stitch. Work 1hdc into the same stitch, ch2, and then rotate your blanket 90 degrees (photo 14). To finish off this first corner, work another 1hdc into that same corner stitch (photo 15).
Now we’ll work down the long side of the blanket. For this section, we will work 2hdc into the side of every row. A little tip: I like to insert my hook right into the middle of the "stem" of the double crochet to work my 2hdc (photo 16). Repeat this for every row along this side. When you reach the very last row (which is the first row you crocheted in the body), work 2hdc into the row and then 1hdc into the corner of the beginning ch (photo 17). Ch2, rotate your work 90 degrees, and work 1hdc into that same corner stitch to complete the corner (photo 18).
Next, work 1hdc into each ch across your foundation row. When you reach the final stitch of the bottom edge, work 1hdc, ch2, then rotate your blanket and work 1hdc into the same corner stitch (photo 19). We’re now heading up the other long side! Just as you did before, work 2hdc into the side of each row. When you reach the top row of your blanket, work 2hdc in the side and 1hdc in the corner stitch. Ch2, rotate 90 degrees, and work 1hdc in the same corner stitch to finish your last corner.
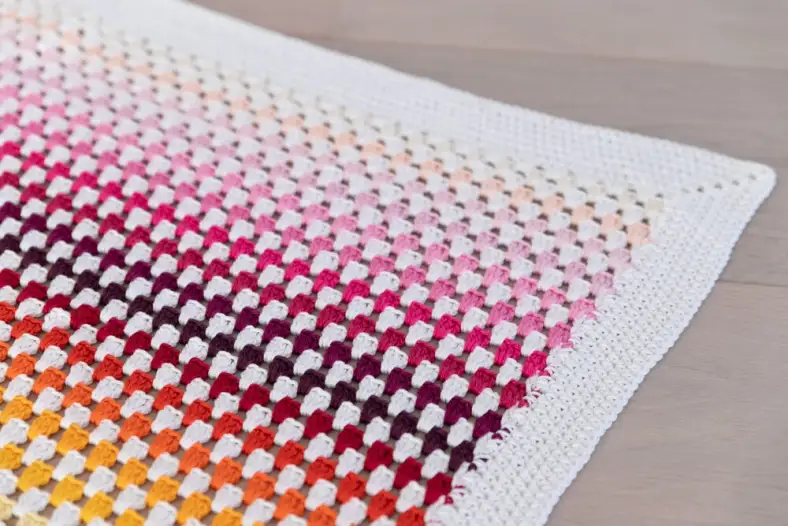
To finish, work 1hdc into each stitch across the top edge. When you reach your very first stitch, join with a ss to close the round. You’ve now finished your first border round, and the foundation is set! I’m sure you’ll have no trouble following the pattern for the remaining rounds. You can see how the border begins to take shape in photo 20, which shows the result after round 2. Be sure to keep an eye out for any rippling and check out my tips in the pattern to keep your border flat and neat.
Video tutorial: Granny Stripe border
Contentblokje
Crochet pattern
Body
With Colour A, ch145.
Instead of turning after each row, you keep working on the RS. This way, all your clusters face the same way. Technically, a double crochet looks the same on both sides, but since we’ll change colours (and cut the yarn) every row, we can make the front extra pretty!
Weave in all ends for the body.
Border
You’re making 2hdc on one side of the corner, and 1hdc on the other side. The reason for this is that when you work in rounds, the slanting of stitches causes the corners to look slightly crooked. By working 2hdc on one side, we’re offsetting this slant and making perfectly square corners. Trust me, it works!
Cut yarn, weave in all remaining ends.
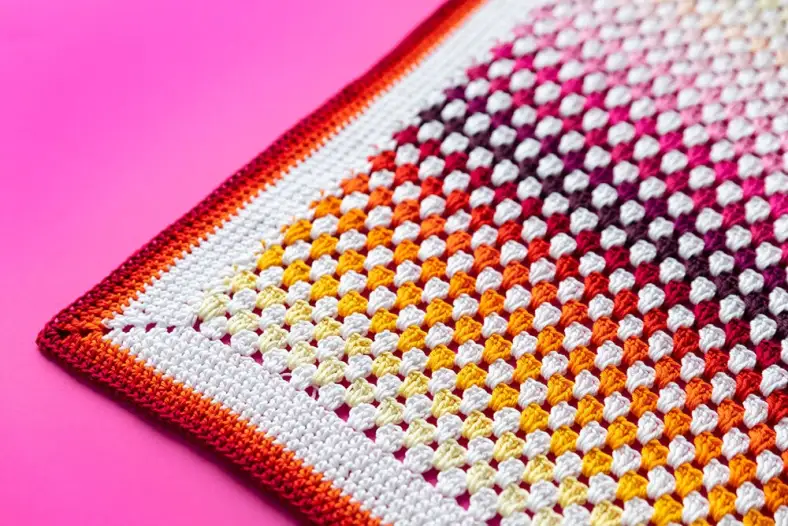
Tip: add some extra colour by making the final rounds in a different colour. Please note that this has not been accounted for in the yardage of colours B-S. You'll need approx. 20g of yarn per border round.
Some thoughts on rippling borders
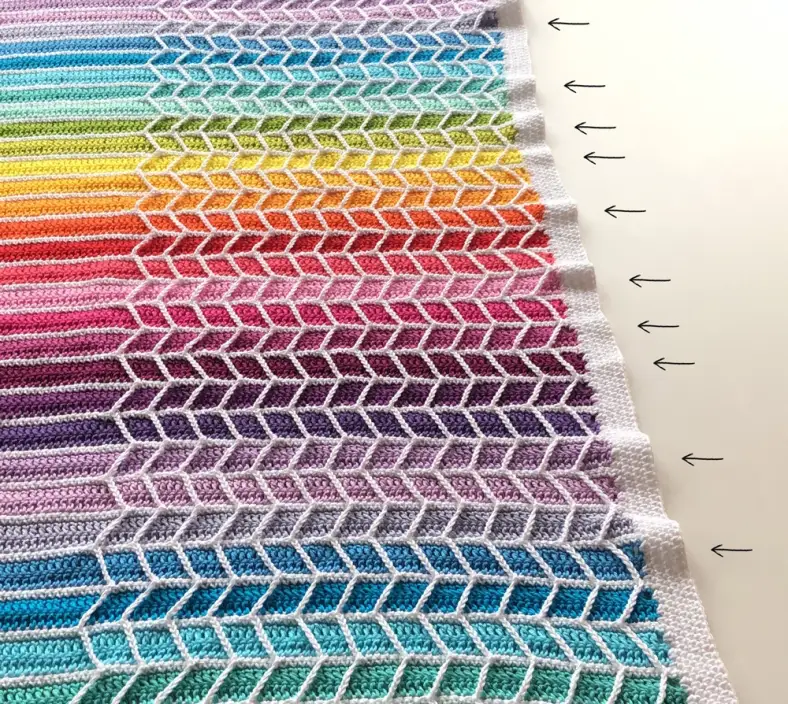
Sometimes a border will ripple, even when you follow the instructions to a T. Getting a perfectly straight edge has everything to do with your personal tension and the yarn you’re using. Even if you follow a pattern, you might end up with just a bit too much ‘fabric’ for the sides to lie flat. Remember: crochet isn’t an exact science, and a ripple is never your fault!
Luckily, this is an easy fix (provided the border isn’t too complicated). If you notice things starting to wave, pause for a moment. Count the number of ripples by pinching them between your thumb and index finger and pulling the rest of the fabric taut. Let’s say you count about 10 ripples. If we could just snip those out, the edge would be flat! But since cutting pieces isn’t great for structural integrity, let’s try a more helpful way.
Write down the number of ripples, then rip out the border rounds until you’re back to the round right before the ripples started (usually Round 2). Crochet that round again, but decrease 10 stitches (or whatever number you wrote down) along the side. Use the pattern’s base stitch to decrease. So for this pattern, the base stitch is hdc, so you would simply replace 10 hdc with 10 hdc2tog. Space them out roughly across the side and continue the pattern as written. You’ll see those ripples disappear, or at least become less noticeable!
If the edge still feels a bit wavy, it’s okay to decrease a few more stitches in the next round. Just try to work the final one or two rounds of your border without any decreases to keep that finish looking neat and tidy. Still a tiny bit of a ripple left? Don’t worry too much. Blocking your blanket usually takes care of those final little niggles.
Adjusting the size
You can easily adjust the size of the blanket. Heightwise, simply add more row repeats. To make the blanket wider, add multiples of 3 chains to the starting chain. For example: 148 chains, 151 chains, or 175 chains. Each added 3 chains create one extra cluster, and add approx. 1.3cm (½in) to your blanket.
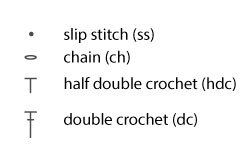
Diagrams
You might also like
Comments
Kay
August 15, 2026 02:00
Patty
August 15, 2026 18:52
Kirsten
August 16, 2026 09:42
Clarissa
August 29, 2026 21:12
Kirsten
August 29, 2026 21:12