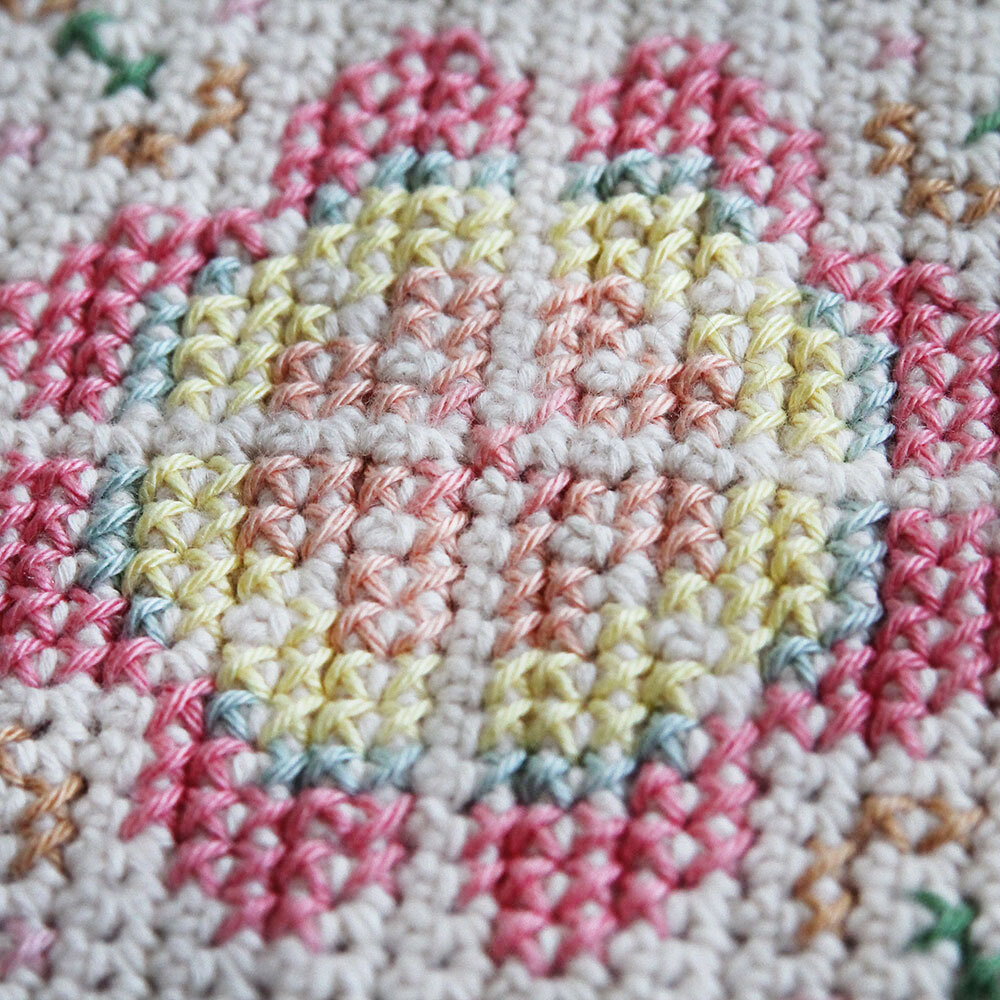
Yay! This week we’re getting back to the embroidery. I know you’ve all been waiting for this part but you know what they say, ‘No pain, no gain’! Now you’ve soldiered through the crochet part of the back panel you can completely focus on the embroidery! We’re not going to do all embroidery in one week: that would be a bit much, 100 rows of embroidery. So I’ve divided it up into two weeks. This week you’ll do the first part, which is the first half of this big beautiful central flower and everything on one side of it. Next week we’ll do the other half.

Design
During the CAL and Meet & Greets I’ve got a couple of questions of how I actually made the embroidery design and tackled it all, which is something I’d be happy to share with you all. In hindsight, I couldn’t tell you how long I exactly spend on making this pattern. Rather, it was a process that took a bit over a year. From the concept of the idea to the finalization of the last PDF’s, so to say. I started with sketches. Once I had some sort of idea about the motifs I wanted to make (after lots of browsing on Pinterest, Google and in IKEA!) I took to software to graph out my embroidery designs. I tried a couple of things, but in the end, I settled for Peskel, an online tool to help you make sprites (pixel-based pictures). It was not ideal, because the tool didn’t make my motif pictures large enough. To solve this issue my better half wrote me a little script which enlarged the pixel picture and added the black grid and letters to it. It is truly, in many ways, a multidisciplinary CAL ;).
The backpiece was the most challenging embroidery design of all. I started out with a completely different idea which I had quite early in the designing process. A green, lush vine forest, lots of different delicate flowers, curled lines, love birds, a truly ‘organic’ feel to it. However, after swatching small pieces I realized the complete picture wouldn’t stand out enough. It was too detailed and wouldn’t do the shawl justice! It is an issue I’m sure many designers encounter: you keep hanging on to your initial idea because that’s why we fell in love with the project. But sometimes ideas develop into something better.
I realized that even though I wanted flowers and the organic feel to it, bold and (relatively) straight lines had to be the way to go. Not everything, but at least one flower had to be big, filled up with colour, and bright. Not very subtle, huh? But still, I went with that idea. I started with the center flower, made one raw half of the vines, mirrored everything and started adding, deleting, moving and changing lines and colours. In the end, it feels both organic and geometric, has some of my favourite flowers in it AND has the little love bird!
Details
The kits are for sale through various Scheepjes retailers, such as Wool Warehouse. The pattern will be released from February 15th 2017 in 14 weekly installments in the Facebook groups, and on Scheepjes.com. To help you understand the patterns, the fabulous Esther from It’s all in a Nutshell has made videos for the techniques used in this CAL. You can find her video’s on her Youtube channel, It’s all in a Nutshell Crochet.


Comments
nope, that's perfectly fine :) April 07, 2017 21:53 - Reply