Luminous Loom Pillow
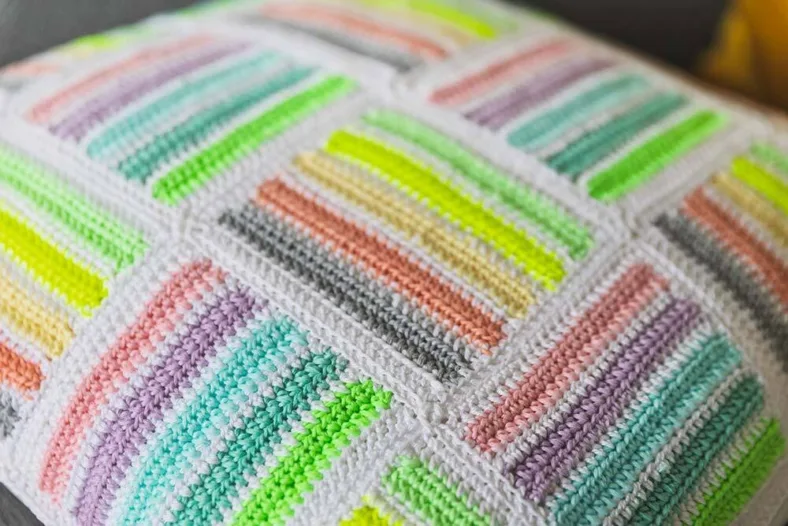
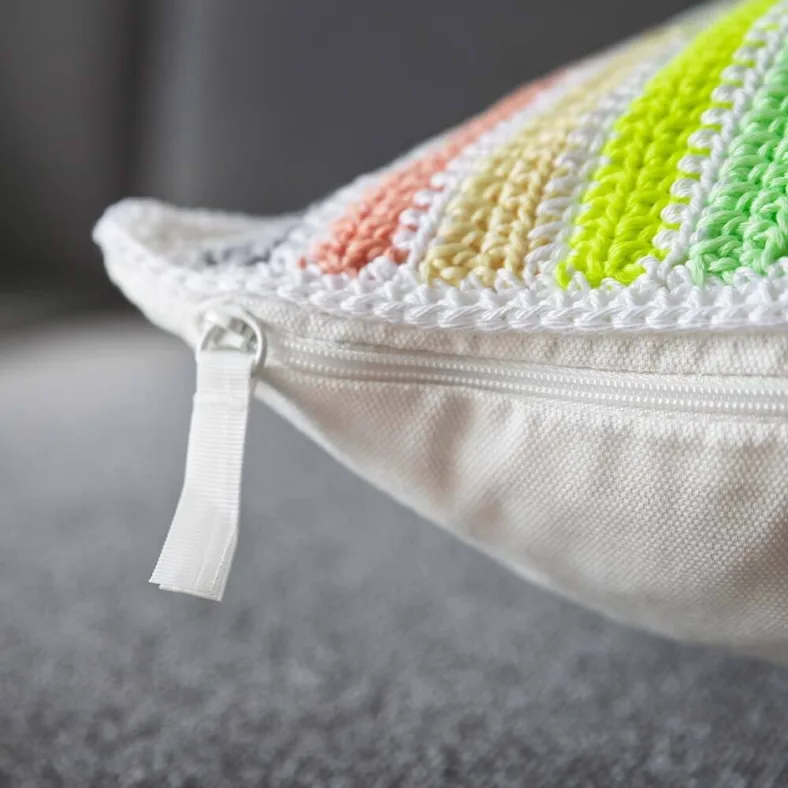
24.Apr.25 / Kirsten BalleringThe Luminous Loom pillow blends color and texture, featuring a basketweave-like design in vibrant rainbow tones. Made with glow-in-the-dark yarn, it absorbs light by day and softly glows at night. A magic touch for any space!
Materials and preparation
Yarn
Rainbow
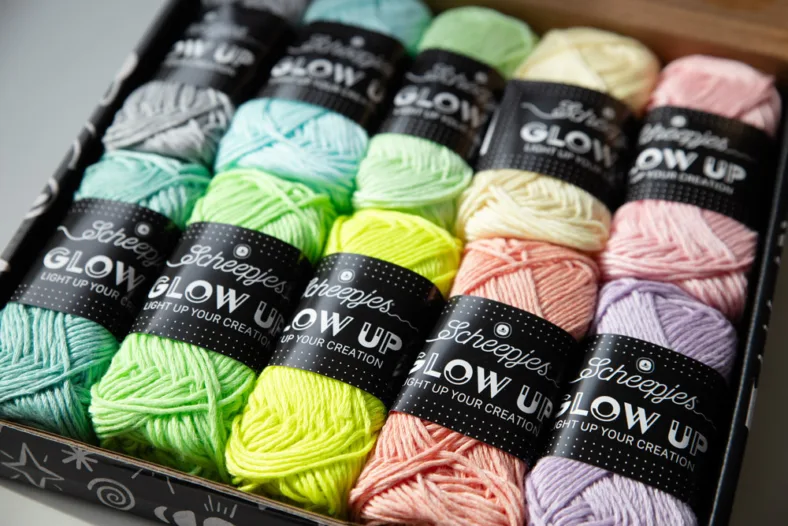
Scheepjes Catona (100% cotton, 50g/125m)- Colour A: 106 Snow White x 3 balls
- Colour B: 1002 Stardust Grey x 1 ball
- Colour C: 1009 Dusky Coral x 1 ball
- Colour D: 1008 Solar Flare x 1 ball
- Colour E: 1007 Neon Glow x 1 ball
- Colour F: 1006 Electric Lime x 1 ball
- Colour B: 1005 Moonbeam Green x 1 ball
- Colour C: 1003 Aqua Aura x 1 ball
- Colour D: 1004 Celestial Mint x 1 ball
- Colour E: 1011 Mystic Bloom x 1 ball
- Colour F: 1010 Blush Nebula x 1 ball
- 50x50cm (19.5x19.5in) pillow case
Crochet hook
3.0mm (US size D/3).
Measurements
Fits a 50x50cm (19.5x19.5in) pillowcase.
Gauge/tension
Each motif measures 11cm (4.3in) in width and height.
Abbreviations (US terms)
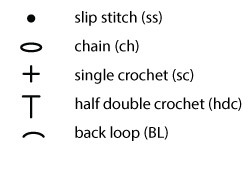
- BL: back loop
- ch: chain
- hdc: half double crochet
- RS: right side
- sc: single crochet
- st(s): stitch(es)
- WS: wrong side
Repeat formats
- *….; rep from * once/twice/3x Crochet the instructions after * and then repeat that section a further number of times as indicated.
- *…; rep to end Crochet the instructions after * and then repeat that section to the end of the row or round.
- (…) once/twice/3x Crochet the instructions between brackets the total number of times indicated.
- […] Indicates the amount of stitches at the end of a row or round.
- (…) in same st/sp Indicates that all instructions between brackets are worked in the same stitch or space.
Colour layout
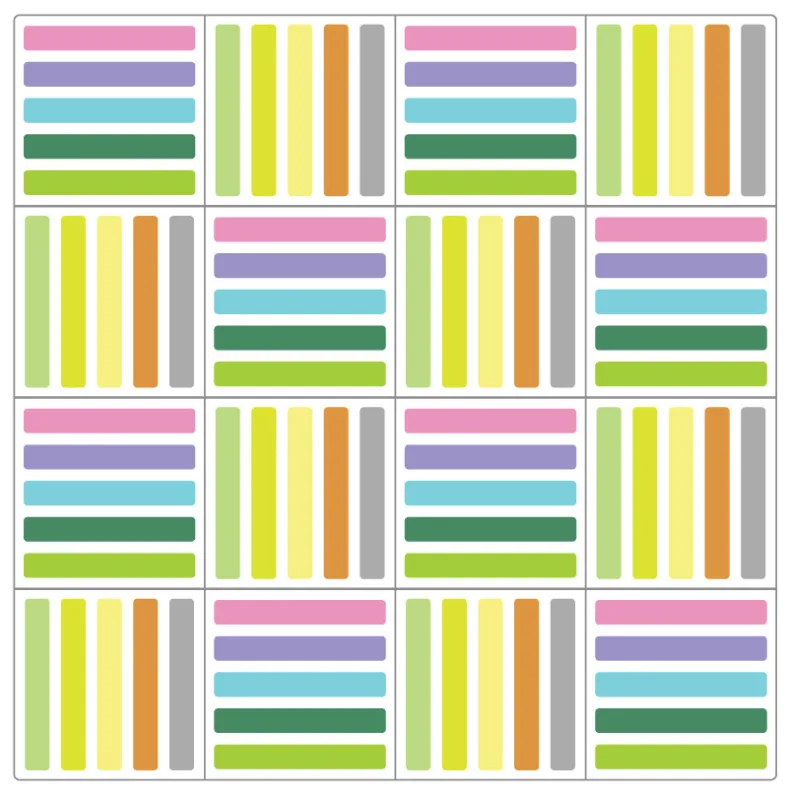
Crochet pattern
Motifs
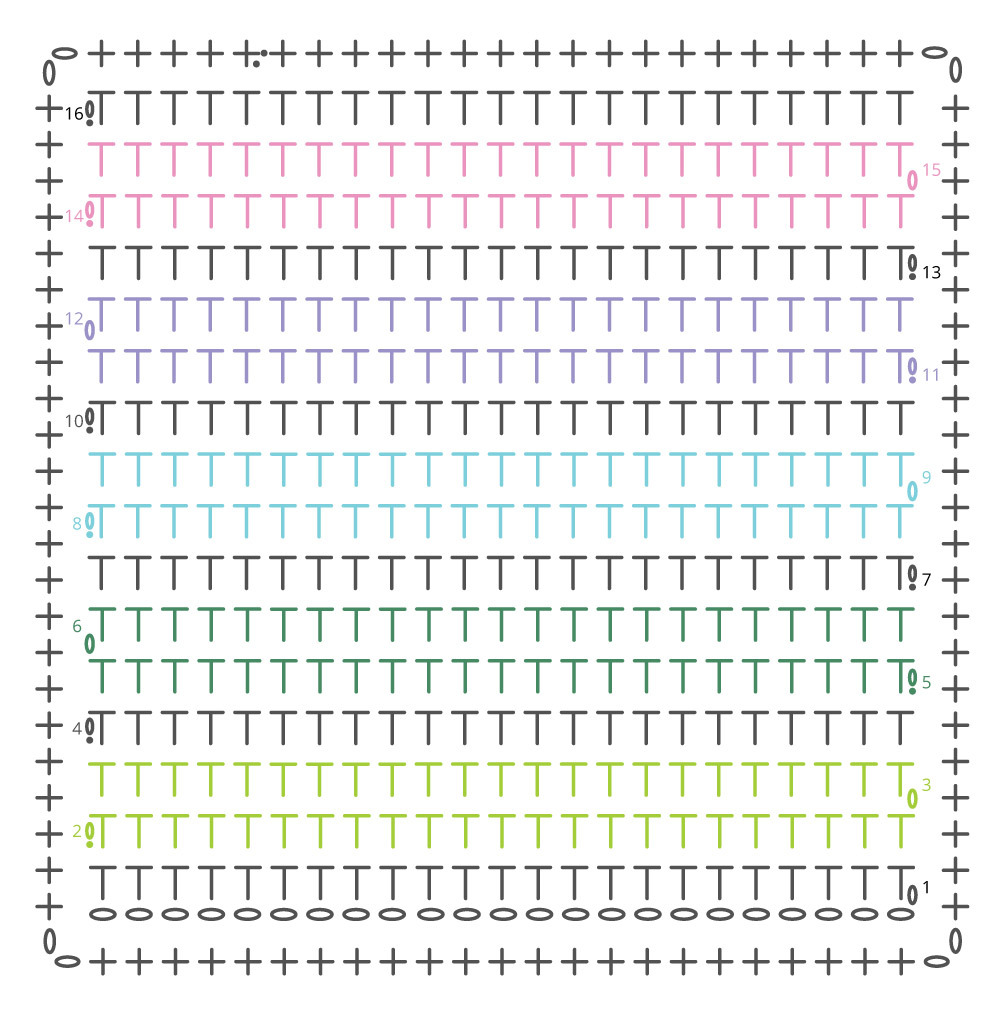
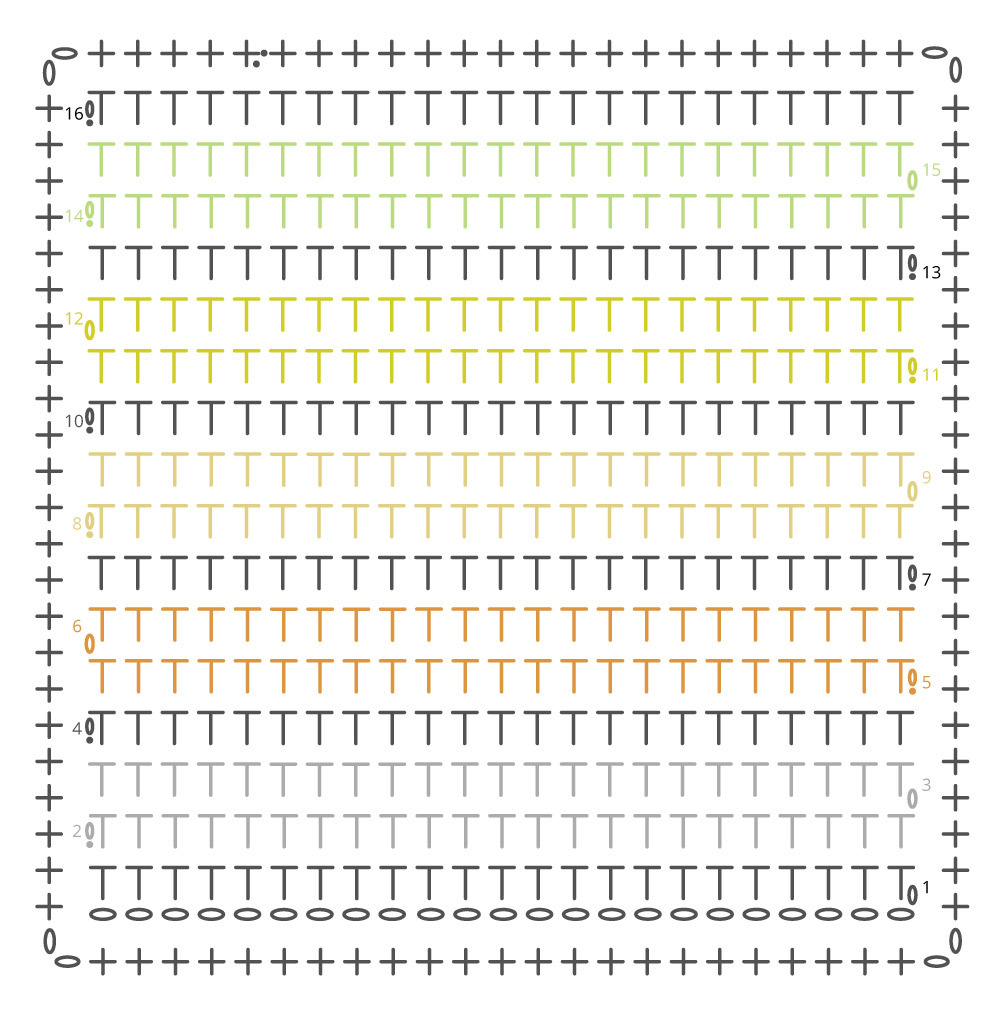
Make 8 motifs each of colour combinations 1 and 2.
Start with Colour A, ch 24.
Row 1 (RS) Starting in second ch from hook, 23hdc. Cut yarn, turn. [23 hdc]
You can crochet over the end of colour A and the beginning of colour B in the next row. If you keep this up throughout the motif, you will not have to weave in many ends. Just crochet 7 or 8 stitches over the tails and cut them after finishing the motif.
Row 2 (WS) Join Colour B with ss in first st, ch1, 1hdc in same st, 22hdc, ch1, turn. [23 hdc]
Row 3 23hdc, cut yarn, turn.
Row 4 Join Colour A with ss in first st, ch1, 1hdc in same st, 22hdc, cut yarn, turn.
Rows 5-6 Repeat Rows 2-3 with Colour C.
Row 7 Repeat Row 4.
Rows 8-9 Repeat Rows 2-3 with Colour D.
Row 10 Repeat Row 4.
Rows 11-12 Repeat Rows 2-3 with Colour E.
Row 13 Repeat Row 4.
Rows 14-15 Repeat Rows 2-3 with Colour F.
Row 16 Repeat Row 6.
Weave in all ends.
Joining the motifs
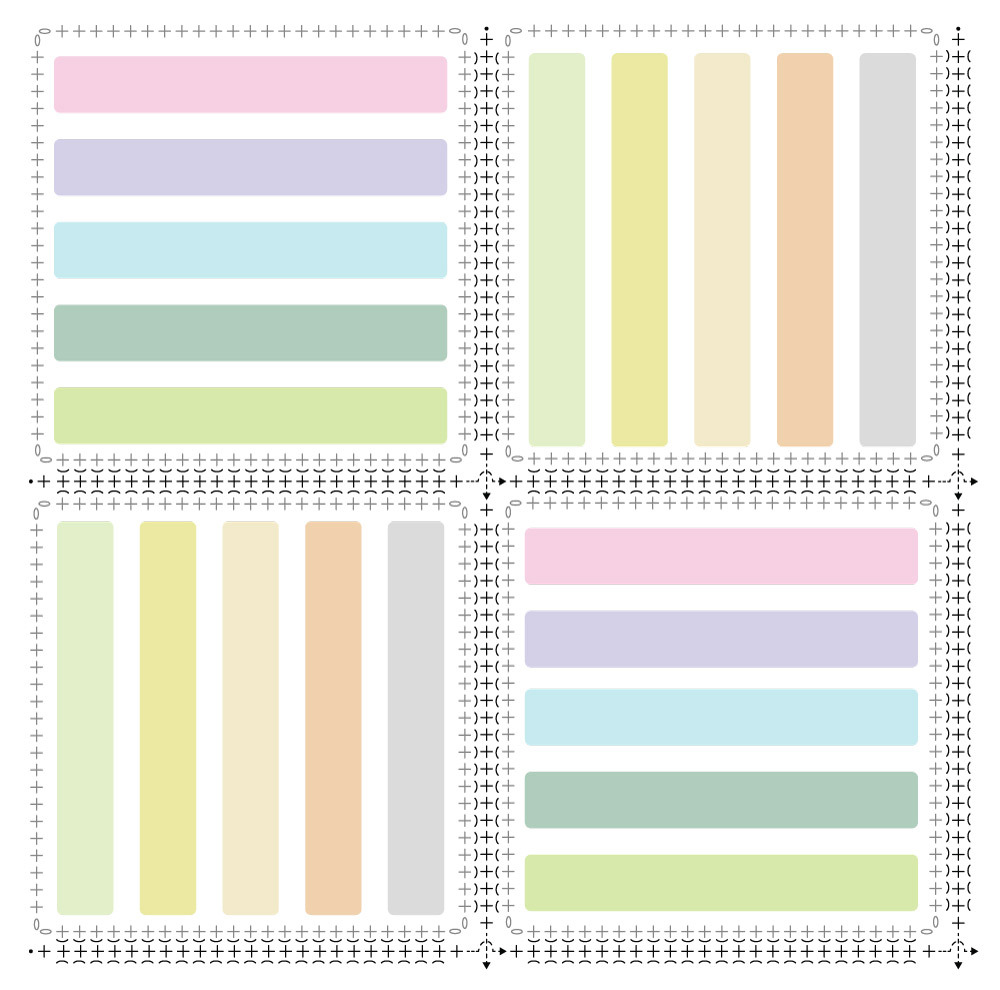
Lay down all motifs. Make sure that all Motifs 1 are lined horizontally and all Motifs 2 vertically (see layout overview).
We’re using a simple sc join on the WS of the pillow to join. Take your first two motifs from columns 1 and 2 and place them RS together. With a ss, join colour A in the opposing ch-2 sps. *1sc in ch-2 sp, 1sc in BL of each opposing st across motifs, 1sc in next ch-2 sps, move to next two motifs; repeat from * for all motifs until end of columns. Continue to check throughout to ensure the orientation of the squares remains correct. Cut yarn.
Next, grab the first motif from column 3 and join it to the motifs of column 2 in the way described above. Make sure the join between columns 1 and 2 is not twisted when you join these motifs. Your sc join runs on the WS, creating a flat seam on the RS. Repeat this for column 4 as well.
Next, join rows in the same way. Join Colour A with a ss in the opposing ch-2 spaces, and make a sc in the BL of every st and ch-sp along the sides. Weave in all ends.
Border
The border along the front is a simple hdc row, to make sewing the cover to the pillowcase easier.
Round 1 (RS) Join Colour A with a ss in any corner sp. 1hdc in same sp, 1hdc in each st and ch-sp along side, *(1hdc, ch2, 1hdc) in next corner sp, 1hdc in each st along side; repeat from * another 2 times, 1hdc in corner sp, ch1, join with ss in first hdc. Cut yarn and fasten off.
Sewing the front on
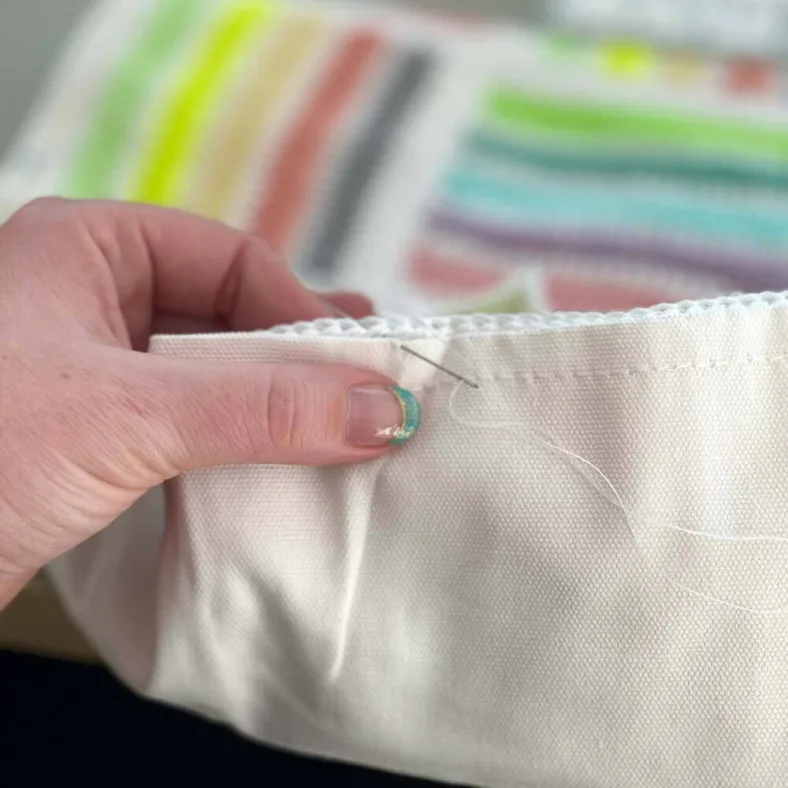
After finishing the edge, block your pillow front to ~ 48cm (19in) on each side. It should be slightly smaller than the pillowcase (‘negative ease’). Lay your pillowcase flat and place the front on top, RS facing towards you. Pin the front to the pillow in the corners, and halfway through each side. Use a sharp needle and white sewing thread to sew the back loop of each hdc stitch to the pillowcase with small backstitches. Because you’re sewing in the back loop the front loop will slightly fall over the edge, hiding your stitches from sight. It will make for a neat finish. Fasten off and put the pillow insert inside the case.
Diagram
Motif 1
Motif 2
Joining
Key (US terms)


Comments
Be the first to comment to this post!