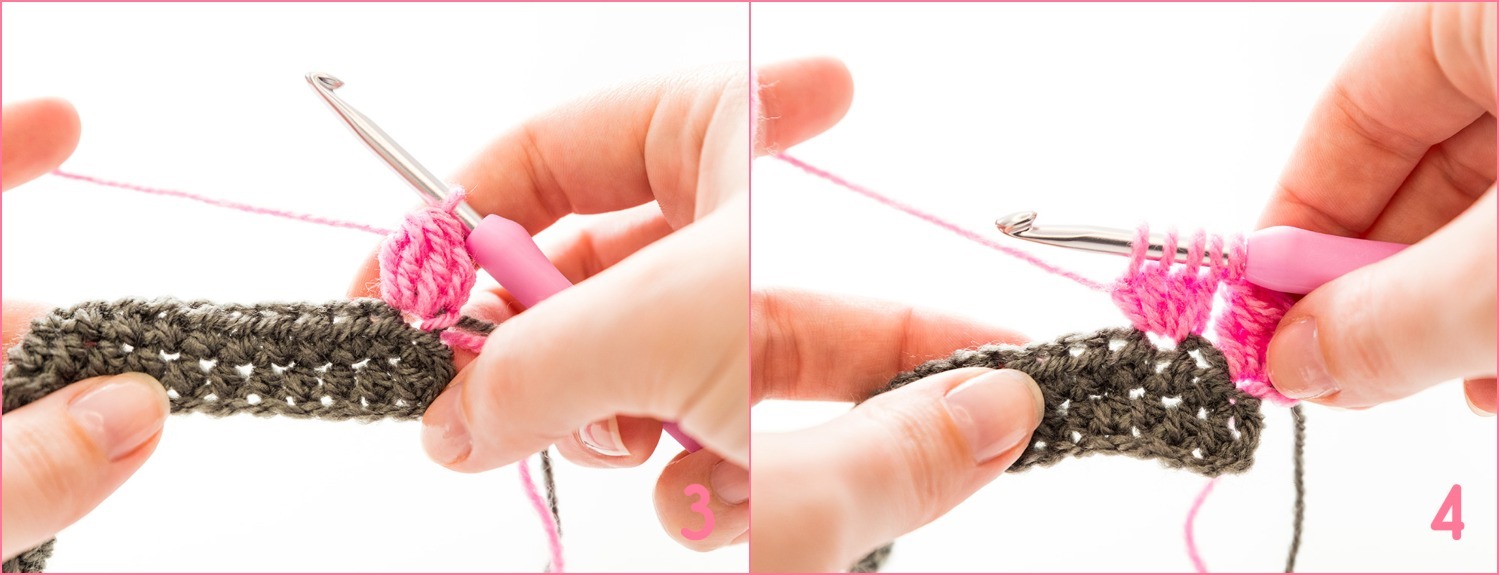
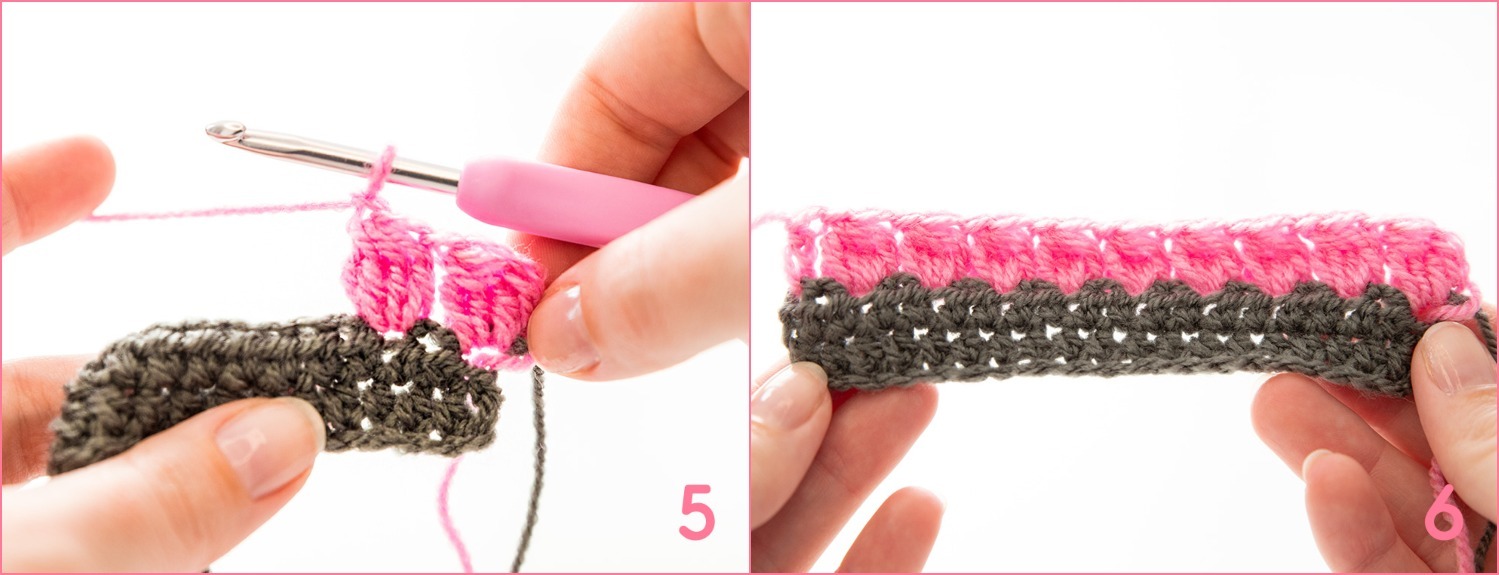
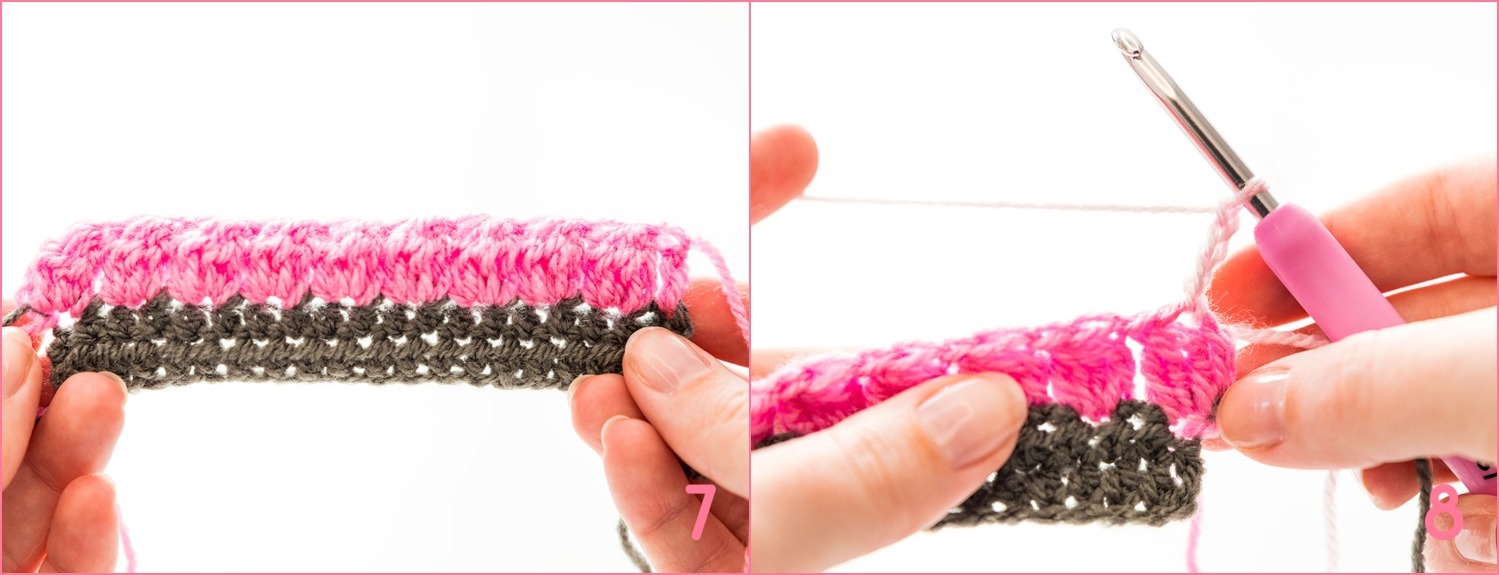
Join your colour with a ss in the first stitch. Crochet two ch which will replace the first half finished dc (photo 1). Yarn over, insert your hook in the same stitch as the ss, yarn over, pull up a loop, yarn over, and pull through first two loops on your hook. Repeat this another two times in the same stitch, so you have four loops on your hook (photo 2). Yarn over again and pull through all loops on hook (photo 3). This is your beginning bobble. Crochet a ch and skip one stitch. (yarn over, insert hook in stitch, yarn over, pull up a loop, yarn over, pull through first two loops on hook) four times in the same stitch (photo 4). Yarn over again, and pull through all loops on hook. This is a normal bobble (photo 5). Crochet bobbles until the end of the row, with skipped stitches and a ch in between. In the final stitch, crochet a dc. Cut yarn and don’t turn your blanket. The back looks like photo 6, and the front like photo 7.
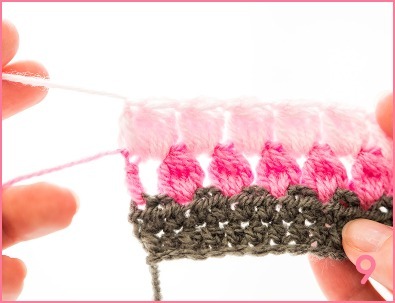
You want all your bobbles pointing in the same direction. So join your new colour with a ss in the first stitch (not the last!) of the previous row, in your begin-bobble. Crochet three ch that count as dc (photo 8). Make a bobble in the space between the begin-bobble and the second bobble, and make a ch. Keep crocheting bobbles in each space, with a ch in between. Work a dc in the final stitch (photo 9). Cut yarn, don’t turn your blanket.
You can repeat these two rows until you’ve reached your desired height. Don’t forget that all bobbles are supposed to point in the same direction!


Comments
Be the first to comment to this post!