Tassels are a great way to bring some pizzazz to a clutch, bunting, pillow or blanket. They're easy to make, and an excellent scrap buster. You don't need much yarn, and if you feel extra fancy, why not throw in some beads? Let me show you how to make DIY yarn tassels in a few simple steps.
Materials for a yarn tassel
- Yarn (as many colours as you like)
- 100cm (40in) of yarn for the top winding
- 2 bits of scrap yarn to tie the ends up temporarily
- A piece of cardboard or item to wrap the yarn around
- Scissors
- Needle
Size
The size and thickness of your tassel depend on how big your cardboard is. For an 8cm (3.2in) tassel, a 9-10cm (3.5-4in) wide cardboard is fine.
DIY Yarn tassel
1. Wrap the yarn
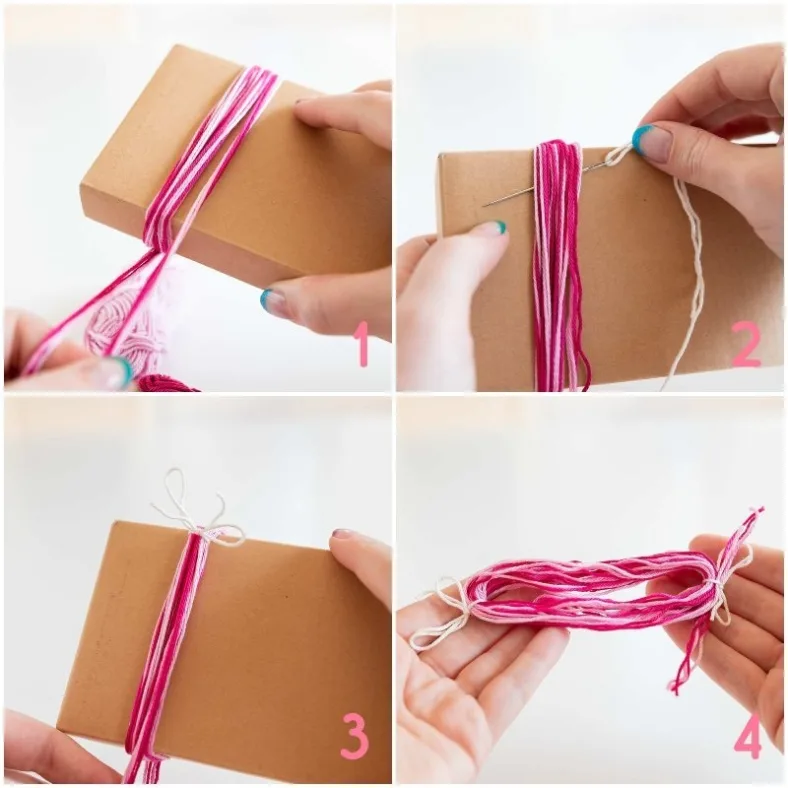
Make sure that you have a piece of cardboard or something similar that's about one centimetre (0.4in) larger than you want your finished tassel to be. You'll be winding the yarn strands around this cardboard. I used a small, sturdy box for this purpose as I didn't have a piece of cardboard lying around.
Next, start wrapping the strands of yarn around your cardboard. How many times depends on how thick you want your tassel to be, I wrapped four strands of fingering cotton six times.
To keep your strand secured while you wind and trim you can tie scrap yarn on both ends. Cut a piece of scrap yarn and thread your needle. Insert the needle under your wrapped yarn and tie a knot to keep your strands together. Repeat this on the other side of the yarn, and remove the wrapped yarn from the cardboard.

2. Winding the top
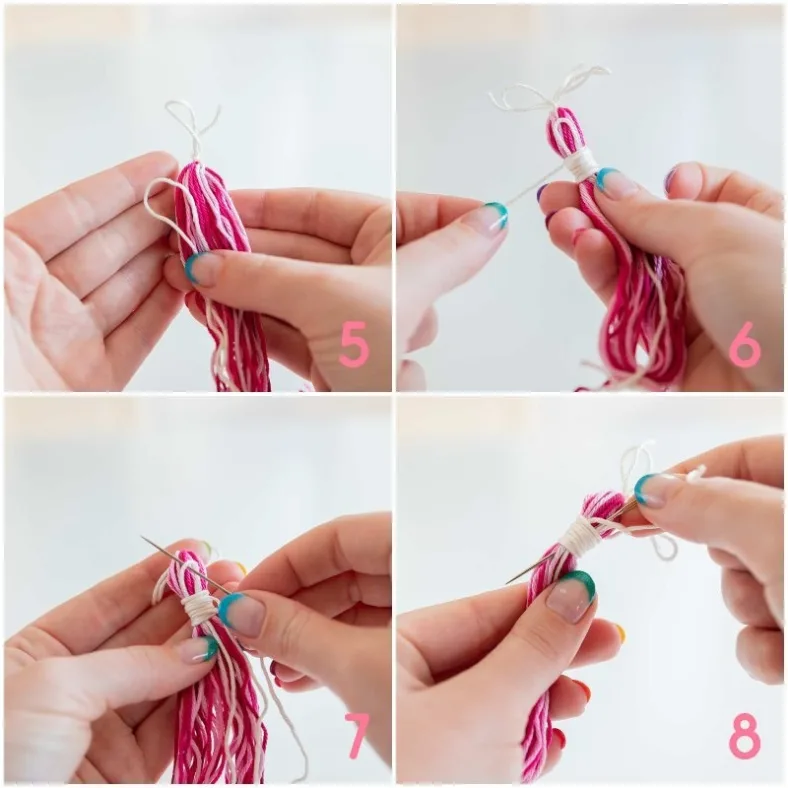
Cut around 100cm (40in) of the colour you want to wind the top with. Place the strand parallel to your tassel with ~ 10cm (4in) sticking out, and fold that 10cm back to form a loop on top.
Take the long end and start winding tightly over the loop and around your tassel. Now, thread the long end on a needle and insert that through the loop you created.
Next, insert your needle from top to bottom through the tassel and pull through. Gently tug on both ends to tighten the winding and to make the ends disappear. If necessary, knot the ends together and cut the ends. If the colour for the winding is the same as the colour in your tassel, you don't have to cut the ends. Simply leave them be and trim them to size along with the rest of the tassel.

3. Trimming the bottom
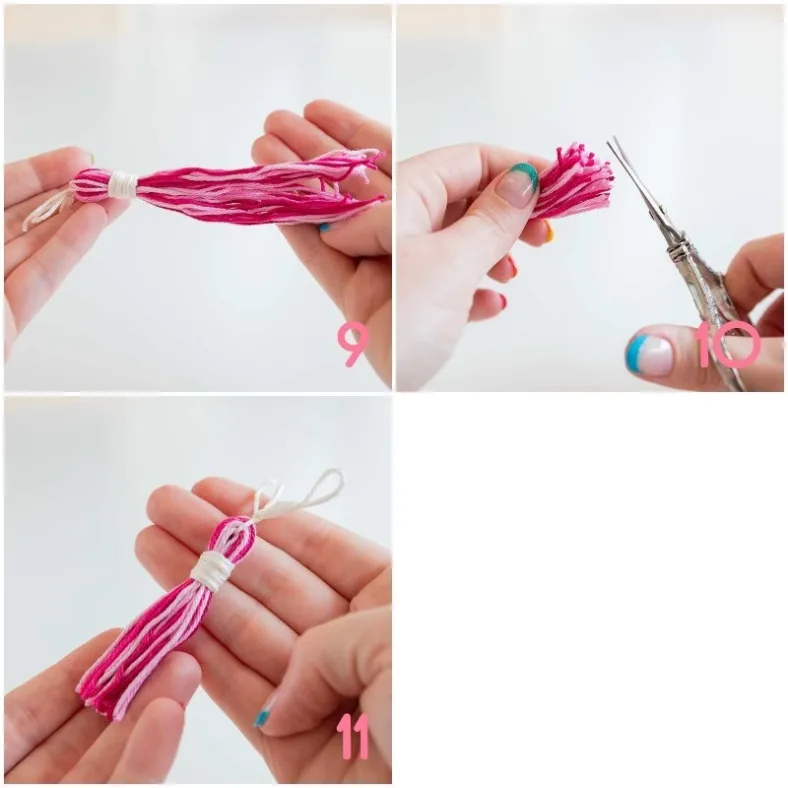
Once you've finished the top, untie the bottom scrap yarn and cut the bottom half of the tassel open. If necessary, gently pull on strings in your tassel to make the top part appear even. Trim your tassel to its desired size. Don't cut off a big chunk immediately, but make small snips.

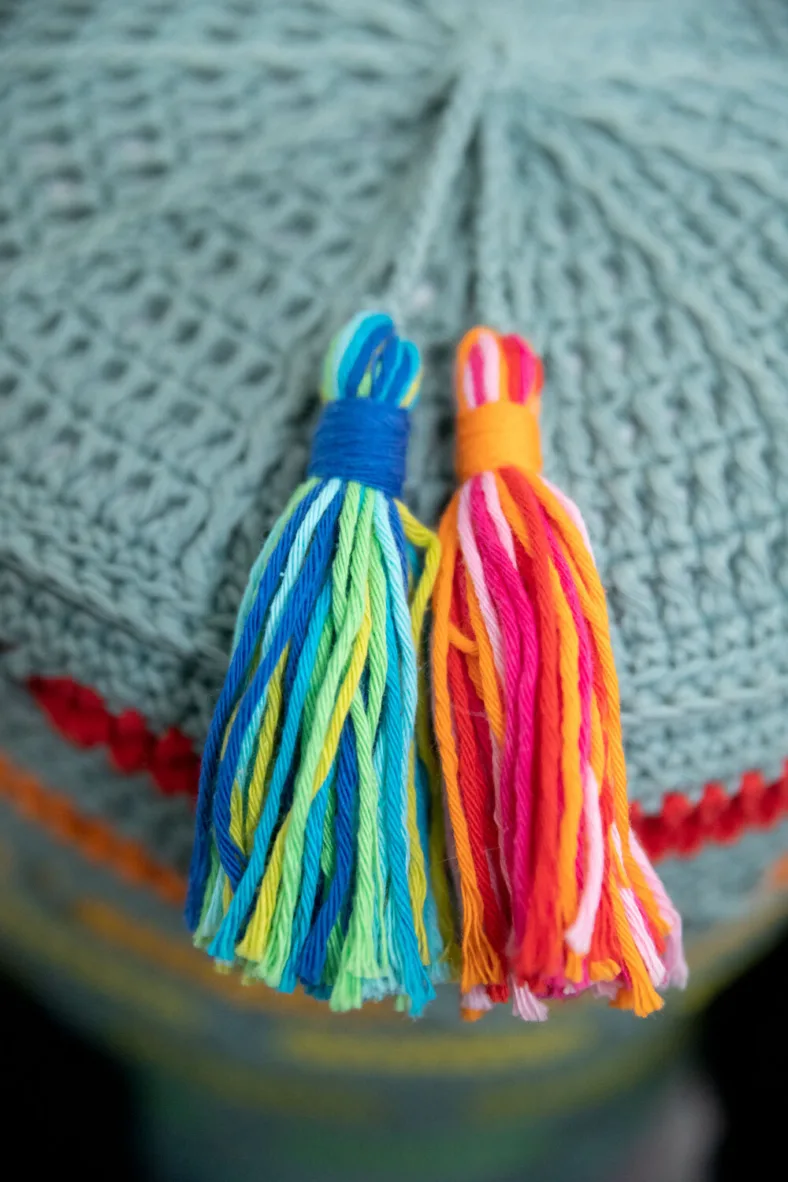
That's it! Depending on how you want to use your tassel, you can either sew it to your project directly with the scrap yarn on top or replace the scrap yarn with a crochet chain. If you feel extra fancy, why not add some beads to the top, or to the tassel itself? The possibilities are endless!


Comments