V-stitch
The V-stitch is named after the V-shape you create when making these stitches. The V is created by making (lots of) dc2togs (2 dc's crocheted together), with the first leg of each dc2tog being in the same space as the last leg of the previous dc2tog. The space between the two dc2togs is V-shaped: hence, the V-stitch.
V-stitch stitch multiple
The stitch multiple for the V-stitch is 2+1 stitch. This means that if you want to calculate how many stitches you need to set up for a row to consist completely of full V-stitches, you can take any multiple of 2 and add 1 stitch to it. For example, 108 x 2 stitches makes 216, + 1 is 217 stitches. You can also make shorter rows with less stitches, say 72 x 2 stitches = 144 +1 is 145 stitches. They all work.
V-stitch tutorial
The V-stitch consists of a one-row repeat. The first row is slightly different because you have to 'start' your pattern, but after that, it's just a one-row repeat. Clean and simple!
First row
Join your colour with a ss in the first stitch, three ch (counts as first dc ) (photo 1). Skip the next stitch, and work one dc in the next stitch (photo 2). Make one ch, and we will now start with the dc2tog’s (photo 3). Yarn over, insert your hook in the same stitch as the previous dc, yarn over again and pull up a loop. Yarn over again and pull through the first two loops on your hook. You now made one leg of the dc2tog (photo 4).
Skip one stitch and work a second leg in the next stitch (photo 5). Yarn over again, and pull through all loops on your hook to finish the dc2tog (photo 6). You can see the V-shape forming between the first leg of your dc2tog and the dc you made before that.
Next, make one ch (you’ll be working a chain in between each dc2tog, photo 7). Make a dc2tog with one leg in the same stitch as the second leg of the previous dc2tog, skip one stitch and work the other leg in the next stitch (photo 8).
Continue like this across the row. When two stitches are left, make one ch, make one dc in the same stitch as the second leg of the previous dc2tog (photo 9), skip the next stitch and make one dc in the last stitch (photo 10). This concludes your row, so cut the yarn and turn your blanket (photo 11).


Second Row
This row looks a lot like the first row. Instead of working in stitches, we'll be working in the 'V-space' that's created in the first row.
Join your new colour with a ss in the first st and make three ch (counts as dc, photo 12). Make one dc in the next V-space (photo 13). Crochet one ch and make a dc2tog with one leg in the same V-space as the dc, and one leg in the next V-space (photo 14). Continue making ch’s and dc2tog’s across the row, and once you have two stitches left end with a dc in the V-space of the last dc2tog and a dc in the last stitch (photo 15).


That’s how you make the V-stitch! You can simply repeat the instructions for the second row if you want to make your piece any taller.
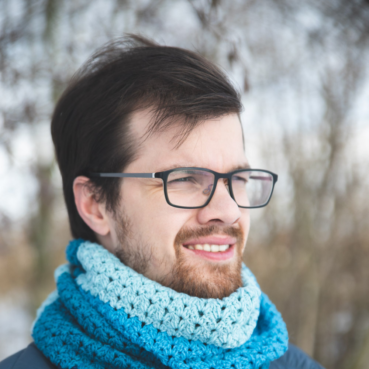
Did you enjoy this pattern? I also have a V-stitch cowl in my pattern section. Check it out!


Comments
Be the first to comment to this post!