Wrapped stitches
Wrapped stitches are exactly as the name implies: stitch groups with stitches wrapped around others. I don't see them used very frequently. A shame, because they look quite nice, don't you think? I like to add extra volume to my wrapped stitches, by working a double wrap. It helps to make this stitch stand out even more!
Wrapped stitch stitch multiple
The stitch multiple for wrapped stitches is 3 + 1 stitches. If you want to figure out how many stitches to start with, you simply take a multiple of three and add one to it. For example, 72 x 3 stitches = 216. now add the extra one, which makes 217 stitches to begin with. You could also make shorter rows, for example, 48 x 3 stitches = 144, +1 is 145.
Wrapped stitch tutorial
First row
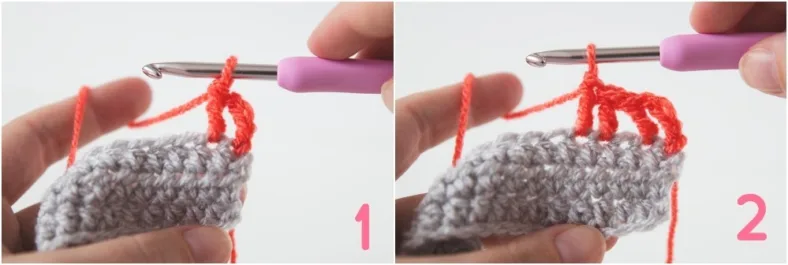
Join your colour with a ss in the first stitch. Make three ch (counts as your first dc), and make a dc in the next stitch (photo 1). Skip the next stitch and work two dc (photo 2).
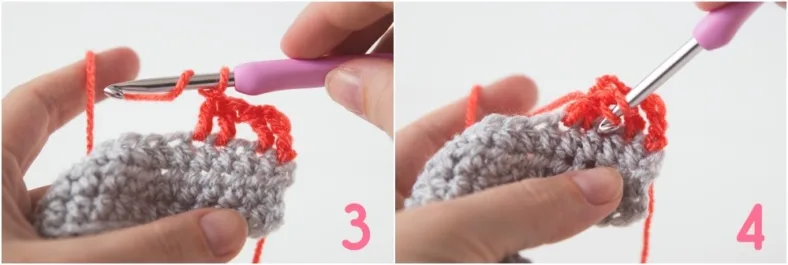
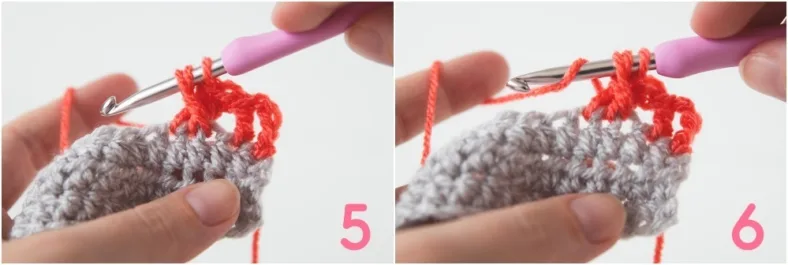
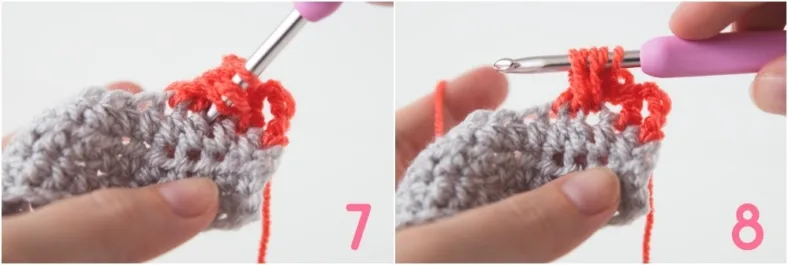
Crochet your wrapped stitch by doing the following: yarn over, insert your hook in the skipped stitch two stitches back, yarn over again and pull up a loop. Yarn over again, insert your hook in the same space, yarn over and pull up another loop. (photos 3-8).
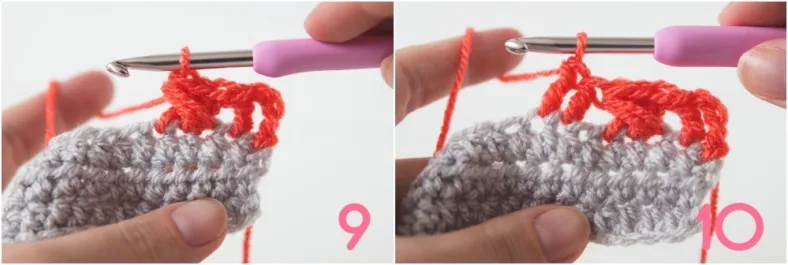
Make sure to pull up all your loops to the top of your stitches. This helps the stitch to look puffy, instead of constricting. Now yarn over once more and pull through all loops on your hook (photo 9). This is a wrapped block. You’ll find that your first wrapped blocks look warped. This will fix itself with making more blocks and more rows.
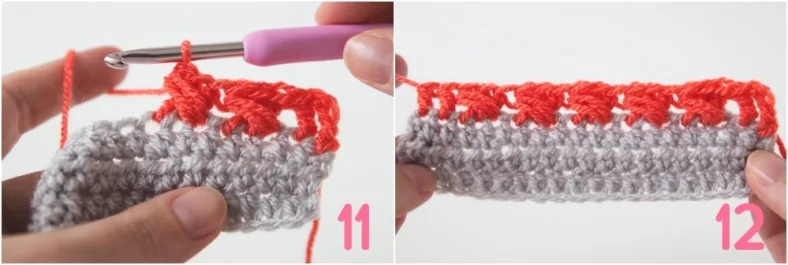
Continue making wrapped blocks by skipping one stitch, two dc, wrapped stitch in previously skipped stitch. When there are only two stitches left in the row, make one dc in each of the final two stitches and cut your yarn (photos 10-12). Turn your blanket.
Second row (normal way of continuing)
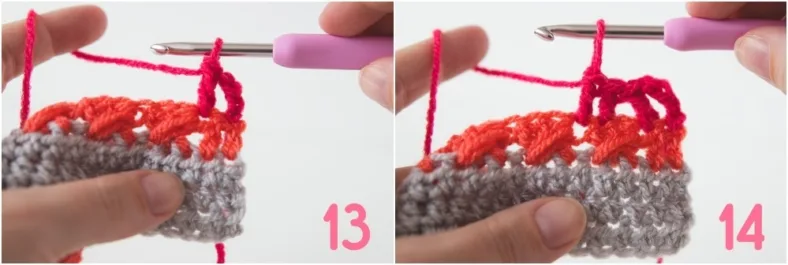
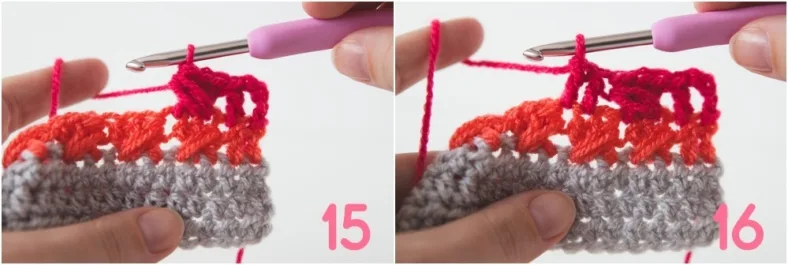
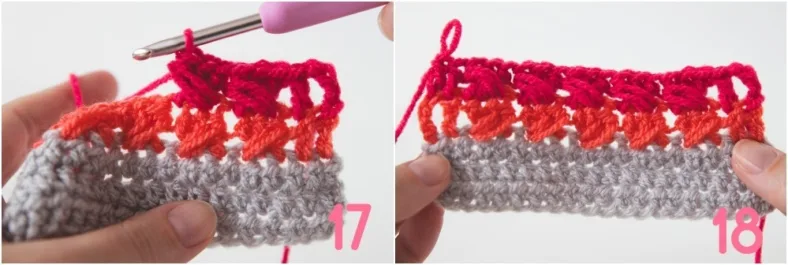
The normal way to continue your wrapped blocks is to join your new colour with a ss in the first st. Make three ch to form your first dc, then another dc. Skip one stitch, work two dc and then a wrapped stitch in the skipped stitch. Continue like this all the way across until you have two stitches left, and make one dc in each of the final two stitches (photos 13-18). Basically, you repeat the instructions above.
Second row (alternative way of continuing)
In the Rainbow Sampler 2 pattern I mentioned another way to continue your second row, to make the wraps align slightly better.
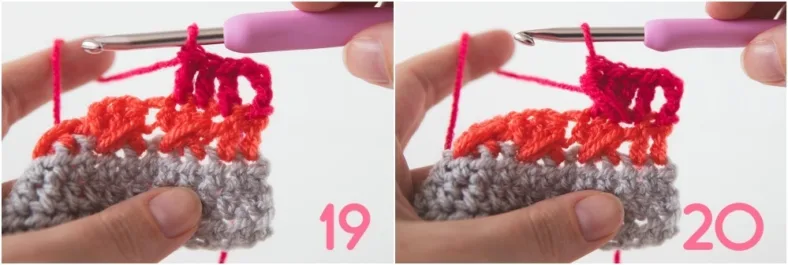
Join your new colour with a ss in the first st, make three ch to make your first dc and then make one more dc. Now, instead of skipping a stitch, do not skip the stitch and work two more dc (photo 19), giving you four dc in a row. Make a wrapped stitch in the space of the second of four dc (photo 20). This is your first wrapped block.
Then continue as described for the first row by skipping the next stitch, making two dc and a wrapped stitch in the skipped stitch. When you reach the final three stitches, skip the first stitch (to compensate for the missed skipped stitch before the first block), and then work one dc in each of the final two stitches. You can use these instructions for every further row of blocks.
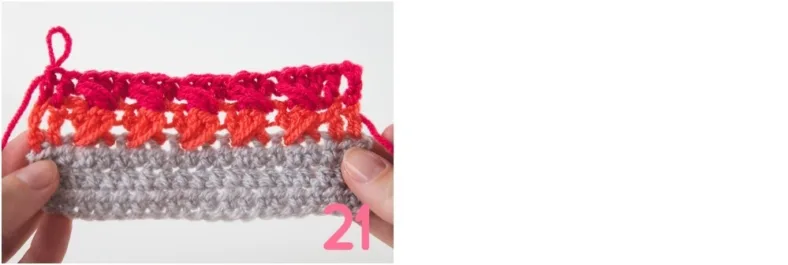
You can see how the blocks in photo 21 align slightly better than those in photo 18. It all comes down to a matter of preference though, and both methods yield the right stitch amount to continue your pattern.


Comments
Be the first to comment to this post!