When I learned to crochet I came across a term that was mentioned in a lot of patterns, but which I mostly ignored: ‘gauge’. I had no idea what it was or why it mattered, so I didn’t bother with it and just ignored those cryptic instructions. In hindsight maybe I should have paid more attention!
If you are currently in the position I was in and don’t know what gauge is all about, read on because I put together a complete guide with all you need to know.
What is gauge?
Simply put: gauge is a measurement of your tension.
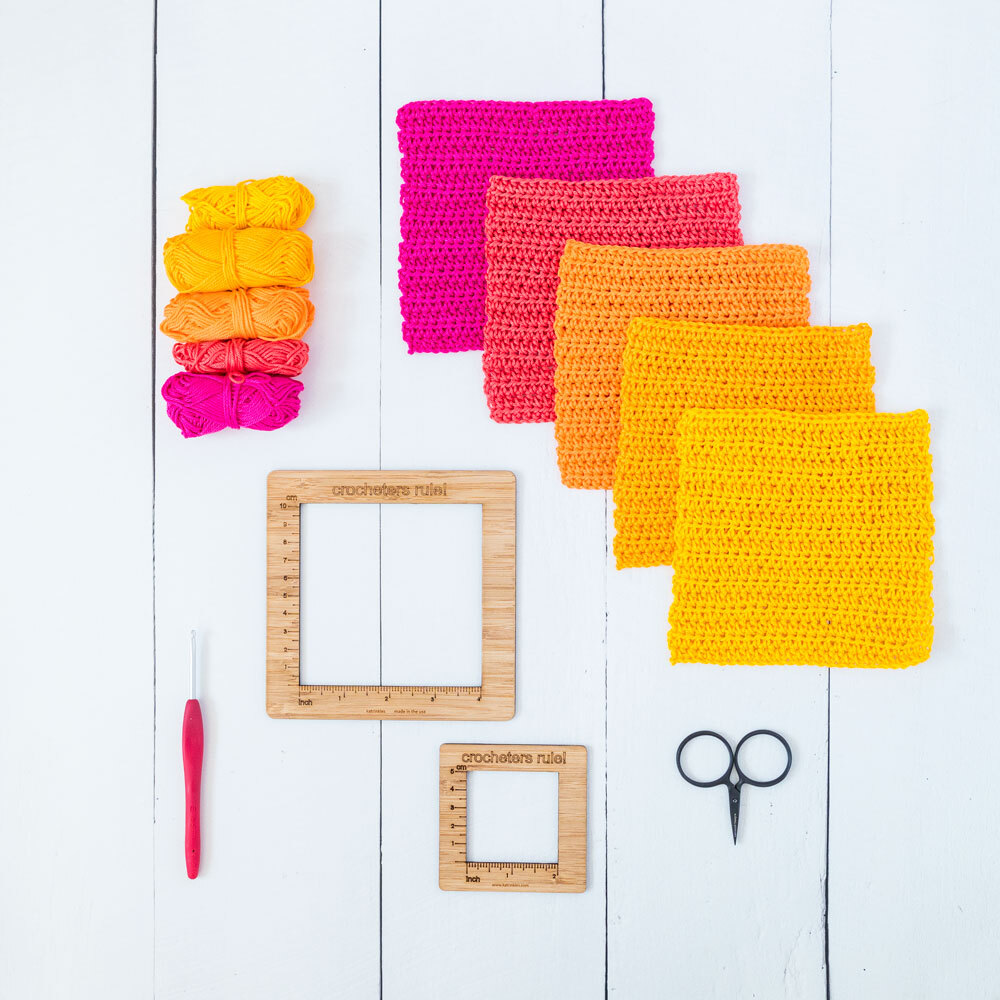
When you crochet or knit to the given (designer’s) gauge, you can tell with certainty that your work will be the same size. You can measure gauge in width (stitches) and height (rows), or as a pattern or stitch repeat. You can measure this with a simple tape measure, or get a fancy gauge tool such as the frame below.
Is gauge important?
If you wonder if gauge is important for your project, answer the following question: ‘Does the exact size matter?’
For blankets, doilies and amigurumi my answer would be ‘no’. If my blanket or doily ends up a few centimetres bigger or smaller than prospected I wouldn’t mind, as long as I’m happy with the look and drape. However, if I would be working on a fitted item such as a cardigan or pillow cover, size does matter. Imagine a pillowcase that sloppily fits your inner pillow or a garment that’s two sizes too small! A few centimeters can already make a big difference.
The influence of gauge on crochet and knit
So how does gauge influence the size of your work? it is because the designer has determined the measurements of the project based on his or her own gauge: if the designer made a project where 10 stitches measure 10cm in width (4in), and your work measures 12 stitches per 10cm, your crochet piece will be smaller. This is because your stitches are less wide. There are more stitches in your 10cm, after all. So if you stick to the pattern’s amount of stitches, your total piece will be smaller as well.
There’s a second way in which gauge influences your work. Gauge directly relates to yardage (the amount of yarn you’re using for your project). If your gauge is off, there’s a chance that you’re using more yarn than the designer did to finish your project, especially if you have to compensate for a size issue by making extra stitches. If you’re working from a yarn kit, this could mean you run out of yarn before finishing your pattern. You don’t want that!
Understanding gauge instructions in patterns
In most crochet or knit patterns, you’ll find instructions for the gauge you need to match. These will often be abbreviated using crochet or knitting lingo and look something like this: “17 sts and 10 rows measure 10 x 10cm (4 x 4in) over tr using 4.5mm crochet hook.“. In a knitting pattern, you’ll find a similar sentence but with a knitting needle size instead of crochet hook size, and with a knitted stitch instead of a crochet stitch. I’ll stick with the crochet example for now, but the principle in knitting is the same.
There’s a lot of information you can get from this single gauge line:
- Over which size you have to measure your stitches: 10 x 10cm. 10 x 10cm (4in) is pretty standard, but sometimes you’ll find that you’ll be measuring 5 x 5cm (2in). Every once in a while you’ll find reversed instructions: the pattern will tell you the width and height of a single pattern repeat which you need to match.
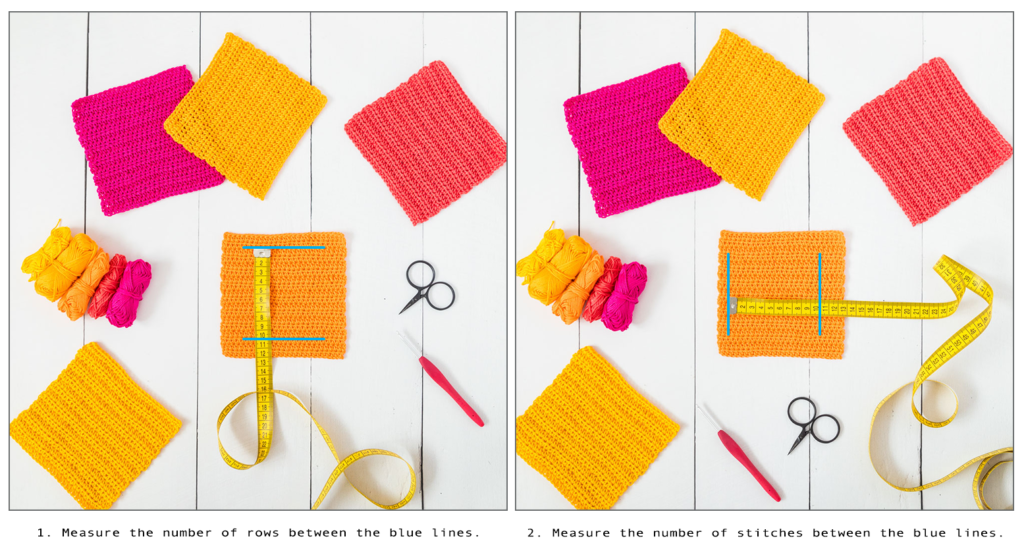
- The number of stitches that should be in your 10 x 10cm piece: 17 stitches and 10 rows. For more information on how to measure this, check the photo tutorial below.
- Which stitch you need to measure gauge over: tr. Normally this is the main stitch used in the pattern such as trebles, single crochets, double crochets and so on. Sometimes it’s a specific set of stitches or a pattern repeat, that’s explained in the pattern itself.
- The hook size: 4.5mm.
Please note: Some patterns state ‘gauge is not critical for this project‘. This pretty much means that the designer answered the ‘Does the exact size matter’ question with ‘no’.
Making a gauge swatch and measuring
You can measure gauge on the go, but I always prefer to make a gauge swatch. It takes a little bit of extra time but it helps you determine beforehand whether you’ll meet gauge.
Instructions to make a gauge swatch are not always included in the pattern itself. If not, you can make one for yourself by following these steps:
- Check which stitch the gauge is measured on. For example, a treble or double crochet.
- Check the number of stitches mentioned in your gauge instructions. For example, 17 stitches and 10 rows. Stitches tend to pull or push outwards slightly on the edges, so its best to make your swatch slightly bigger for a more accurate measurement. For the above example, you might crochet 22 stitches and 15 rows. This gives you plenty of stitches in the middle of your swatch to measure.
- Crochet your swatch using the stated hook size. Don’t cut your thread, so you can frog it later and re-use the yarn. Some patterns tell you the blocked gauge. In that case, block your swatch before measuring.
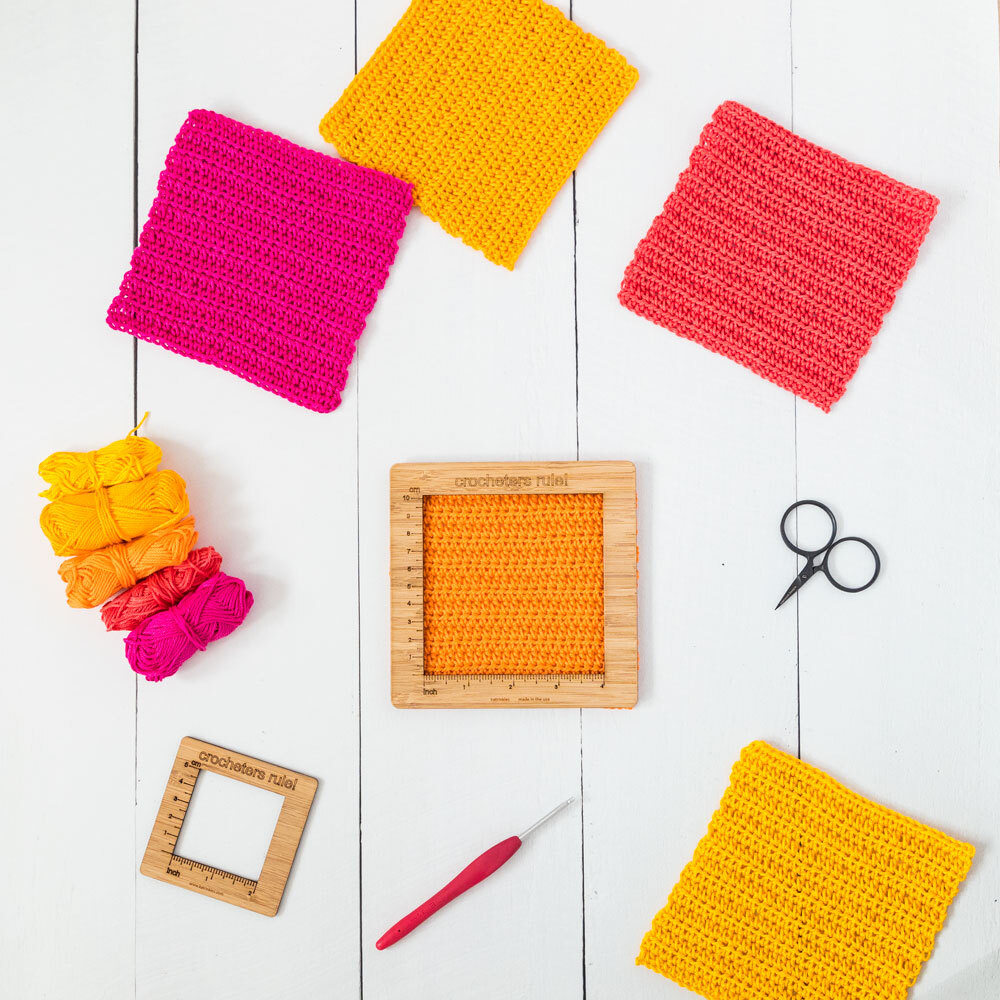
- Measure your swatch in the middle. If you’re tight on yarn, you can rip out your gauge square and re-use your yarn in your actual project. However, if you have enough yarn you can turn a gauge square into something extra.
- Finally, compare your gauge with the designer’s gauge. If it’s spot on, that’s great! If you’ve got less stitches (or rows) per 10cm, this means that your work will end up larger than the designer’s example. And if you’ve got more stitches (or rows) per 10cm, this means that your work will be slightly smaller.
Adjustments you can make to get the right gauge
If you’re not meeting the right gauge, you need to change something. This can be one of the following things:
- Change hook sizes. Go up a hook size if your swatch is too small, go down a size if it’s too big. Keep an eye on the drape of your work, it shouldn’t become too loose or too stiff.
- Change hook material. Different materials such as bamboo or aluminium have different traction on your yarn. Subsequently, your tension might differ with different materials. It might just be the right minor tweak for you!
Don’t worry too much though. Not matching the gauge is not the end of the world. In my opinion, there’s an acceptable range that you can work with. Imagine this: You’re working on a cardigan and the designer’s gauge is 17 stitches and 10 rows per 10 x 10cm (4in) and you end up with 17.5 stitches and 10 rows in your gauge swatch. Is that too much? Do you need to adjust? And what if you can’t meet it after changing your hook size?
Well, put it in perspective: you are making 0.5 stitches more per 10cm (or 1 stitch per 20cm (8in) for easy maths). So if you make a garment where the designer designed a bust circumference of 110cm (43in), you would need to make 110/20cm = 5.5 stitches extra per row to end up with the same circumference. Considering you don’t want to mess with the pattern you decide not to bother. Because if you look at the gauge swatch, you can tell 5.5 stitches are approximately 3cm (1.2in). And in all honesty, if you block your cardigan, you can stretch it a little bit to get those extra centimetres. No pattern fiddling needed! Of course, judging whether your gauge difference is fixable by blocking requires a bit of experience. But in my experience, blocking can solve a lot!
Maintaining your gauge in your project
Knowing you match the gauge is one thing, but now you need to maintain this gauge throughout your project. And anybody who has worked on a large project can tell you that your gauge can differ from day to day, depending on your mood, stress levels and many other factors. Luckily, there are a couple of things you can do, or check, while you are crocheting or knitting to keep your gauge consistent.
- Check the way you hold your yarn. Tension is vital here. You’re going to have to take a good look at the way you hold your thread. Do you yank your hook downwards after you finish a stitch, or do you lift your hook upwards? Do you pull your yarn taught after a stitch? This all influences the height of your stitches and thus your gauge.
- Make sure your yarn isn’t overly tensed or stretched. When you work from a ball, the yarn tends to be a little tighter when you pull out extra yarn, and a bit looser when you’ve just unwinded a couple of meters. To prevent this, you can consider using a yarn butler. These little helpers rotate your ball for you, gently unwinding your yarn. This helps you keep those pesky tension differences at bay.
- Make sure YOU aren’t overly tensed. If you are stressed or pressed for time, chances are that you are going to crochet tighter. Be aware of your own stress levels and the way this influences your work. Your gauge will thank you.
- Don’t change hooks in the middle of a project. While you might think that a 4.5mm hook from different brands is the same, variations in shape, length or weight of the hook can change your tension. This, in turn, can influence your gauge.
- Finish a row or segment of a pattern before you put your work away for the night. Gauge differences are more likely to show in rows or rounds, and not as much between various sections.
- Lastly: measure every once in a while to see if you’re still on the right track!
Fixing sizing issues afterwards
It happens to the best of us. Your swatch is on point, but when you do a quick check halfway through, your measurements are still off. Now you’re hoping that I can give you a golden tip to fix this without ripping it all out but the reality is that sometimes you will need to start over. However, if the difference is not too big, a thorough blocking might help you. Blocking relaxes the fibres and redistributes tension in your yarn. This means that your piece becomes suppler, and often also larger. You can judge this beforehand by laying the fabric flat and ‘ironing’ it with your hands. If it stretches a lot, you’ll be able to block it to size more easily. If it’s sturdy, don’t expect to get a lot of extra centimetres out of it with blocking.
That’s all that I have to tell you on the subject of gauge! If I think of anything else, I’ll update this post. And of course, if you have a tip that might help your fellow crafters to meet gauge more easily, leave a comment below this post!


Comments
ell done written
http://bestfootbags.com/ December 18, 2020 07:22 - Reply
ell done written
http://bestfootbags.com/ December 18, 2020 07:23 - Reply
ell done written
http://bestfootbags.com/ December 18, 2020 07:23 - Reply
ell done written
http://bestfootbags.com/ December 18, 2020 07:23 - Reply
I have reached correct stitches but short by 3 for my rows. I am crocheting (planning to) a slouchy shrug so wondering if it will matter? May 28, 2021 15:10 - Reply