

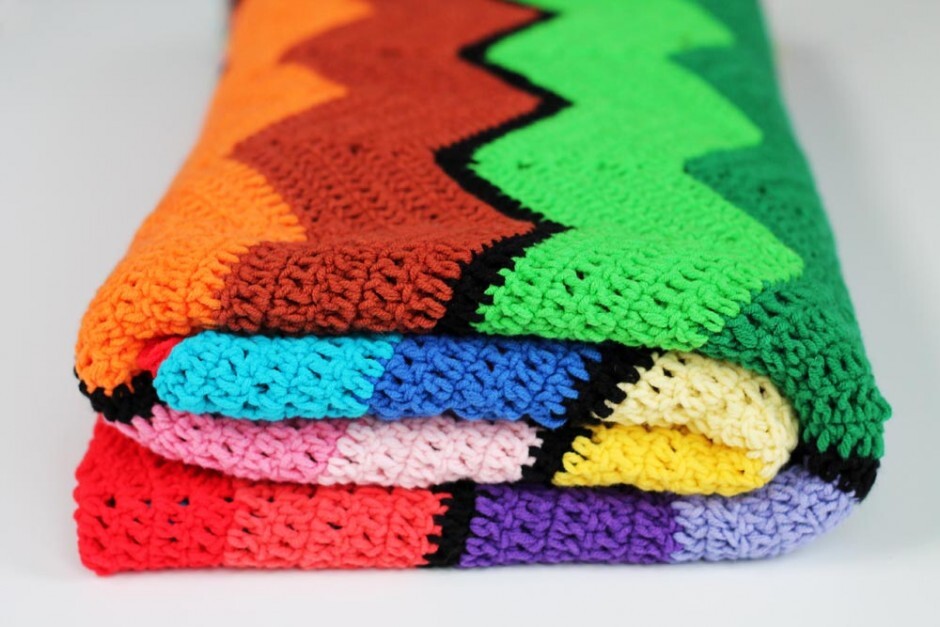
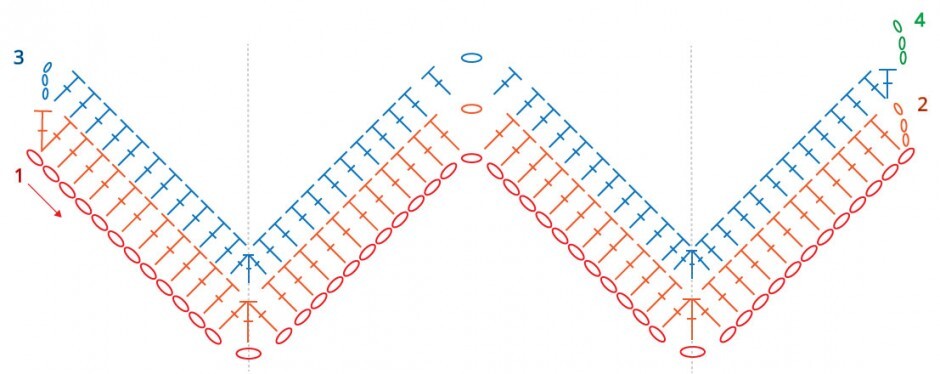
This is the pattern for the Retro Ripple! This blanket is easy to adapt in size. I made it pretty big, but with half the yarn, you can also make a decent-sized throw. The pattern is written in US terms, and I’ve included a chart for the ripple too, as well as a photo tutorial for the fringe.
The pattern is suitable for beginning crocheters as the stitches are easy to memorise and have a nice ‘rhythm’ to them (a.k.a. TV crochet). Enjoy!
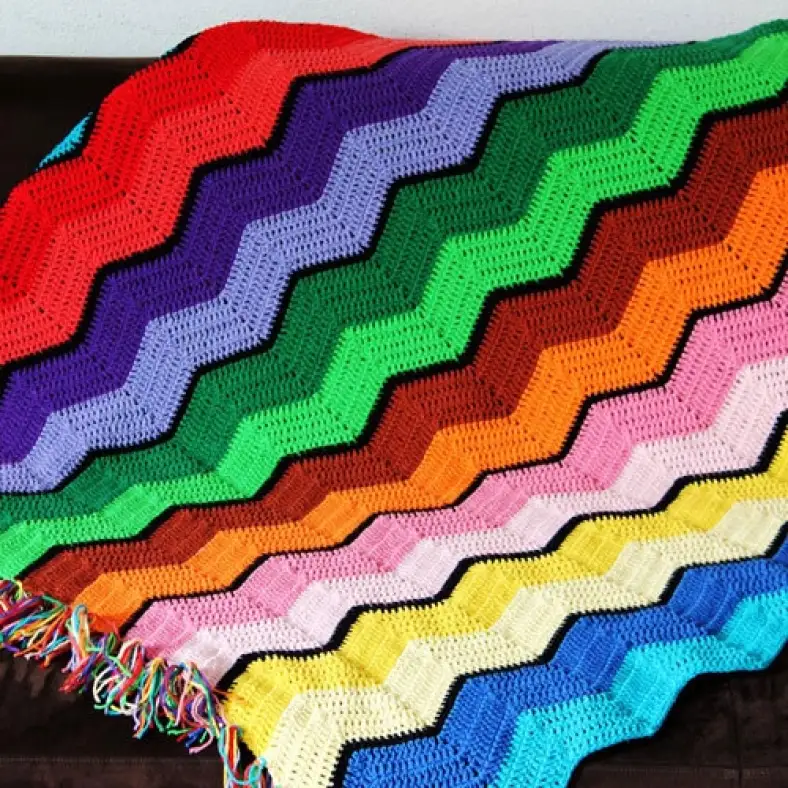
Materials and preparation
Yarn
| Label | Colour name | Code | Amount |
|---|---|---|---|
| Colour A | Red | 2410 | 2 balls |
| Colour B | Coral | 2449 | 2 balls |
| Colour C | Dark Purple | 2515 | 2 balls |
| Colour D | Purple | 2519 | 2 balls |
| Colour E | Dark Green | 2535 | 2 balls |
| Colour F | Apple Green | 2517 | 2 balls |
| Colour G | Terracotta | 2431 | 2 balls |
| Colour H | Orange | 2427 | 2 balls |
| Colour I | Bright Pink | 2514 | 2 balls |
| Colour J | Pastel Pink | 2513 | 2 balls |
| Colour K | Yellow | 2518 | 2 balls |
| Colour L | Soft Yellow | 2496 | 2 balls |
| Colour M | Dark Blue | 2452 | 2 balls |
| Colour N | Turquoise | 2511 | 2 balls |
| Colour O | Black | 2408 | 3 balls |
Shop the yarn
You can get Soft Fun from Scheepjes retailers, or webshops such as:
Crochet hook
4.0 mm (US size G/6)
Measurements
120cm x 200cm, excluding fringes. (47 x 78in).
Gauge/tension
Not critical
Abbreviations (US terms)
- ch
- chain
- dc
- double crochet
- dc3tog
- double crochet 3 stitches together. (Yarn over, pull up loop in stitch, yarn over, pull through first two loops on hook) for each of the three stitches, you now have 4 loops on your hook. yarn over, pull through all loops on hook
- ss
- slip stitch
- st(s)
- stitch(es)
Repeat formats
- (…) in same st/sp — Indicates that all instructions between brackets are worked in the same stitch or space.
Notes
- Clarifying remarks and references to the photos are placed in italic between brackets. Italic text is not a pattern instruction, regular text is! Also, the photo tutorial uses different colours as you will crochet the first stripes of your blanket with.
Crochet pattern
With Colour A, ch193.
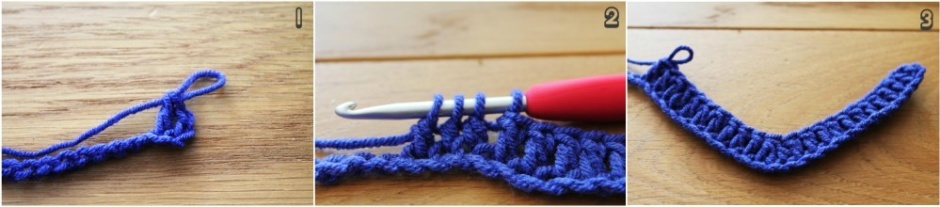
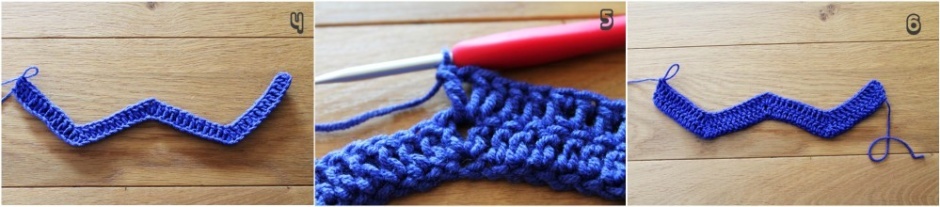
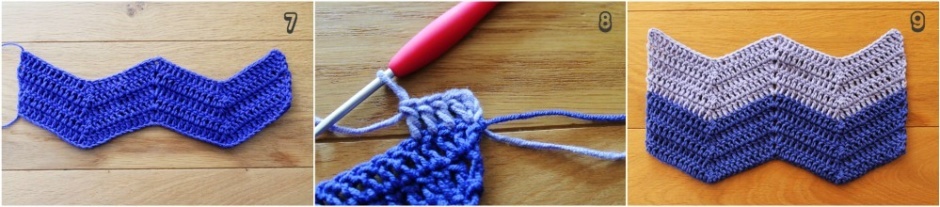
Repeat Row 2 for every next row of the blanket, using the following colours:
Repeat the whole colour sequence, including using Colour A and B another time. For the second repeat, don’t work the final row of Colour O but instead, end with the 5 rows of Colour N. Fasten off and weave in all ends.
Fringes
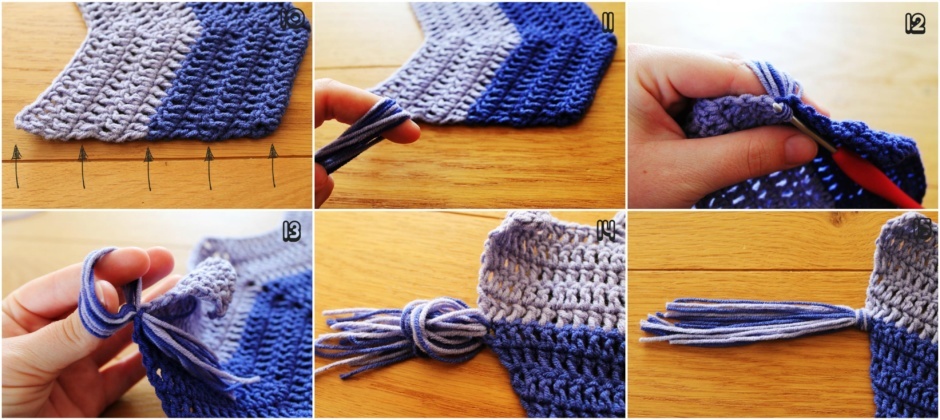
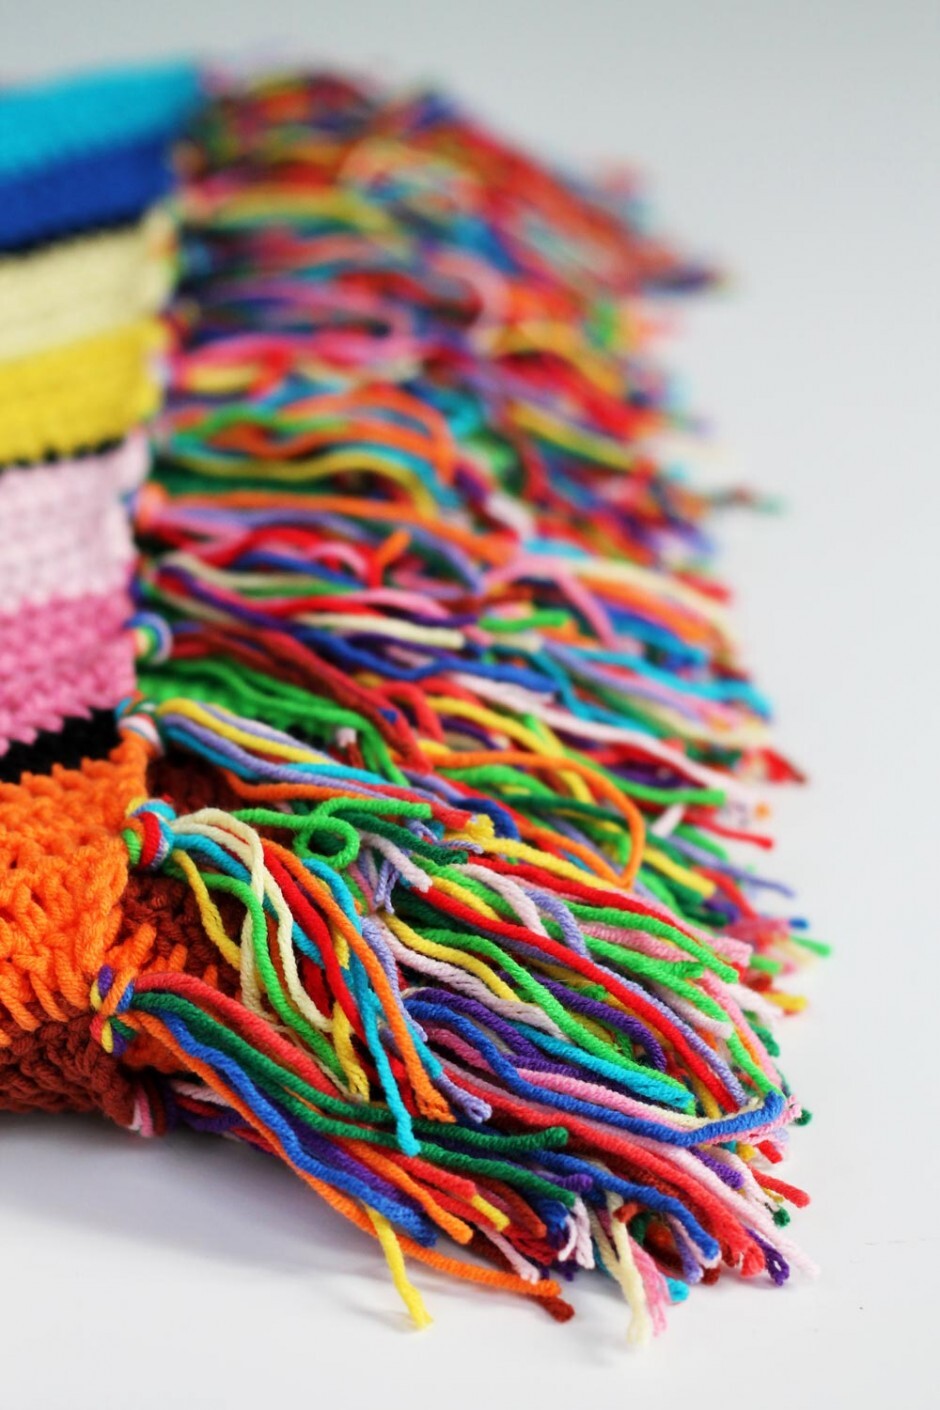
I’ve added the fringes on different places (arrows, photo 10). I started out with fringes in between two colours and in every black row, but that seemed a little sad and lonely. So I’ve added fringes in every 3rd row of a colour block too. If you’re not too sure, just start with making fringes in between the colours and in every black row, and add extra fringes if you deem this necessary later.
Making fringes is easy. First, gather all your yarns and put them in a bucket or box so they can’t roll away. Grab a strand from each yarn and cut sections of 15cm. Divide these into two strands of 7 threads each with the colours split at random. The fringes are going to be knotted double in your blanket and if you make fringes with 14 strands, they’ll end up too bulky in my opinion.
Take a fringe and fold it in half (photo 11). Insert your crochet needle through the loop, and pull the loop through your blanket (photo 12). If you make a fringe on the border of two colours, use the stitch in which you’ve attached your new colour. If you attach fringes to other parts of your blanket, just take the stem of the dc.
Insert your thumb and index finger in the loop (photo 13). Then pull your ends through your loop and pull gently to tighten the fringe (photo 14, 15). Trim your fringes to size.
Adjusting measurements
If you want to increase or decrease the width of your blanket, add or subtract 24 chains to your beginning chain of 193. Every 24 chains create one ripple. If you want to increase in height, simply add more Row 2 repeats to either the colour blocks or add new colours altogether.
Diagrams
You might also like
Comments
Elizabeth Oreilly
May 04, 2021 17:41