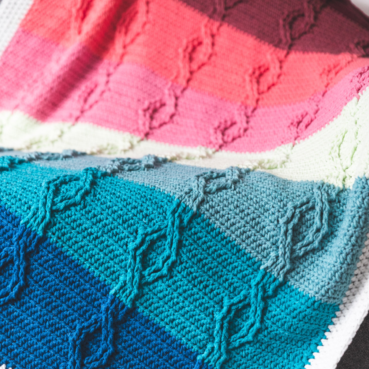
Pop Spots Blanket
07.Aug.25 / Kirsten BalleringThe Pop Spots Blanket features spots in every colour of the rainbow, adding a fun and vibrant touch to any room! The pattern is cheerful, which makes it ideal as a baby shower gift, keepsake or just an opportunity to use all colours available to you.
And if you find it too colourful, switch out some colours with regular balls of Stone Washed, and customise the palette to your taste. Easy as that!
Materials and preparation
Yarn
Rainbow
Scheepjes Stonewashed (78% Cotton, 22% Acrylic), 50g/130m:- Colour A: 801 Moon Stone x 20 balls
- Every colour: x 1 ball

Shop the yarn!
You can find Scheepjes Stone Washed at your local Scheepjes retailer, or shop online at:
Crochet hook
4.0mm hook
(US size G/6)
Measurements
154 x 116cm (60 x 45½in)
Gauge/tension
Motif measures 12cm (4¾in)
Abbreviations (US terms)
- beg puff: begin puff stitch: ch2, (yarn over, insert hook in st, yarn over, pull up loop) 3 times, yarn over, pull through all loops on hook, ch1 to close the puff stitch
- BLO: back loop only
- ch: chain
- ch sp: chain space: the space below the chain of the previous row, e.g. ch-1 space, ch-2 space, etc.
- dc: double crochet
- puff: puff stitch: (yarn over, insert hook in st, yarn over, pull up loop)4 times, yarn over, pull through all loops on hook, ch1 to close the puff stitch
- hdc: half double crochet
- hdc2tog: half double crochet 2 stitches together: (yarn over, insert hook in st, yarn over, pull up loop) twice, yarn over, pull through all loops on hook
- RS: right side
- sc: single crochet
- ss: slip stitch
- st(s): stich(es)
- WS: wrong side
Repeat formats
- *….; rep from * once/twice/3x Crochet the instructions after * and then repeat that section a further number of times as indicated.
- *…; rep to end Crochet the instructions after * and then repeat that section to the end of the row or round.
- (…) once/twice/3x Crochet the instructions between brackets the total number of times indicated.
- […] Indicates the amount of stitches at the end of a row or round.
- (…) in same st/sp Indicates that all instructions between brackets are worked in the same stitch or space.
Colour layout
This is the colour overview. Every number in the chart corresponds with a colour number in the Stone Washed and River Washed colour pack. Every number is shown twice because you can make two motifs out of each colour.
Note: you won't use colour 801, 802, 803 and 821, so put those aside.

Techniques
Motif
The motif consists of a circle in Colour A, two rounds of puff stitches in a coloured yarn and then another two rounds of Colour A to square the motif.
Start with a magic ring. Ch3 (photo 1), and work 15 dc in the magic ring. Pull the loose end to close the magic ring tight, and work a ss in the 3rd ch to close (photo 2). Moving to round 2, Ch3 again and work a dc in the same stitch (photo 3). Continue working two dc in each dc of round 1 to complete this round, and close with a ss (photo 4). Now cut the yarn.

Join the coloured yarn with a ss in any stitch. It doesn’t matter where, and I prefer to do it on the opposite side of where I ended the previous round to make weaving in ends less bulky.
We’re starting with a beginning puff stitch. To start, ch2 (this is as your first unofficial ‘yarn over’ in the beginning puff stitch), (yarn over, insert your hook in the same stitch, yarn over and pull up) another 3 times (photos 5-6). Yarn over once more, pull through and ch1 to close the stitch (photos 7-8). Ch1, skip the next dc and make a puff stitch by working (yarn over, insert your hook in the same stitch, yarn over and pull up) 4 times, yarning over once more, pull through and close the stitch with a ch (photo 9). The only difference between a beginning puff stitch and a regular puff stitch is that in the beginning puff stitch, the first yarnover is replaced with 2 ch’s!
Ch1, skip a dc and make a puff stitch in the next stitch. Continue working this way around the motif and join with a ss in the final ch of your beginning puff stitch (photo 10). Do not cut your yarn.
It’s okay if your circle does not lie flat, but is concave at this point. That’ll even out in later rounds.

Loosely slip stitch to the next chain space (photo 11). There, make another beginning puff stitch (photo 12). You’ll be working two chains in between each puff stitch to accommodate for the increase in circumference. So ch2, and work a regular puff stitch in the next ch-sp. Continue like this all around and join with a ss in the first puff stitch (photo 13). Now you can cut your yarn.
Join Colour A with a ss, in any chain space (photo 14). We’ll be starting with squaring the motif. Ch3 (those count as your first dc), and in the same chain-space make 2 more dc, 2 ch, and 3 dc (photo 15). This will create one of the four motif corners. To fill out the circle in a square, we’ll combine various stitch heights on the side. In the next chain space, crochet 3hdc. In the one after 3sc. Then 3hdc in the next chain space again. (photos 16-17). Make your second corner by working 3dc, 2ch and 3dc in the next space. Continue around until you’ve finished the round. Join with a ss in the first stitch.
Ch1 (does not count as a stitch) to get up to height for the final round. We’ll be working 1hdc in each stitch (photos 18-19), and 2hdc, ch2, 2hdc in the corners. This gives the motif a more square shape and provides you with even stitches for the joining. After this round, cut your yarn and weave in any ends.

Joining
We’ll be joining with the Flat Zipper Join. This creates a lovely flat row of ss in between the motifs. It might take a second to get used to, but once you get the join in your fingers, it’ll be second nature. For the techniques tutorial, I used different colours for the motifs and join to show the different loops. However, when you work this join in one colour, it’s not nearly as visible.
Follow the pattern instructions to sort and stack the motifs. When you have your first two motifs, place them WS together (photo 20).
Insert your hook through the back loops of the chain spaces of both motifs (photo 21). Pull up a loop of Colour A, pull it through the loops, and make a ss (photo 22). This secures your yarn.
Next, make sure your thread is in between the motifs and under your hook. Pick up the back loop from the next stitch on the top (right) motif, the white motif in photo 23, while keeping your thread between your motifs. Pick up the back loop of the corresponding stitch on the other motif (photo 24). Still, your thread is between the motifs, under your hook. Now yarn over, and pull through. This creates a flay laying slip stitch on top of your work with your thread still coming out between the motifs (photo 25).
This is the basis of the join. Pick up the back loop on one motif, pick up the one on the other motif while your thread is still below your hook, and then pick up your thread and pull through the loops on your hook (photos 26-27). Continue like this until you’ve joined the first ch of your next chain space (photo 28). Then, grab the next two motifs and continue joining. Follow the pattern instructions to join all subsequent columns and motifs. That’s it!

I've also made a quick video to show you the join:
If that’s not clear enough, several YouTube tutorials explain the flat zipper method in detail.
Crochet pattern
Motif (make 108, 2 of each colour)
Use Colour A and start with a magic loop.
Round 1 (RS) Ch3 (counts as dc), 15dc in magic loop, close loop with ss. Pull the loop tight. [16 dc]
Round 2 Ch3 (counts as dc), 1dc in same st, (2dc in next st) in each st around, join with ss, cut yarn. [32 dc]
Round 3 Join coloured yarn with ss in any st. Beg-puff in first st, *ch1, skip 1 st, puff in next st; repeat from * another 14 times, ch1, join with ss in beg-puff. [16 puff stitches, 17 ch-1 sps]
Round 4 Ss to top of next puff st, ss to next ch-1 sp, beg-puff in same ch-1 sp, skip puff *ch2, skip puff, puff in next ch-1 sp; repeat from * another 14 times, ch2, join with ss in first st. [16 puff stitches, 17 ch-2 sps]
We’re now going to square up the motif.
Round 5 Join Colour A with ss in any ch2-sp. Ch3, (2dc, ch2, 3dc) in same space, *3hdc in next space, skip puff, 3sc in next space, skip puff, 3hdc in next space, skip puff, (3dc, ch2, 3dc) in next space, skip puff; repeat from * another 2 times, 3hdc in next space, skip puff, 3sc in next space, skip puff, 3hdc in next space, skip puff, join with ss in first st. [15 sts on each side]
Round 6 Ch1, 1hdc in same st (this is the first dc of 3dc’s in corner-space), *1hdc in each st to corner sp, (2hdc, ch2, 2hdc) in corner-space; repeat from * another 3 times, 14hdc, join with ss in first hdc. Cut yarn, weave in all ends. [19 hdc on each side]

Layout and assembly
Lay out all the motifs on the floor. Next, stack together the motifs per column. Stack all motifs from top to bottom, so all motifs from the last row are on top of their respective stack. It’s best to tie the motifs together with a string through the corner spaces and number the stack with each corresponding column number. You will have 9 stacks of 12 motifs each, numbered 1 through 9 (1 being most right column, 9 being most left).
Joining
Motifs are joined using the flat zipper method. All columns are first joined from right to left, and then the row joins are made. Work your slip stitches loosely. If you tend to crochet tight, consider using a larger hook size for the joining.
Joining columns
Start with stacks 1 and 2. You will be working through the back loops of all stitches. Place the first two motifs with their WS together.
*Pick up BL of opposite ch-sps on both motifs. Pull Colour A through the stitches and make a ss. Now, make sure the thread of Colour A is in between both motifs on the WS. Pick up the BL of the next stitch on the right motif, then pick up the BL of the next stitch on the left motif. Pull Colour A through (this creates a flat laying ss between motifs); repeat from * for all stitches and the first chain of ch-sp on the motif’s sides. Grab the second motifs from both stacks (making sure the second motif from Stack 1 is placed alongside the joined motif from Stack 1). Continue joining in the way described above across all motifs from stacks 1 and 2, cut yarn. Columns 1 and 2 are now joined.
Grab Stack 3 and join them to the unjoined side of the Column 2 motifs. Repeat this for all nine stacks until all motif columns are joined.
Joining Rows
Joining rows is much easier, as the motifs can’t shuffle. Continue joining the rows like for the columns, skipping over the previously made column seam to the following motifs in the row. Cut the yarn and fasten off any loose ends.

Edge
The first two rounds are a bit funky. Through trial and error, I found that we want to decrease the number of stitches in the border a bit compared to the number of stitches in the motifs, as the border tends to ripple otherwise.
However, this makes the pattern instructions for the first rounds a little crowded. If you find them confusing, follow my laid-back approach on stitch count: crochet 1 stitch in every stitch and make 9hdc2tog sprinkled on both short sides and 11 hdc2togs on both long sides. You do this for both Rounds 1 and 2. This means you decrease ~ 18 stitches on both short sides and ~ 22 stitches on both long sides. It should be enough to get a straight edge, but play around with it and sprinkle in more decreases if the border still ripples.
Round 1 (RS) Join Colour A with a ss in the bottom right corner. Ch1, *(2hdc, ch2, 1hdc) in corner space, (19hdc, 1hdc2tog in ch-sps of this and next motif) for all motifs on side until last motif, 19hdc; repeat from * for all sides, join with ss in first st. [182 hdc on short sides, 242 hdc on long sides]
You’re making 2hdc on one side of the corner and 1hdc on the other side. This is because when you work in Rounds, the slanting of stitches causes the corners to look slightly crooked. By working 2hdc, we’re offsetting this slant and making perfectly square corners. Trust me; it works!
Round 2 Ch1, 1hdc in same st, 1hdc in each st to corner space, *(2hdc, ch2, 1hdc) in corner space, 2hdc, (18hdc, 1hdc2tog) 11 times, 20hdc, (2hdc, ch2, 1hdc) in corner space, 2hdc, (18hdc, 1hdc2tog) 8 times, 18hdc, 2hdc; repeat from * once more omitting the final 2hdc, join with ss in first st. [177 hdc on short sides, 234 hdc on long sides]
Rounds 3-7 Ch1, 1hdc in same st, 1hdc in each st to corner space, *(2hdc, ch2, 1hdc) in corner space, 1hdc in each st to next corner space; repeat from * for all sides, join with ss in first st. [177 hdc on short sides, 234 hdc on long sides]
Cut yarn, fasten off. Block your blanket to size.
Adjusting the size
If you want to adjust the measurements of the blanket, you can add or remove motifs. Each motif adds or removes around 12cm/4¾in to or from the blanket. Border and joining instructions do not need to be changed; only the number of repeats changes.

Diagram
Motif

Joins

Border

Key (US terms)


Comments