Tulip stitch
The tulip stitch is a wonderful example of combining simple stitches into something more. By crocheting V-shaped leaves and a bobble, the illusion of fields filled with little tulips is created. Let me teach you how to create this stunning stitch in just a few simple steps.
Tulip stitch stitch multiple
Stitch multiple in this blanket: 3 + 1 stitches. If you want to figure out how many stitches to start your tulip row with, you simply take a multiple of three and add one to it. For example, 72 x 3 stitches = 216. now add the extra one, which makes 217 (like in the Rainbow Sampler 2). You could also make shorter rows, for example, 48 x 3 stitches = 144, +1 is 145.
Tulip stitch tutorial
The Tulip stitches are made in two rows. First, you create the leaves, and in the next row the flower bulbs.
First row (leaves)
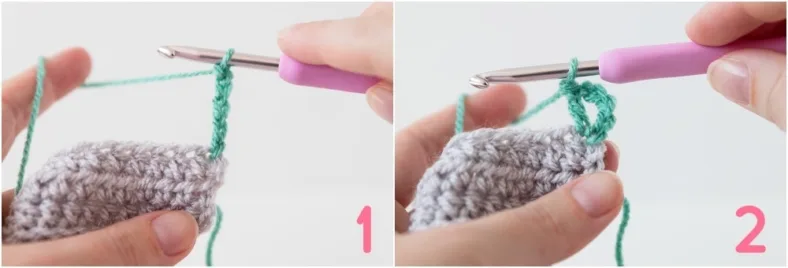
Start by joining your first colour with a ss in the first st, and make four ch (This consists of three ch that count as dc and a ch) (photo 1). Make a dc in the same stitch (photo 2). Together, this forms a small ‘V’, the base shape of this row.
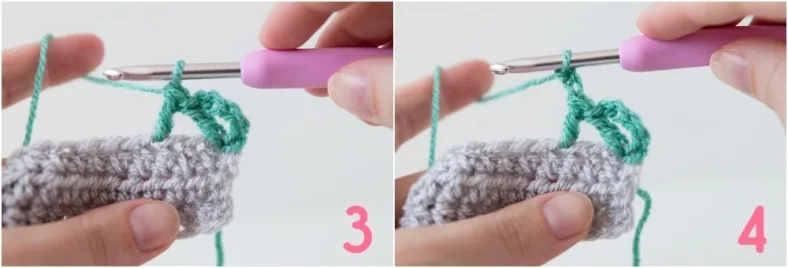
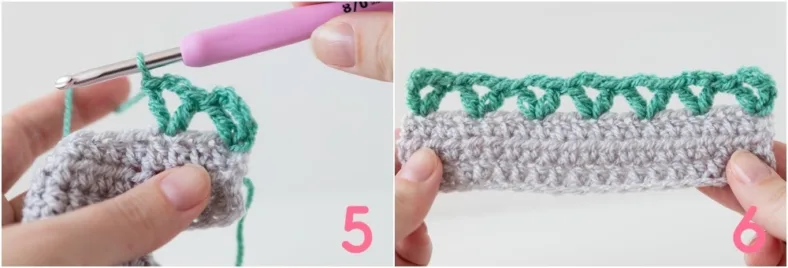
Next, skip two sts and crochet (1dc, ch2 and 1dc) in the next st (photos 3-5). Continue skipping two sts and making (1dc, ch2 and 1dc) in the next st to the end of your row. In your final V, work (1dc, ch1, 1dc) to mirror your starting V (photo 6). Cut your yarn and turn your blanket.
Second row (flowers)
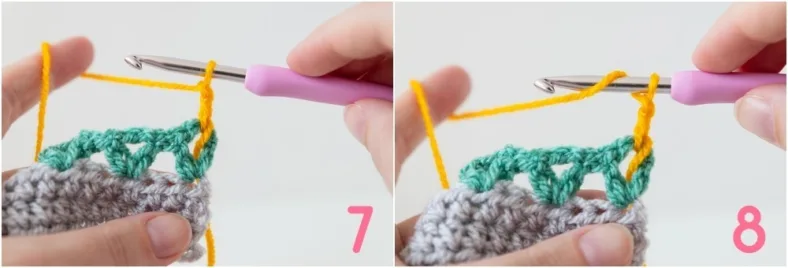
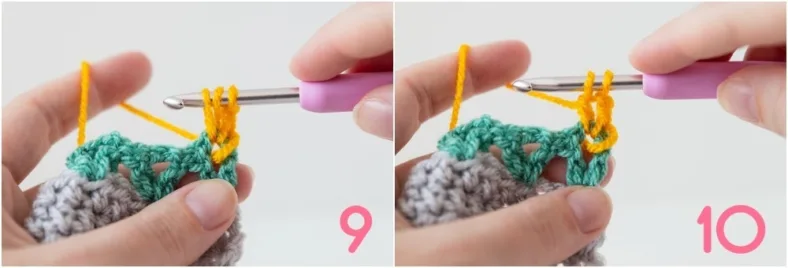
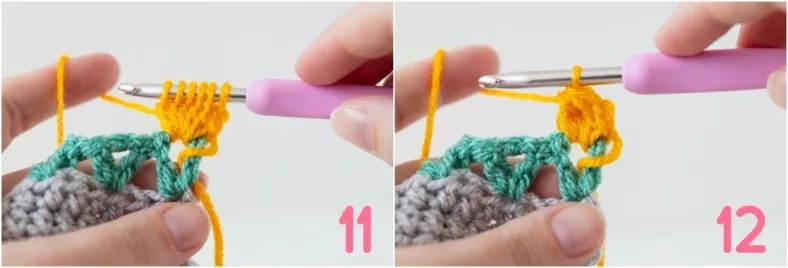
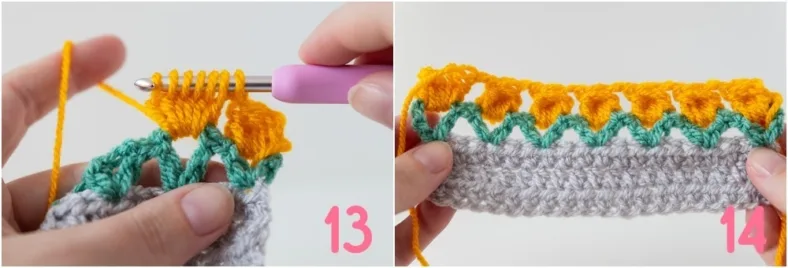
Now join your second colour for the flowers with a ss in the first V-space (the space below the chains). Make a begin-bobble by working two ch, yarn over, insert hook in space, yarn over again, pull up a loop, yarn over again and pull through the first two loops on your hook. Repeat what’s between brackets another four times in the same space, so you have six loops on your hook (photos 7-11). Yarn over one more time and pull through all loops on the hook. Pull it tight, so you get a nice bobble shape (photo 12).
Make two ch to cover the distance to the next V-space, and make a full bobble stitch by doing a yarn over, insert your hook in space, yarn over again, pull up a loop, yarn over again and pull through the first two loops on your hook. Repeat this another five times in the same space, so you have six loops on your hook. Then yarn over once more and pull through.
Continue with the two ch and bobble stitches to the end of your row (photos 13-14). Photo 15 shows what the tulip stitch looks like from the front. Cut the yarn and turn your blanket.

Continuing in top of tulips
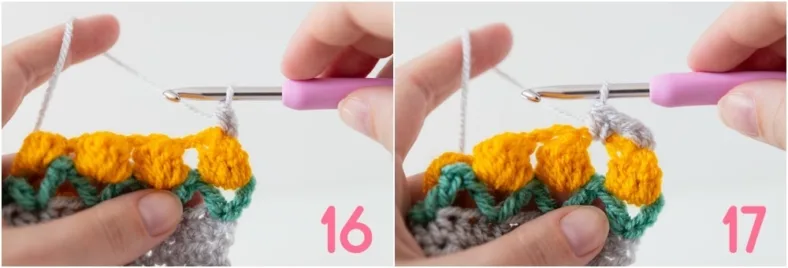
Join your colour with a slip stitch in the top of your first tulip. It doesn’t really matter if you join in the place of the final yarn-over or in the more open space to the left of it, as long as you crochet a hdc in the top of each tulip and two hdc in the spaces between them (photos 16-17). I would suggest trying both methods for a few stitches and seeing what looks best in your blanket.
As said, make one hdc in the top of each tulip and two hdc in the spaces between. Continue to the end of the row and end with a hdc in the last tulip (photo 18). This is how you crochet Tulip stitches!



Comments
Be the first to comment to this post!