Dutch Skies Potholders
26.Dec.19 / Kirsten BalleringToday I want to share with you my all-time favourite pattern for potholders. I’ve been making these for quite some time, even selling some of them in my Etsy store. But I like to share what I have, so I’m putting it out here for everyone to enjoy!
This is a pattern for round crocheted potholders. I’ve named them the ‘Dutch skies potholders’, as they resemble the sometimes clouded, grey stormy and bright blue sky here. Read on for the full pattern!
Materials and preparation
Yarn
- Colou r A: Brandless x 1 ball
- Colour B: Faience x 1 ball
- Colou r C: Pacifique x 1 ball
- Colour D: Canard x 1 ball
- Colour E: Minerai x 1 ball
Crochet hook
4.5mm (US size 7).
Gauge/tension
Gauge is not critical for this project.
Repeat formats
- *….; rep from * once/twice/3x Crochet the instructions after * and then repeat that section a further number of times as indicated.
- […] Indicates the amount of stitches at the end of a row or round.
Crochet pattern
Body (make 4 for 2 double-sided potholders)
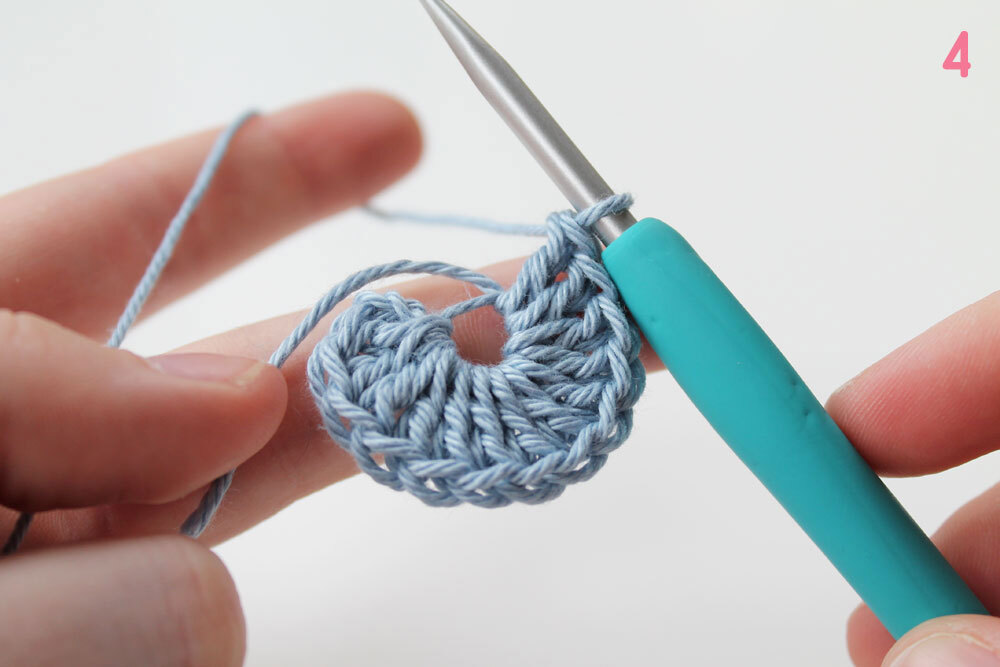
Round 1 You will need a magic loop. A magic loop is a way of creating a circle centre without leaving a hole behind. You start with making a loop with Colour A. Then put your hook through the loop, yarn over and pull the new-made loop through your big loop: Make a chain next to secure your magic loop.
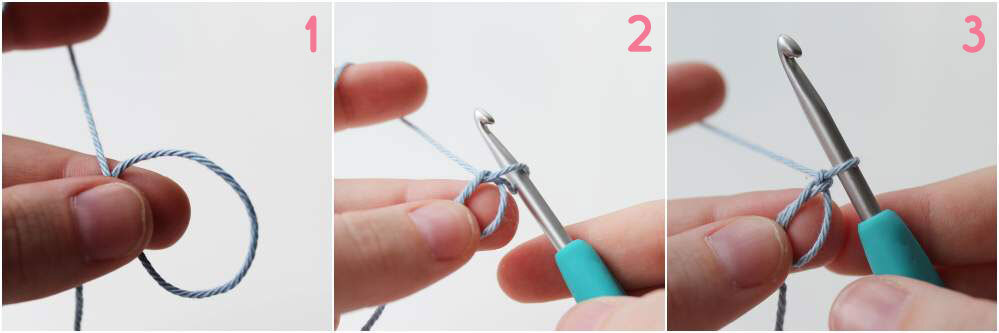
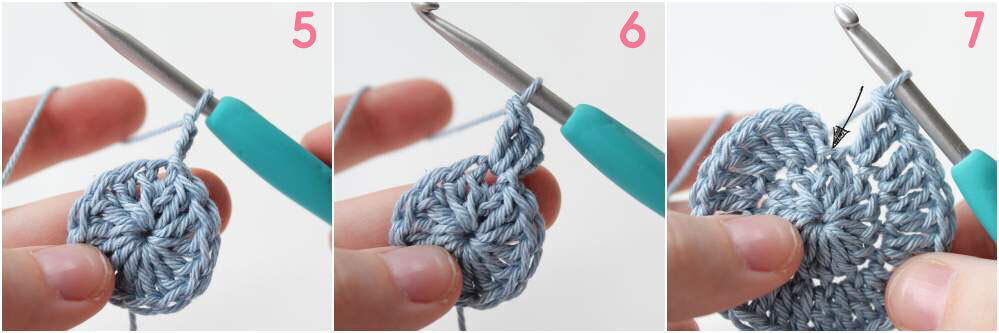
There it is. Now you can start working your first stitch. Ch3 (counts as your first dc). crochet 13 dc more and close the loop by pulling on the loose end.
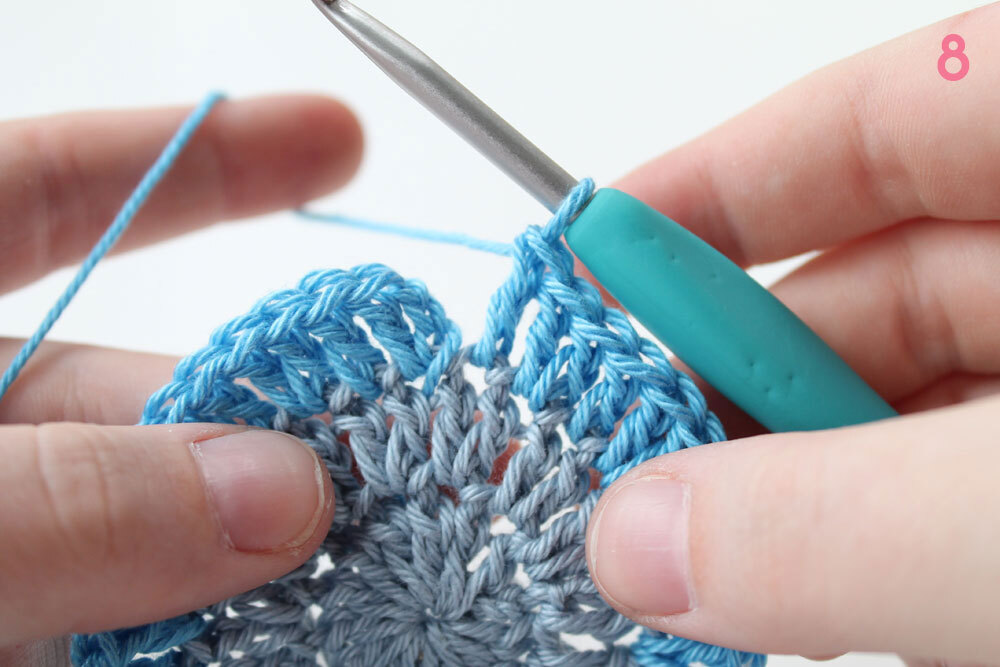
Slip stitch the last dc to the third ch of your first stitch. That’s the end of your first round. [14 dc in total]
Round 2 With the same colour, Ch3 (counts as first dc). 2dc in the next stitch. 2dc in every stitch until the end of your round. In the slip stitch of the previous round you will also make 1dc as indicated by the drawn arrow. Slip stitch to the 3rd chain of your first stitch. Fasten off. [28 dc]
Round 3: Join colour B with ss in any st. Ch3 (counts as first dc). 1dc in the same stitch again. 1dc in next stitch. Repeat *2dc in same stitch, 1dc in next stitch* until the end of your round. Basically, you’re increasing every other stitch. This is necessary to keep your circle flat, instead of concave or ruffling. Join the last dc with a slip stitch to the 3rd ch of your first stitch. [42 dc]
Round 4: Ch3, 1dc in next stitch. *2dc in same stitch, 1dc in each of next 2 stitches* until the end of your round. In the last stitch, you will notice that you end with 2 dc’s in the same stitch. This is correct because you started with the last part of the repeat, the ‘1dc in each of next 2 stitches’ this round. This will occur throughout the whole pattern. As long as the combination of your last repeat and the start of your row gives you a complete repeat you’re still on the right track. Fasten off. [56 dc]
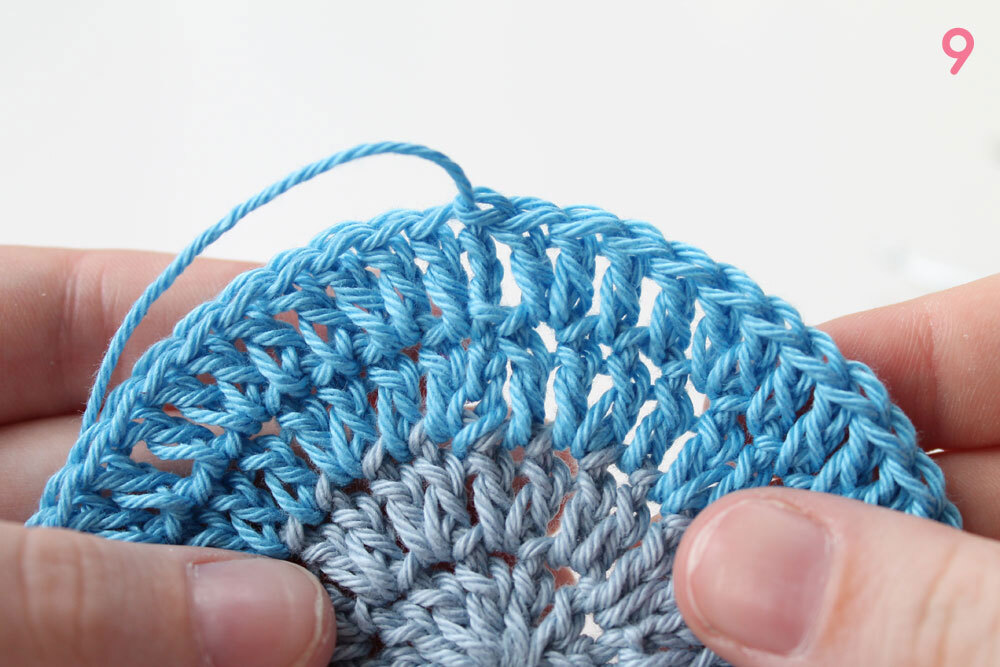
Round 5 Join Colour C with a ss in any st. Ch3 (counts as first dc), 1dc in the same stitch. Make 1dc in each of the next 3 stitches. Repeat *2dc in same stitch, 1dc in each of next 3 stitches* until the end of the round. Slip stitch to 3rd ch of first stitch. [70 dc]
Round 6 Ch3 (counts as first dc), 1dc in the next stitch. Repeat *2dc in same stitch, 1dc in each of next 4 stitches* until the end. You will notice that your last repeat cannot be completed fully as explained in Round 4. Fasten off. [84 dc]
Round 7 Join Colour D with a ss in any st. Ch3 (counts as first dc), 1dc in same stitch. 1dc in each of the next 5 stitches. Repeat *2dc in same stitch, 1dc in each of next 5 stitches* until the end of the round. Slip stitch to third ch of first stitch. [98 dc]
Round 8 Ch3 (counts as first dc), 1dc in the next stitch. Repeat *2dc in same stitch, 1dc in each of next 6 stitches* until the end of the round. You will notice that your last repeat cannot be completed fully as explained in Round 4. Fasten off. [112 dc]
Congrats! You made it this far, now bear with me for the joining and edging.
Joining
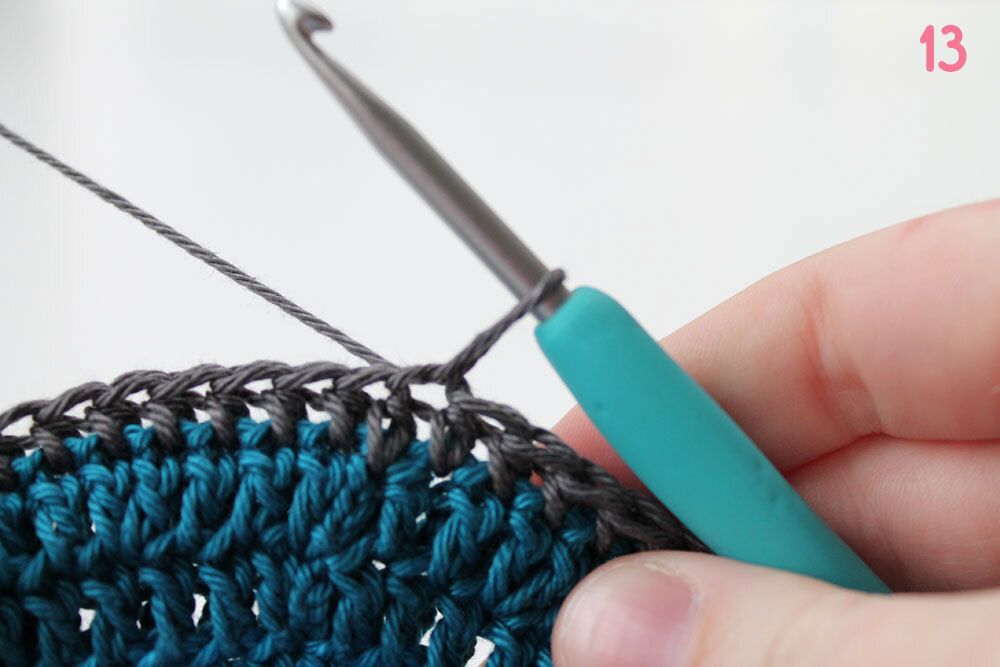
Put two of the bodies with their wrong sides together so the right sides are facing outward (photo 10). Next, take Colour E and make a chain through stitches on both sides, then make 1hdc in the same stitch (photo 11-12). You can use a sc as well, but I liked the extra height the hdc provides. Large and supple are the keywords here! 1hdc in each stitch on both sides all the way around the potholders, slip stitch to first hdc or use the special fastening described in Round 4 of this pattern. Fasten off. (photo 13)

Edging
I’m a big fan of picots. When I say big fan, I mean that I use it on almost all my patterns and blankets. The picot makes for a nice finishing touch which simply looks great on these potholders.
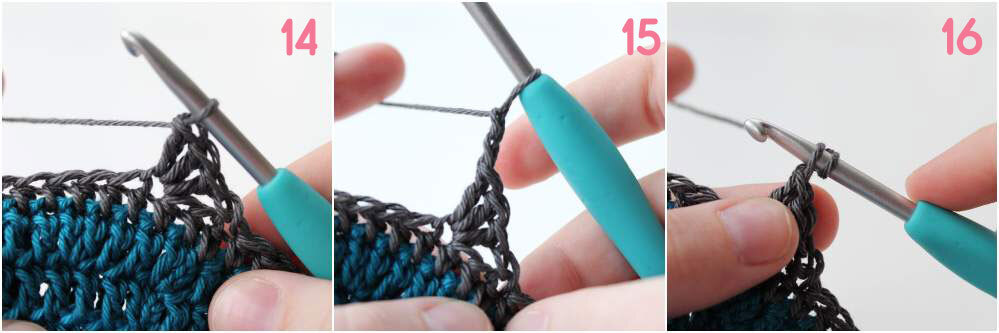
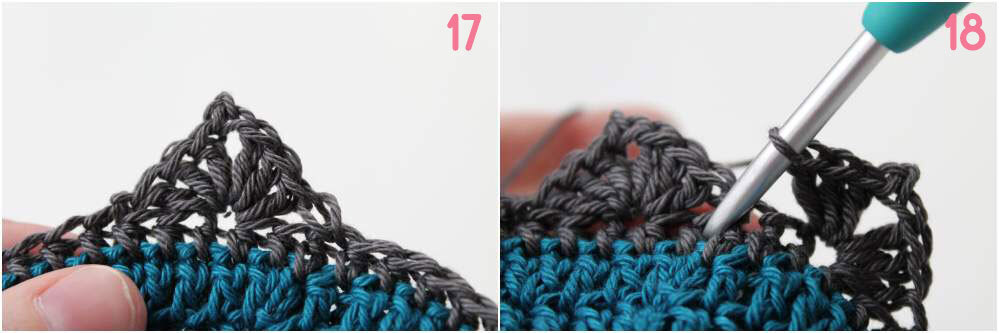
Take Colour E and crochet a ch in any stitch. Skip 2 stitches and crochet 3dc in next stitch (photo 14). Ch2, insert your crochet hook through the first ch. Yarn over, and pull your hook through all loops on the hook (picot made) (photo 15-16). 3dc more in the same stitch, skip 2 stitches and slip stitch in the next stitch. (First cluster of edging made) (photo 17)
Repeat this until you’ve worked the round. You will notice that your last edging cluster cannot be completed without overlapping 1 stitch in the first cluster. That’s the intent as it makes your hanging loop in the next step rather nice and sturdy. Finish your last cluster by slip stitching it to the first skipped stitch of your first cluster. (photo 18)
Next, ch12 and slip stitch this ch to the same stitch as where you started. (photo 19). Turn your work, and work 30hdc’s in the hanging loop. If 30 doesn’t fit, 25 is enough too. (photo 20)
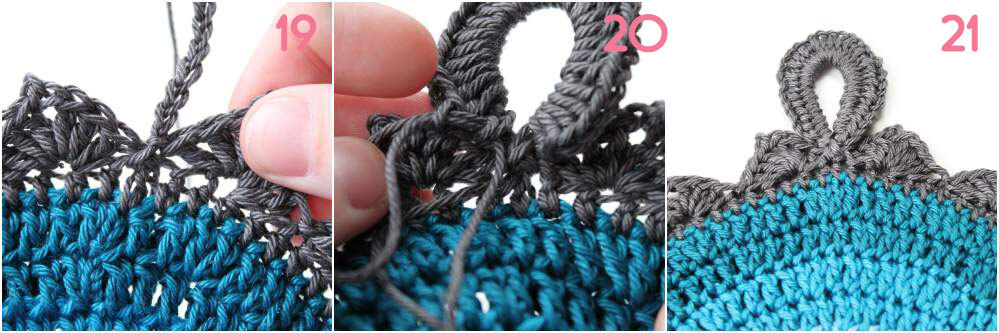
There you go! You only need to darn in the ends now (photo 21). I usually steam-block my potholders to make them nice and flat. Only do this if you’re working with 100% cotton! When in doubt, wet-blocking is always safe.
Congratulations! You have just made a beautiful pair of potholders that will probably outlive you and your grandchildren (yes, they are that durable). If you want to do something extra with your potholders, you could use surface crochet (as described in this pattern) before you join the two bodies together as I did for these two sets.


Comments
I have made this pattern so many times for so many happy receivers!
So firstly: thank you for sharing ♡
But I do have one question... I've experienced that the edging really curls up after I washed my potholders... Could you perhaps give me a tip on an alternative edging that I wouldnt have to block every time I wash it?
Not a problem for me, because I know what it is and hpw to do it.. but most of my receivers dont crochet.. it would be awesome if there could be a way around the blocking.
Otherwise.. this is one of my fav. patterns for a set that makes a cery thankful gift ♡ thank you! September 02, 2020 03:54 - Reply