The background of Granny Squares
What exactly is a Granny Square?
A Granny Square is a basic crochet block. Throughout time, Granny Squares have been made in all shapes and sizes, but the Classic Granny Square is a square motif made from clusters (groups) of three double crochets. You work these clusters in rounds, and each round you add new clusters to grow your motif. The end result is a square motif with groups of stitches.
Where Granny Squares get their name from is not 100% clear. The widespread tale is that in days gone, Grandma's who could no longer help with manual labour and/or household tasks used all sorts of scraps and cloths to create clothing and blankets for their family. Since these motifs lend themselves perfectly to scraps, they were nicknamed Granny Squares as you often found Grandma making them.
If it's a true story, nobody can tell. But it sounds plausible! You can read more about the first mention of Granny Squares in my History of Granny Squares.
What kind of Granny Squares are there?
Granny Squares have grown from a particular type of crochet motif to their own category. Don't let the sheer amount of different types deter you though, as they're all variations on the classical Granny Square.
Besides the classic, you also have Solid Granny Squares, Farmhouse Granny Squares, Ribbed Granny Squares, Overlapping Granny Squares and many more. You've also got Granny Mandalas, hexagons and all sorts of shapes, but we'll stick with Squares for this guide.
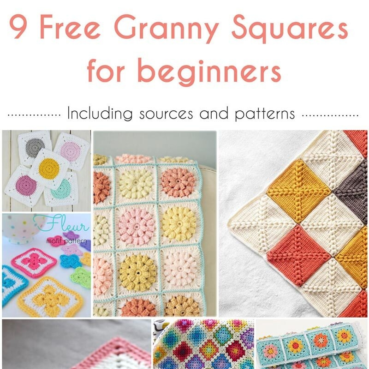
Is a Granny Square easy for beginners?
A Granny Square is perfect for beginners, for multiple reasons:
- The motif is easy. The Classical Granny Square consists of chains, slip stitches and double crochets. All three stitches are basic crochet stitches that a beginner can make.
- The stitch rhythm is repetitive. This helps you get a feel for the pattern and understand how the stitches create the motif. This in turn will help you prepare for more advanced crochet motifs.
- A granny is easy to adjust in size. Because you can grow a square to any size you want, you can make all sorts of variations. One-square Granny blanket? Go ahead. Joined square shopping bag? You decide whether you want two-round squares or 10-round squares. It's completely up to you!
If you're looking for a beginner pattern, have a look at my Granny Square Rainbow Blanket. It combines the Classic Granny Square with a bright colour palette. A great way to get used to this block and creating something beautiful in the process!
The practicalities
Which yarn should I use for a Granny Square?
You're in luck: you can use almost any type of yarn. Granny Squares lend themselves best to solid, plied yarn though. A fuzzy or novelty yarn will cause the pattern to lose its stitch definition, and that is part of what is so attractive in a Granny. Any thread that's cotton, acrylic, wool or otherwise solid will do just fine.
For beginners, I always advise using a non-splitting yarn, such as the 100% cotton Scheepjes Catona. It's a tightly plied yarn that comes in over 100 colours. You can pick any colour, although I wouldn't recommend black because it's hard to see black stitches at night!

How do you crochet a Granny Square?
This question deserves an entire post of its own. That's why I've created an extensive tutorial with a photo tutorial on how to crochet a Granny Square, completely geared towards beginning crocheters. Follow the photo tutorial in this post, or scroll below the tutorial to find a condensed written version of the pattern.
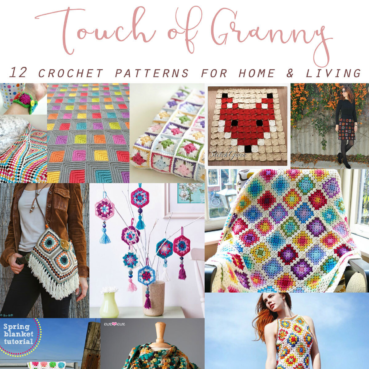
What can you do with Granny Squares?
The question is rather, what can't you do with Granny Squares? The squares lend themselves perfectly to projects such as:
- Blankets (big or small)
- Pillows
- Bags and Pouches
- Potholders
- Wall Hangings
- Scarves
- Placemats
You really can use them for anything. Because it's so easy to resize a block by adding or discarding rounds, you can customize a project completely to your wishes.
How many Granny Squares do you need for your blanket?
This really depends on the type of Granny block you're making and the yarn you're using. More rounds and thicker yarn create larger squares than fewer rounds and thinner yarn. But there's more to it, so I've created a separate page for this. Read here about how many squares you need for a blanket.

How can I join my Granny Squares?
The beauty of Granny Squares is that they're symmetrical on each side. This means that if you put them next to each other, the position where there are clusters and chains is the same on each square. This makes joining easier to understand.
Join-as-you-go
The easiest method is a join-as-you-go joining. This type of joining is made while actually crocheting the last round of your square. This means that instead of making chains in between clusters as you did in previous rounds, you make slip stitches in the chain space of the opposite motif. This immediately joins your Granny to the other motif(s).
It's a neat and easy way to join the squares. I used this method in my Rainbow Granny Square Blanket.
Alternatively, you can also use joins such as:
- Whipstitch join (As used in the Little Lily baby blanket!)
- Single crochet join
- Flat zipper join
There are also more decorative joins that you could reuse in the blanket border if you want to. They are slightly more advanced, but the result is ever so beautiful.
How do I grow my Granny Square?
You can easily make your Granny Square bigger by repeating the round instructions over and over again. The beauty of a Classic Granny Square is that it's a repeatable pattern, adding one cluster to each side every round. By adding an extra cluster, the circumference of your rounds keeps growing, and you can grow your Granny Square indefinitely. The last round of my tutorial explains this.
Refining your Granny Technique
Why does my Granny Square look crooked?
A Granny Square (or any pattern that's worked in the round) can look crooked after a while. The reason for this is simple: Crochet stitches naturally slant to the right side (left, if you're left-handed). If you continue working rounds without turning your work, this slanting will cause your corners to shift after a couple of rounds, and that makes your Granny Square look crooked.
Turning after each round
Luckily, there are ways to solve this. The easiest way is to turn your Granny Square after each round. This method lends itself perfectly to the Classical Granny Squares, which are reversible.
Once you finish the first round, turn your Granny Square over so the backside is facing you. Then work your pattern instructions for the second round. After finishing the second round, turn your work over once more so that the front faces you again. By working rounds this way you offset the slanting that happens when you continuously keep the same side towards you - and your square will be perfectly straight.
This method works best if you create Classical Grannies. If you are crocheting more intricate motifs that have a non-repetitive pattern or, for example, a flower in the centre this turning method won't work. You don't want half of your flower ending up on the backside of your motif!
Blocking your Grannies
Another method is to use blocking to straighten out your motif. Blocking is the process of soaking your motif and letting it dry in shape. This works best for smaller motifs that do not have a large offset. You can read all the details about blocking in my extensive blocking tutorial, which shows you step by step how to block your Granny Squares and other projects.

I hope this post helps you make the most of your motifs. If you have any questions, feel free to pop them in the comments below and I'll answer them to the best of my knowledge!
Reply