Puff stitches
Puff stitches are one of three major ways to create voluminous bobbles in your crochet. The other methods are bobbles and popcorns. Puff stitches are the smallest of the three - they are little, solid-looking puffs of yarn. Perfect for little spots of interest - or to make a subtle yet interesting row of stitches in your sampler!
Puff stitch stitch multiple
The stitch multiple in this blanket is 2 + 1 stitch. If you want to figure out how many chains to start with for a piece of puff stitches, you simply take a multiple of two and add one to it. For example, 108 x 2 stitches = 216. now add the extra one, which makes 217 (like in the Rainbow Sampler 2). You could also make shorter rows, for example, 72 x 2 stitches = 144, + 1 is 145.
Puff stitch tutorial
First Row
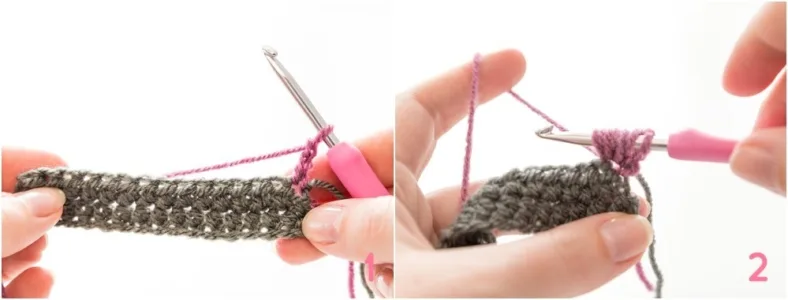
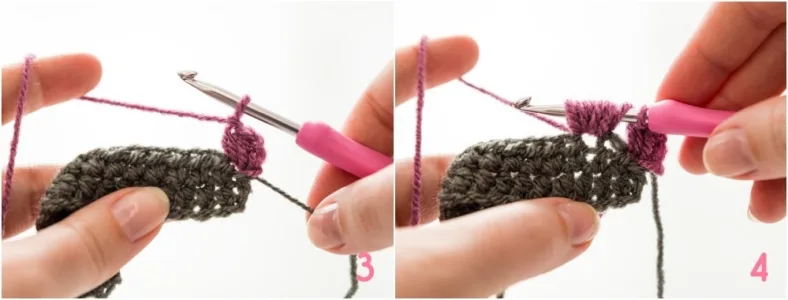
Join your new colour with a ss in the first stitch. Crochet two ch (photo 1). These two ch will help you get the right height for this stitch and are simultaneously part of the begin-puff. Yarn over, insert your hook in the same stitch as the ss, yarn over, pull up a loop. Repeat this twice more in the same stitch to have seven loops on your hook (photo 2). Yarn over again and pull through all loops on the hook. This is your begin-puff stitch. Crochet a ch (photo 3).
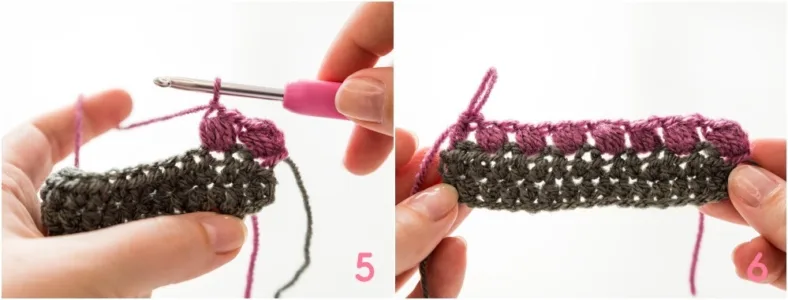
You will now work ‘regular’ puff stitches. Skip one stitch. Yarn over, insert your hook in the next stitch, yarn over and pull up a loop. Repeat this another three times in the same stitch, so you will have nine loops on your hook (photo 4). Yarn over again, and pull through all loops on the hook. This is your regular puff stitch. Again, crochet a ch (photo 5). Can you see how the chains are lying on top of the puff stitches?
Continue like this until the end of the row: work puff stitches with a chain and a skipped stitch in between. Finally, work a dc in the last stitch (photo 6). Turn your blanket.
Second row
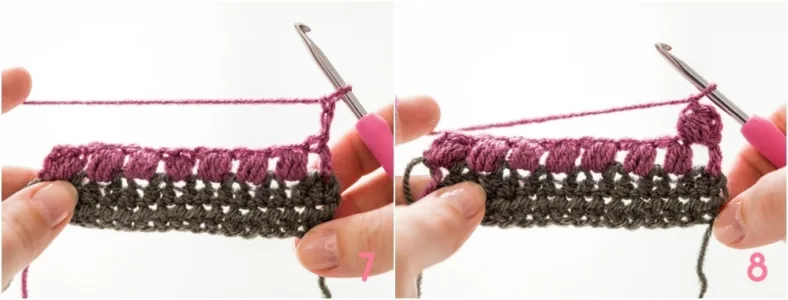
Crochet three ch (counts as first dc) (photo 7). Crochet a regular puff stitch in the first chain space between the dc and the final puff stitch of the previous row (photo 8). By working puff stitches in the chain space, you’ll get a more compact row.
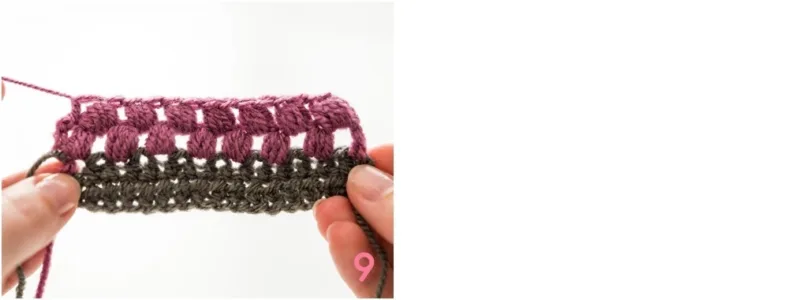
Repeat the pattern of the last row by creating puff stitches with chains in between. Work a dc in the final puff stitch (the begin-puff stitch of your previous row). Remember that you are not working a ch between the last puff stitch and the last dc. Cut yarn (photo 9).
In the Rainbow Sampler blankets, we only work small sections of puff stitches. But if you want to make a larger piece, you could repeat the first and second row indefinitely. It's that easy!


Comments
Be the first to comment to this post!