All things Granny
I'm sure you've heard of the Granny Square - a square motif that's loved by all crocheters.
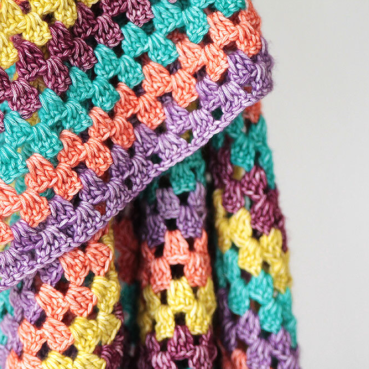
The stitch that's used in the Granny Square, or rather the cluster of stitches that is responsible for the iconic look of the Granny is the Granny Cluster. It's a cluster of three dc's, made in the space between clusters of the previous row. The stitch is rhythmical and easy to remember - that's why it's very popular with beginners!

Difference between Granny Clusters and Granny stripes
Technically speaking, Granny stripes consist of Granny Clusters. However, both terms are used interchangeably, and you can understand from context which part of the Granny (the stitch or the row) we're talking about. It's one of those things that grew like this when crochet took over the internet.
Granny stripe stitch multiple
The stitch multiple for a Granny cluster is 3 + 1. If you want to figure out how many chains to start with, you simply take a multiple of three and add one to it. For example, 72 x 3 stitches = 216. now add the extra one, which makes 217 (like in the Rainbow Sampler 2). You could also make smaller stripes, for example, 48 x 3 stitches = 144, +1 is 145.
Granny Stripe tutorial
First row
Join your first colour with a ss. Crochet three ch that count as a dc here and further on (photo 1). Work a dc in the same stitch as your ss (photo 2).
You’ll now start with the actual Granny Clusters. Skip two stitches on the first row, and make three dc’s in the next stitch (photo 3). Repeat this until the end of the row. Make two dc’s in the last stitch (photo 4). Cut yarn if you need to change colours, and turn your blanket.


Second row
If you’ve changed colours, join the new colour with a ss in the final stitch of the previous row and work three ch (photo 5). Work three dc’s in the space between the last and second-to-last dc cluster (photo 6).
Crochet three dc’s in every space until the end of the row, and a dc in the final stitch of the row (which is the third ch of the first stitch in your previous row) (photo 7). Cut yarn if you need to change colours, and turn your blanket.


Third row and further
The third row looks very much like the first row, only you'll be working in the spaces between clusters instead of in the stitches of your base row.
If you’ve changed colours, join the new colour with a ss in the final stitch of the previous row. Make three ch, and crochet a dc in the first space between clusters. (photos 8-9).
Crochet Granny Clusters consisting of three dc’s in each space to the end. Work one dc in your final stitch (which is the third ch of the first stitch in your previous row) (photo 10). Cut yarn and turn your blanket.


You can repeat the final two rows until you’ve reached your desired length. This is how you crochet Granny Clusters.


Comments