Baby Rainbow Sampler Blanket (part 2)
15.Oct.20 / Kirsten BalleringMaterials and preparation
See part 1 for yarn and hook requirements.
Yarn
Shop the yarn!
You can find Scheepjes Catona via your local Scheepjes retailer or order online in these webshops:
Notes
- Don't forget: Blue colour codes are for the Rainbow version!
Abbreviations (US terms)
- :
Repeat formats
- *….; rep from * once/twice/3x Crochet the instructions after * and then repeat that section a further number of times as indicated.
- (…) once/twice/3x Crochet the instructions between brackets the total number of times indicated.
- […] Indicates the amount of stitches at the end of a row or round.
- (…) in same st/sp Indicates that all instructions between brackets are worked in the same stitch or space.
Colour layout


Techniques
Wave stitch
Click here for the tutorial about the Wave stitch.
Bobble stitch
Click here for the tutorial about the Bobble stitch.
Crochet pattern
Wave section 1 (rows 14-17)
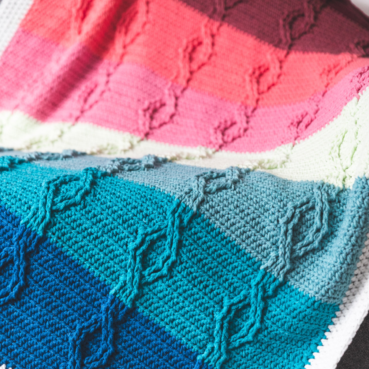
These waves are a great way to shake things up a bit. And although we only crochet two wave rows, I’m sure you can imagine how a whole blanket in this pattern would look like!
While you work your first row of waves, your blanket might look a bit wobbly. That actually makes sense, when you think about it. The stitches in one wave repeat varying in height. The nature of crochet is that the top of the stitches want to align themselves as much as possible. Due to the variety in height, the bottom of your stitches (and thus the rest of the blanket) will try and form a wave. This will be sorted out when you crochet the second row of waves. This row is the exact opposite of the first row in terms of height, and thus the forces that pull on the blanket cancel each other out, resulting in a straight wave.
Row 14 (RS) Join Colour F (D) with a ss in first st, 1sc in same st, *1hdc, 1dc, 2tr, 1dc, 1hdc, 2sc; repeat from * another 17 times, cut yarn, turn. [1 sc, 18 waves consisting of 1 hdc, 1 dc, 2 tr, 1 dc, 1 hdc, 2 sc]
Row 15 (WS) Join Colour G (E) with a ss in first st (which is the last sc of the previous row), ch4 (counts as first treble), 1tr, *1dc, 1hdc, 2sc, 1hdc, 1dc, 2tr; repeat from * another 16 times, 1dc, 1hdc, 2sc, 1hdc, 1dc, 1tr, cut yarn, turn. [2 tr, 17 waves consisting of 1 dc, 1 hdc, 2 sc, 1 hdc, 1 dc, 2 tr and 1 wave consisting of 1 dc, 1 hdc, 2 sc, 1 hdc, 1 dc, 1 tr]
Row 16 (RS) Join Colour A with a ss in first st, ch1, 1hdc in same st, 144hdc, ch1, turn. [145 hdc]
Row 17 (WS) 144hdc, cut yarn, don’t turn. [145 hdc]
Bobble section 1 (rows 18-23)
Bobbles are one of several ways to get a slight ‘bump’ in your blanket. In previous rows, we’ve made Popcorns. Bobbles are a form of popcorns, but you don’t crochet the stitches together with a slip stitch. Instead, you depend on the height of the individual stitches and the tightness of the stitch to pull the excess yarn forward and make a ‘bump’.
Don’t be alarmed if your bobble stitches don’t really pop. Bobbles only tend to pop if they’re crocheted in between other tight stitches such as single crochets, and have nowhere to go but forward or backwards. Because we’ll be skipping stitches, our bobbles will form a small raise on the backside rather than turn into voluminous bobbles. Because we’re working them at the wrong side, the bobbles will pop to the front. If you can’t get them to pop, they’ll take the shape of little flower petals. In any case, it’s a beautiful stitch to try!
Please note: you’re working these stitches on the WS again, so don’t turn after your previous row.
Row 18 (WS) Join Colour H (D) with a ss in first st, begin-bobble, ch1, skip 1 st, *bobble, ch1, skip 1 st; repeat from * another 70 times, 1 bobble, skip 1 st, 1dc in final st, cut yarn, don’t turn. [1 begin-bobble, 71 bobbles, 72 ch-1 spaces, 1 dc]
Your blanket should be able to lay flat while you work on this row. If your blanket starts to wobble a little bit this means that there are too many stitches for your blanket to fit into a straight line. While this can be sorted out to a small degree with blocking, we’re not going to bet on that.
If you think it’s too wobbly, adjust your bobble a bit. Instead of 4 stitches per bobble, you’ll make 3 stitches per bobble, like this: (yarn over, pull up loop, yarn over) in the same stitch 3 times, yarn over, pull through all loops on hook. This goes for all the next bobble rows in this section too.
The reason why we don’t turn this row is that bobbles are visible on one side and not as much on the other. If you would turn to work your next row, you would see the backs of the bobbles and we want them pointing all to the same side.
Row 19 (WS) Join Colour I (D) with a ss in first stitch on the wrong side (your begin-bobble), ch3 (counts as first dc), bobble in ch-space between bobbles of previous row, *ch1, bobble in next ch-space; repeat from * another 70 times, 1dc in final st, cut yarn, don’t turn. [2 dc, 72 bobbles, 71 ch-1 spaces]
Row 20 (WS) Repeat Row 18 (with Colour E), with the exception of the final skipped st. [1 begin-bobble, 71 bobbles, 72 ch-1 spaces, 1 dc]
Row 21 (WS) Repeat Row 19 (with Colour E), turn. [2 dc, 72 bobbles, 71 ch-1 spaces]
You’ll find that the bobble stitch uses a lot of yarn compared to other stitches. And it makes sense when you think about it. For every 2 stitches in the previous row, you make 4 double crochets. So that’s twice as many stitches and twice as much yarn if you disregard the chains in between stitches for convenience. It’s a yarn eater but creates a soft, textured stitch.
Row 22 (RS) Join Colour A with ss in first stitch, ch1, 1hdc in same st, *1hdc in next bobble, 1hdc in next ch; repeat from * another 70 times, 1hdc in next bobble, 1hdc in final dc, ch1, turn. [145 hdc]
I recommend crocheting in the chains between the bobbles, instead of crocheting over it. In my opinion, the end result will be neater. If you find this too cumbersome, then just crochet around it. It will not matter for the stitch count.
Row 23 (WS) 145hdc, cut yarn, turn. [145 hdc]
Stripes section 1 (rows 24-28)
This section consists of hdc rows only, making for great TV-crochet. Let the rhythm of the stitches guide you, and you’ll see that you got this section finished before you know it.
Row 24 (RS) Join Colour J (F) with a ss in first st, ch1, 1hdc in same st, 144hdc, cut yarn, turn. [145 hdc]
Row 25 (WS) Join Colour K (G) with a ss in first st, ch1, 1hdc in same st, 144hdc, ch1, turn. [145 hdc]
Row 26 (RS) 145hdc, cut yarn, turn. [145 hdc]
Row 27 (WS) Join Colour L (F) with a ss in first st, 1hdc in same st, 144hdc, cut yarn, turn. [145 hdc]
Row 28 (RS) Join Colour A with a ss in first st, ch1, 1hdc in same st, 144hdc, cut yarn, turn. [145 hdc]
Continue to part 3 of the pattern.
Diagram
Diagram part 2

Key part 2


Comments
Be the first to comment to this post!