

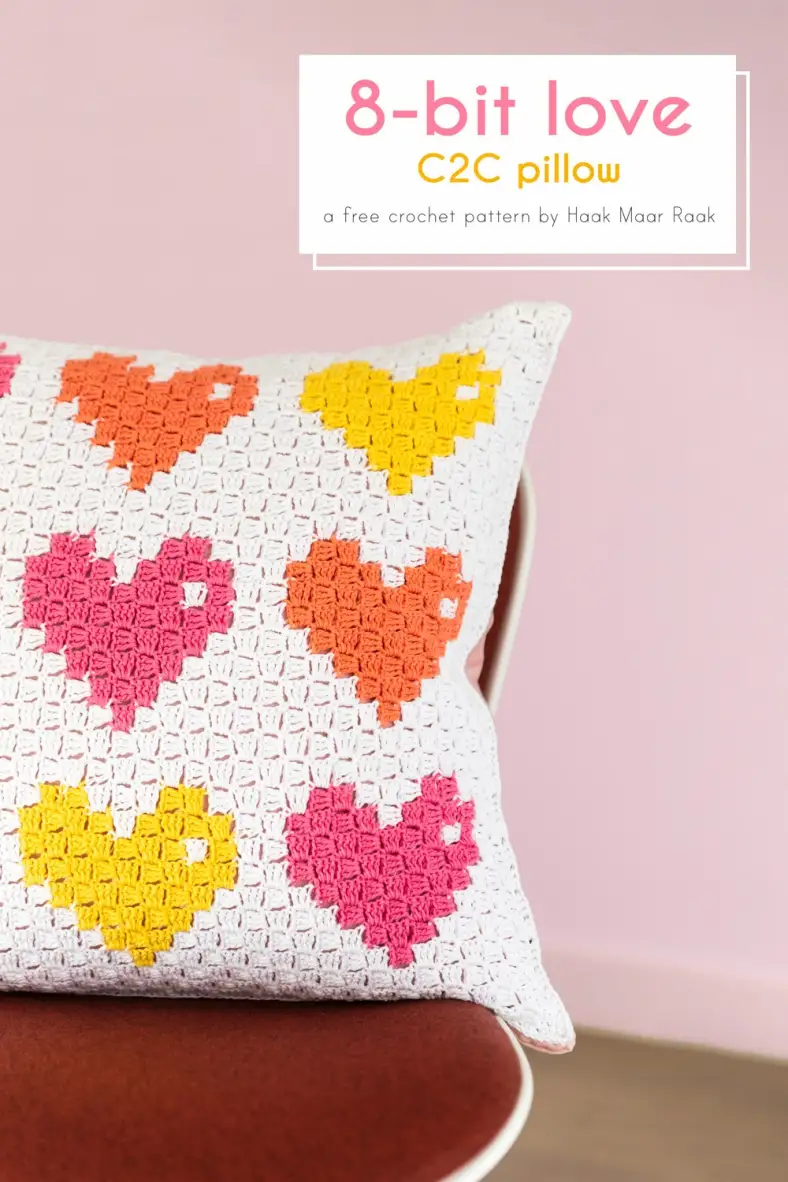
Learn a new technique with this beginner corner-to-corner crochet pattern! The 8-Bit Love pattern is perfect when you're new to C2C crochet, and delivers a plump and quirky cushion cover.
Materials and preparation
Yarn
| Label | Colour name | Code | Amount |
|---|---|---|---|
| Colour A | Oxygen | 219 | 2 balls |
| Colour B | Apple Blossom | 207 | 1 ball |
| Colour C | Gentle Primrose | 211 | 1 ball |
| Colour D | Desert Bloom | 209 | 1 ball |
Other materials
- 1x 50 x 50 cm (20 x 20 in) pillowcase, I used ‘SANELA’ from IKEA
- Head pins
- Needle and sewing thread
- 50 x 50cm (20x20 in) pillow insert
Shop the yarn!
You can find Scheepjes Organicon via Scheepjes retailers, such as:
Crochet hook
3.0mm
Measurements
Fits on a 50 x 50 cm (20 x 20 in) pillowcase.
Gauge/tension
9 by 9 blocks measure 12 x 12cm (4¾ x 4¾ in)
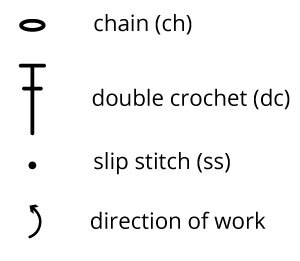
Abbreviations (US terms)
- ch
- chain
- dc
- double crochet
- hdc
- half double crochet
- RS
- right side
- ss
- slip stitch
- WS
- wrong side
Repeat formats
- *….; rep from * once/twice/3x — Crochet the instructions after * and then repeat that section a further number of times as indicated.
- *…; rep to end — Crochet the instructions after * and then repeat that section to the end of the row or round.
- […] — Indicates the amount of stitches at the end of a row or round.
- (…) in same st/sp — Indicates that all instructions between brackets are worked in the same stitch or space.
Notes
- Colour change is done in the last st before the colour change as follows: work the final stitch (which is the third dc) until the last yarn over, take hook from loop, pick up a strand of the new colour, yarn over and pull through loop.
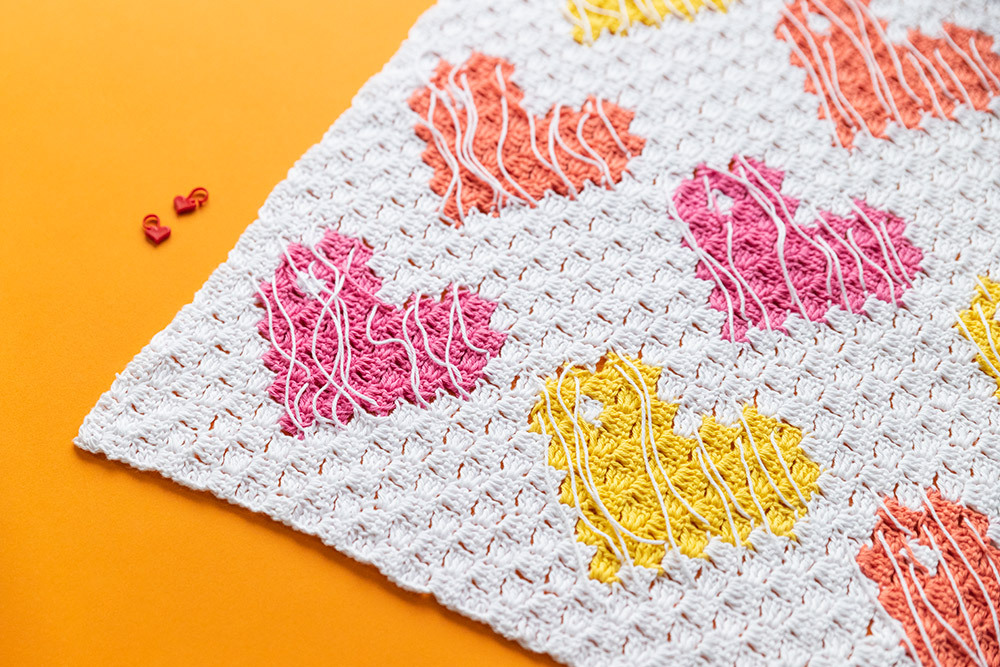
- Because we’ll be making a pillowcase, I decided to leave the unworked yarn colour hanging on the WS.
- You’ll first make the C2C front. Once finished, you’ll work an edge of hdc around the front. Finally, you’ll sew the front to the pillow to the pillowcase.
Techniques
C2C tutorial
You will find all the techniques for C2C crochet in this tutorial. The page contains photo tutorials and written instructions of:
- Getting started with C2C blocks
- Changing colours on the go
- Decreasing the number of C2C blocks when you've hit your top corner
Crochet pattern
C2C (increasing)
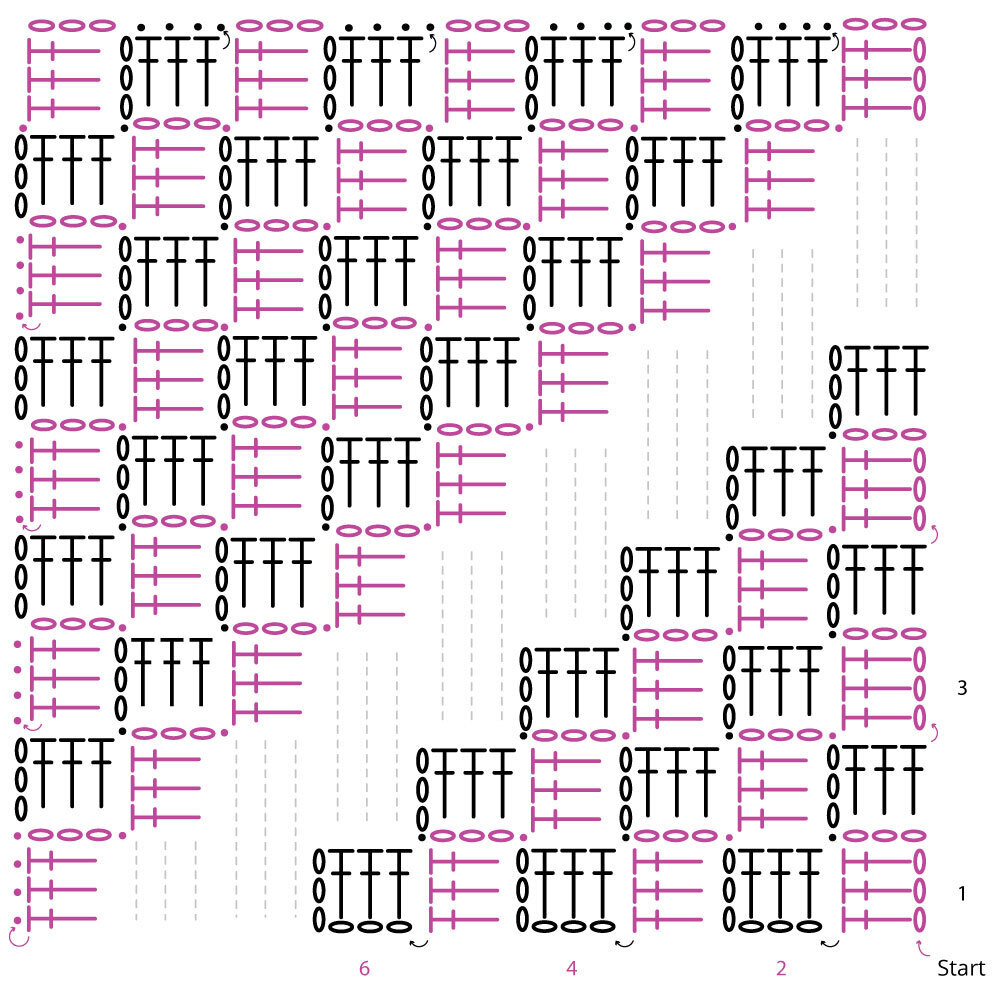
C2C is worked diagonally. That's why the first half of the pillow consists of increasing, and the second half consists of decreasing.
With Colour A, ch6.
Reading the diagram
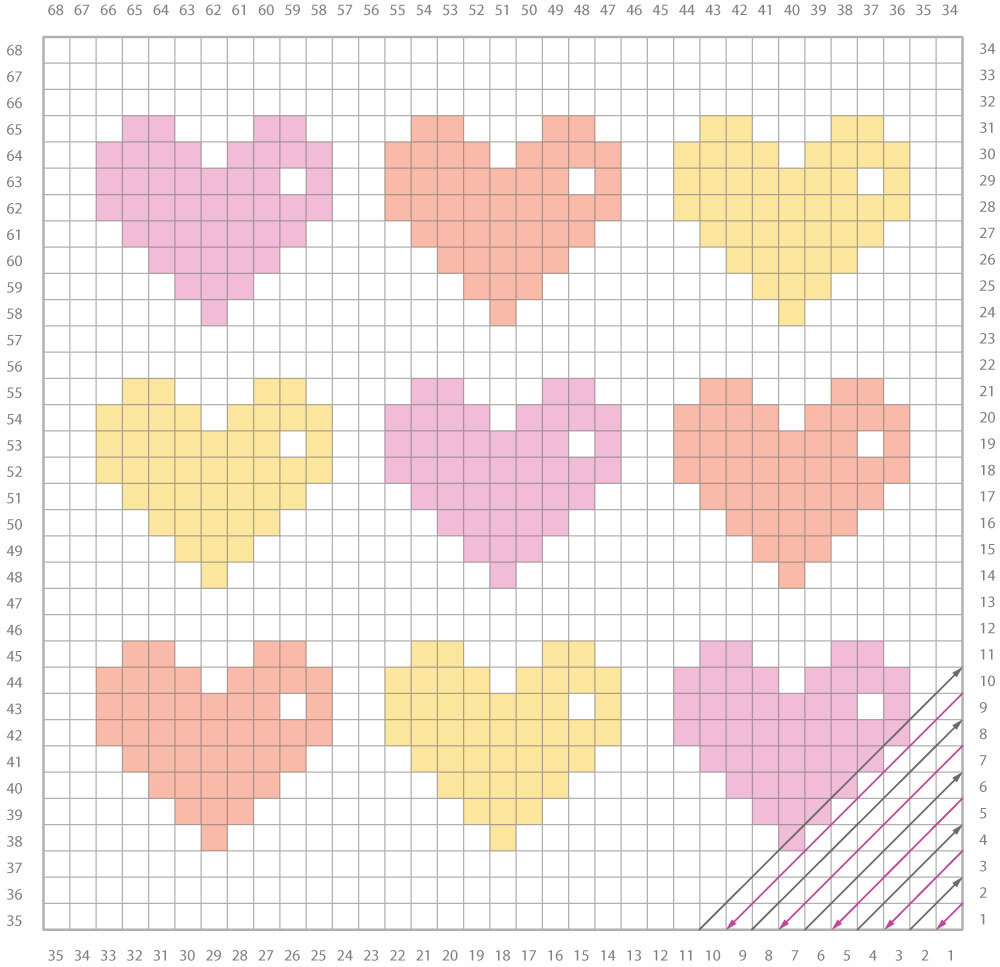
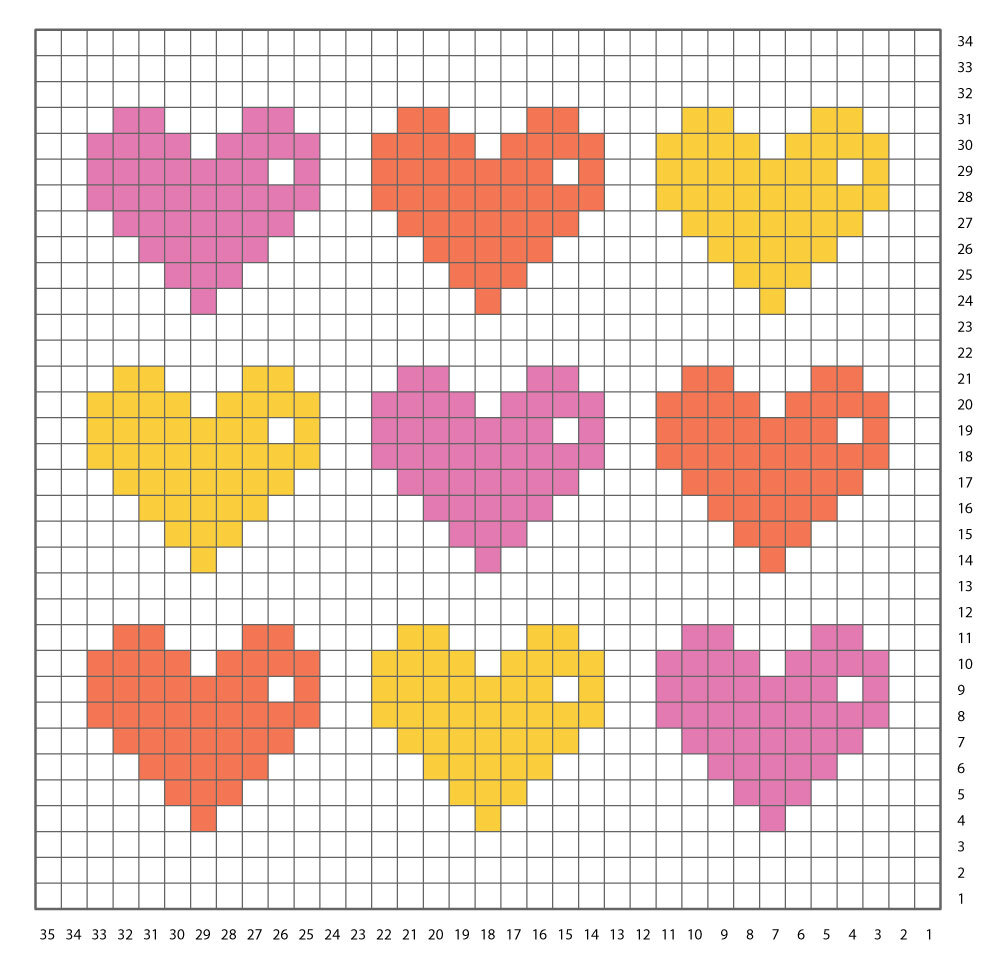
The repeated section in the row above is key to increasing the number of blocks in each row. Each row you add another repeat, causing the pillow to grow along both sides. You follow the pattern set in the C2C diagram (at the bottom of the pattern). Each row is worked diagonally over the previous blocks. Count the blocks to see how many you need to make in each colour per row. I find it best to simply strike through the rows that I've made with a pencil to keep track of my progress. Like this:
Changing colours
Take a strand of the colour you need to change to. Right before the last yarn over of the third dc of a block, yarn over in the new colour and pull through. You’ve finished the dc in the old colour, and have a loop of the new colour on your hook. Ss in the ch-3 sp of the next block to secure your new colour. Changing back to the original colour is done in the same way, by simply picking up the strand of the original colour right before you finish the third dc of a block.
Since you’re sewing the pillowcase to a pillow later, you can leave the strands of yarn on one side of your work. Make sure it’s the same side every time.
C2C (decreasing)
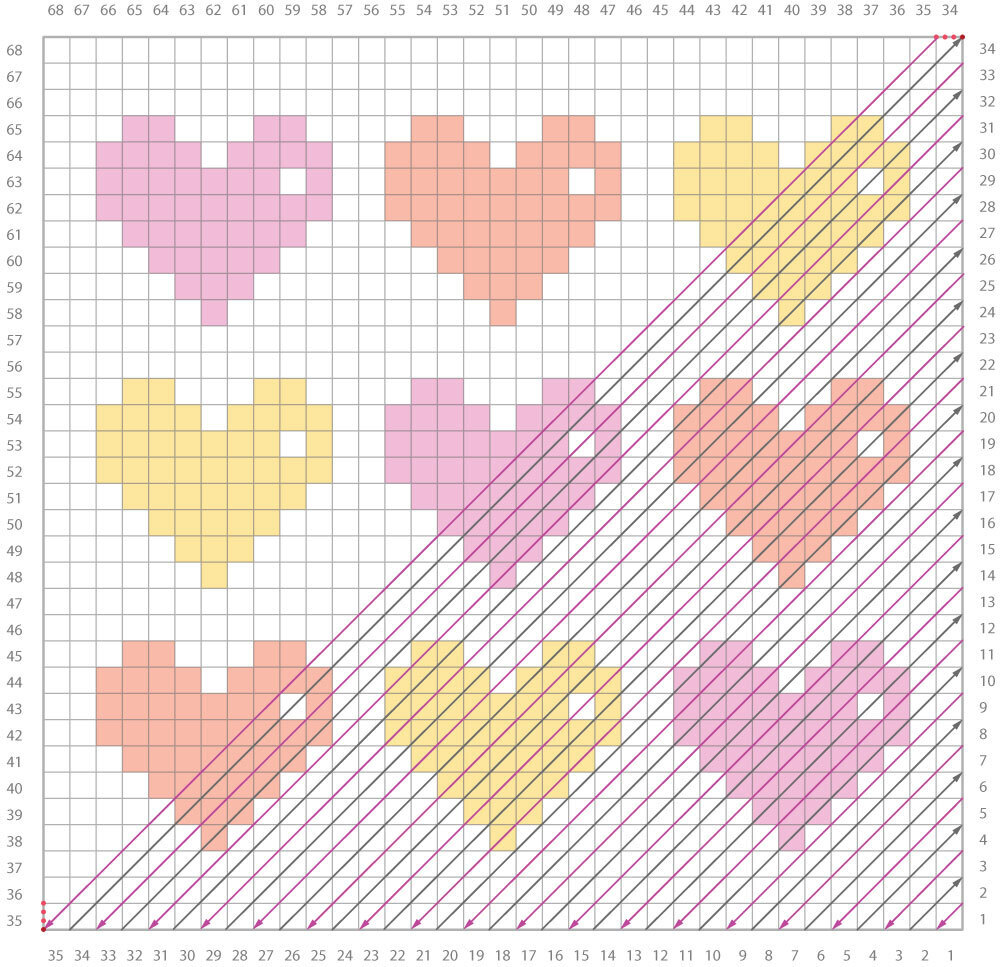
This pillow is not completely square because of the equal white space above and below the heart motifs. The design consists of 34 blocks in height, and 35 in length (this will not be noticeable once it's sewed on). This does mean that the top-right and bottom-left corners are not made on the same row. Rather, you start decreasing in Row 34 to create the top-right corner, and in Row 35 to create the bottom-left corner (see diagram below). Decreasing is done in the first and final block of each row.
Edge
Assembly
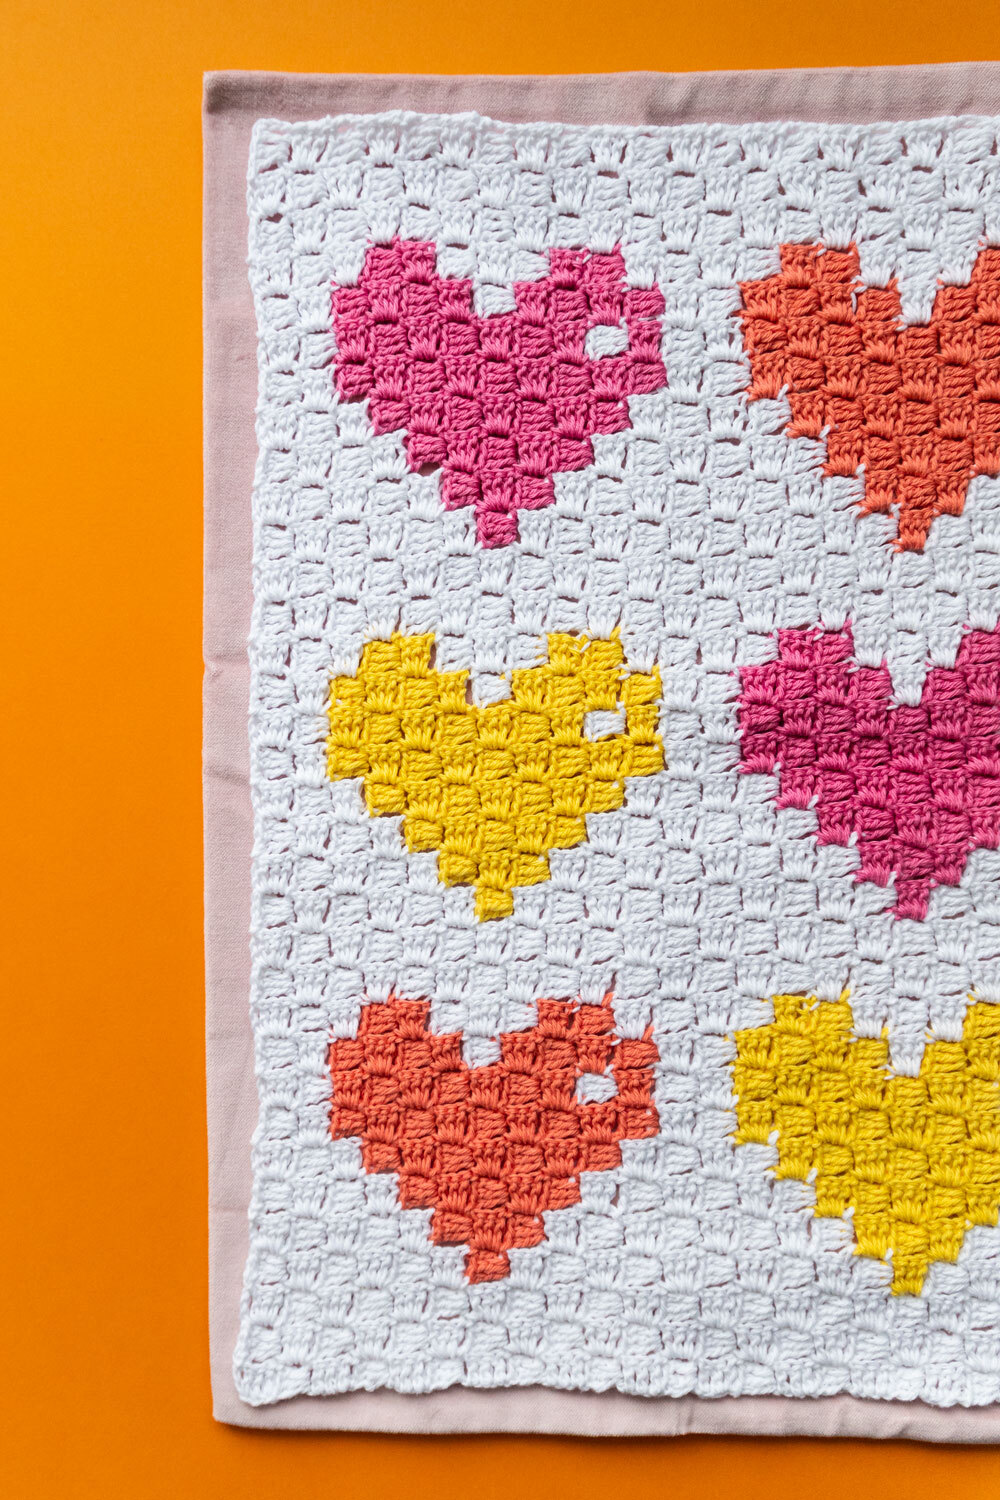
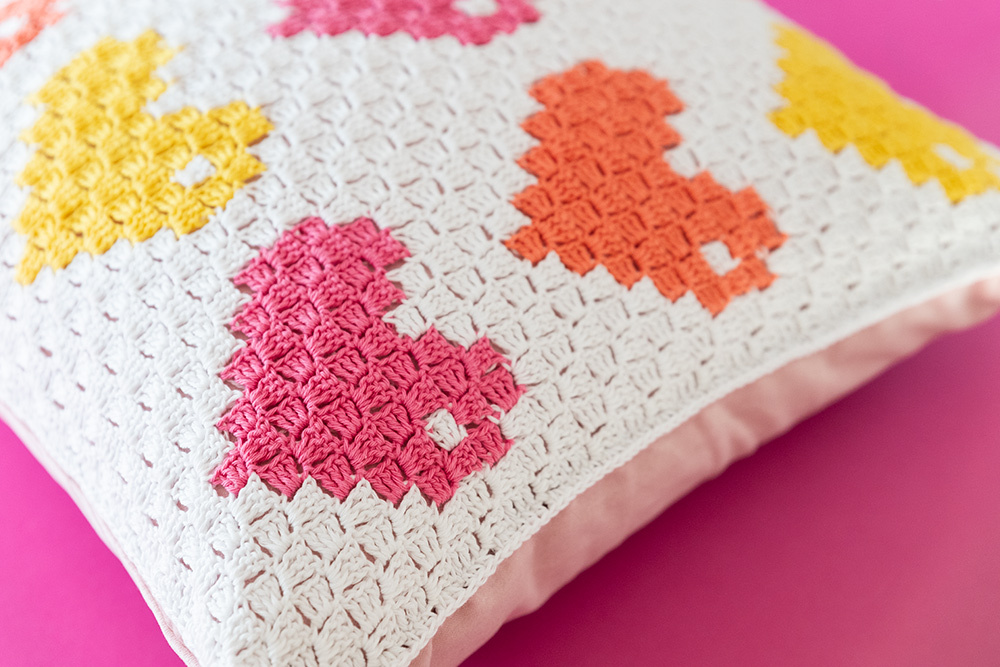
After finishing the edge, block your pillow front to 48-49 cm on each side. It should be slightly smaller than the pillowcase (so-called ‘negative ease’). Lay your pillowcase flat and place the front on top, RS facing towards you. Pin the pillow in place in the corners, and halfway through each side. Use a sharp needle and white sewing thread to sew the back loop of each stitch to the pillowcase with small backstitches. Because you’re sewing in the back loop, the front loop will slightly fall over the edge, hiding your stitches from sight. It will make for a neat finish. Fasten off and put the pillow insert inside the case.
Diagrams
You might also like

Comments
Annelie Fouche
December 28, 2020 11:31
Reem
January 27, 2021 13:35
ann
February 20, 2021 15:42
Andrea Meyers
March 11, 2024 16:01
Kirsten
March 14, 2024 15:51