

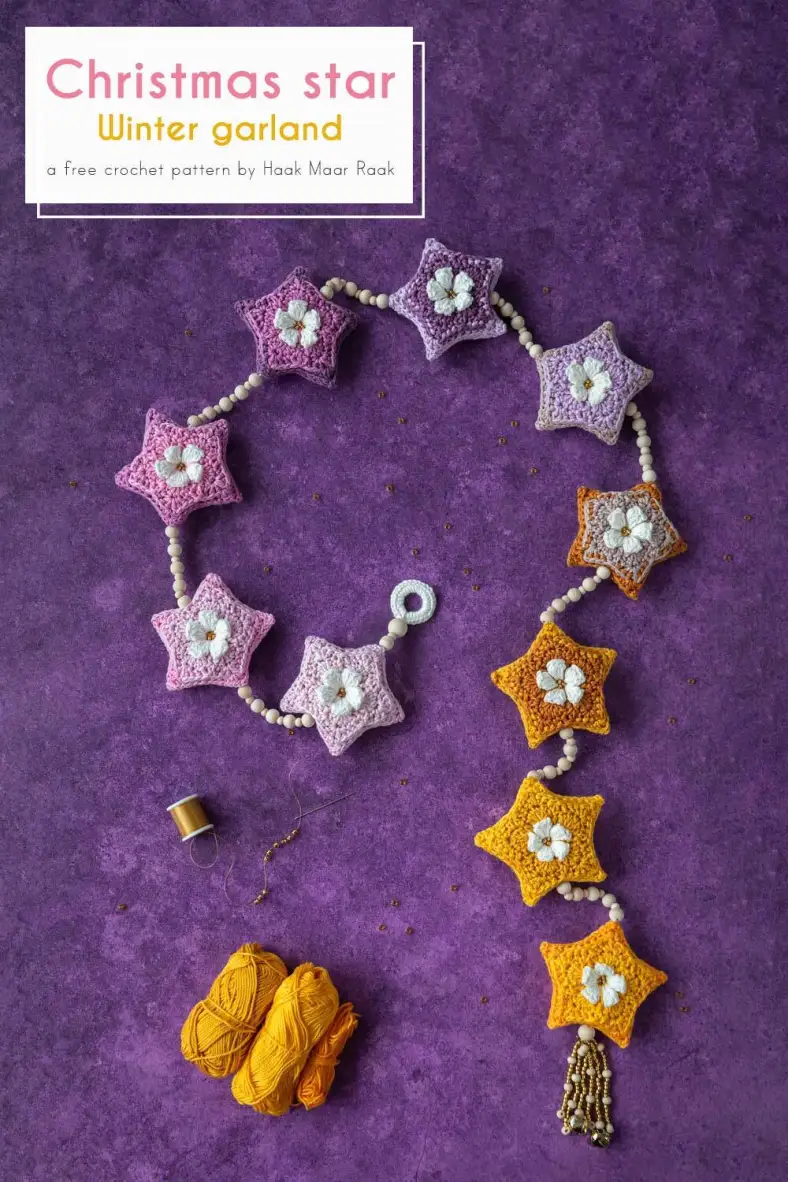
Celebrate the Christmas season with a beautiful garland. The cheerful gradient, wooden beads and golden tassel add a festive touch to your home. Let’s craft some holiday magic!
Materials and preparation
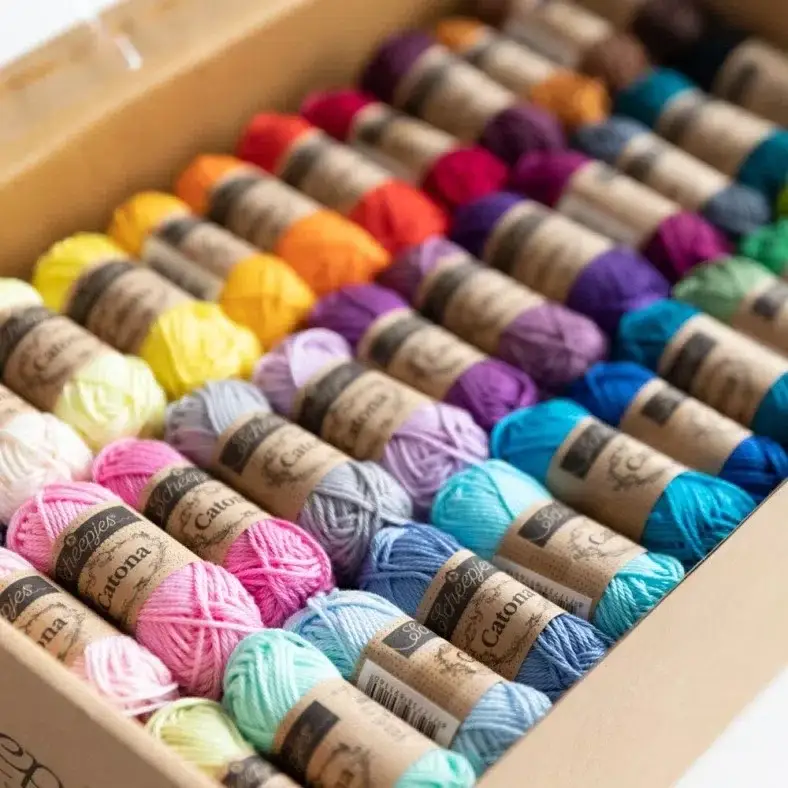
Yarn
| Label | Colour name | Code | Amount |
|---|---|---|---|
| Colour A | Snow White | 106 | 1 ball |
| Colour B | Powder Pink | 238 | 1 ball |
| Colour C | Icy Pink | 246 | 1 ball |
| Colour D | Tulip | 222 | 1 ball |
| Colour E | Colonial Rose | 398 | 1 ball |
| Colour F | Amethyst | 240 | 1 ball |
| Colour G | Light Orchid | 226 | 1 ball |
| Colour H | Antique Mauve | 257 | 1 ball |
| Colour I | Ginger Gold | 383 | 1 ball |
| Colour J | Saffron | 249 | 1 ball |
| Colour K | Yellow Gold | 208 | 1 ball |
| Colour L | Sweet Orange | 411 | 1 ball |
Other
- Golden seed beads (I used ~135 Toho Silver-lined Med Topaz, a 10g package of beads)
- Wooden beads in different sizes. I used 50 each of a small and medium-sized bead, and 2 large beads
- Beading or jewelry thread, or fishing wire that fits seed beads
- 25mm ring for hanging
- Small amount of toy stuffing for stars
- Optional: 2 golden bells for tassel
Shop the yarn!
You can get Scheepjes Catona at most Scheepjes retailers, such as:
Crochet hook
3.5 mm (US size E/4).
Measurements
Star measures 10 cm/4 in from point to point. The complete garland measures 145 cm/57 in.
Gauge/tension
Not critical.
Abbreviations (US terms)
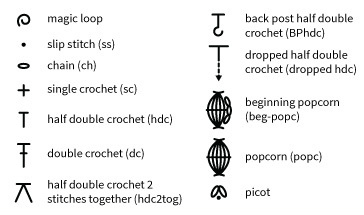
- Beg-popc
- begin-popcorn: ch3, crochet 5dc in same stitch, remove hook from loop, put hook from front to back through 3rd ch and pick up loop again, pull through loop on hook
- BPhdc
- Back post hdc: yarn over, insert hook from back to front and back to back around the stem of the stitch, yarn over, pull through all loops.
- ch
- chain
- dc
- double crochet
- dropped hdc
- a regular hdc, but made in a round below the previous round
- hdc
- half double crochet
- hdc2tog
- half double crochet 2 stitches together
- picot
- ch2, insert hook through first of two ch, yarn over, pull through all loops on hook
- popc
- popcorn: crochet 6dc in same stitch, remove hook from loop, put hook from front to back through first dc and pick up loop again, pull through loop on hook
- RS
- right side
- ss
- slip stitch
- sc
- single crochet
- st(s)
- stitch(es)
- WS
- wrong side
Repeat formats
- *….; rep from * once/twice/3x — Crochet the instructions after * and then repeat that section a further number of times as indicated.
- *…; rep to end — Crochet the instructions after * and then repeat that section to the end of the row or round.
- (…) once/twice/3x — Crochet the instructions between brackets the total number of times indicated.
- […] — Indicates the amount of stitches at the end of a row or round.
- (…) in same st/sp — Indicates that all instructions between brackets are worked in the same stitch or space.
Colour layout
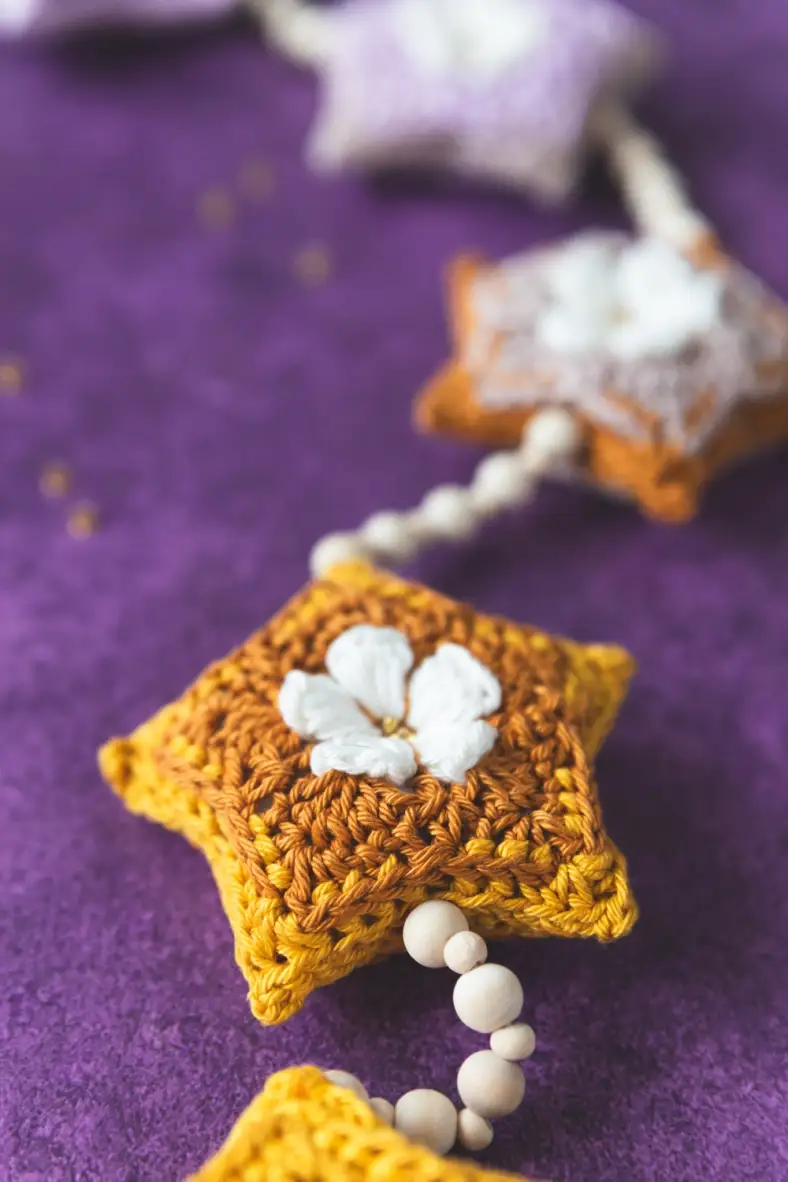
The stars in this garland follow a sequence. Each star has three colours: a centre of Colour A (white) and two other colours. The second and third colours are B and C for the first star, C and D for the second star, D and E for the third star and so on.
If you want to adjust your garland in height, you can either duplicate all stars (make two of each colour combination), mirror the gradient (so make the 11th star again as the 9th star, the 12th star as the 8th and so on), or add a few colours of your choosing after Colour L. You can then continue the gradient in the same way.

Techniques
Video tutorial
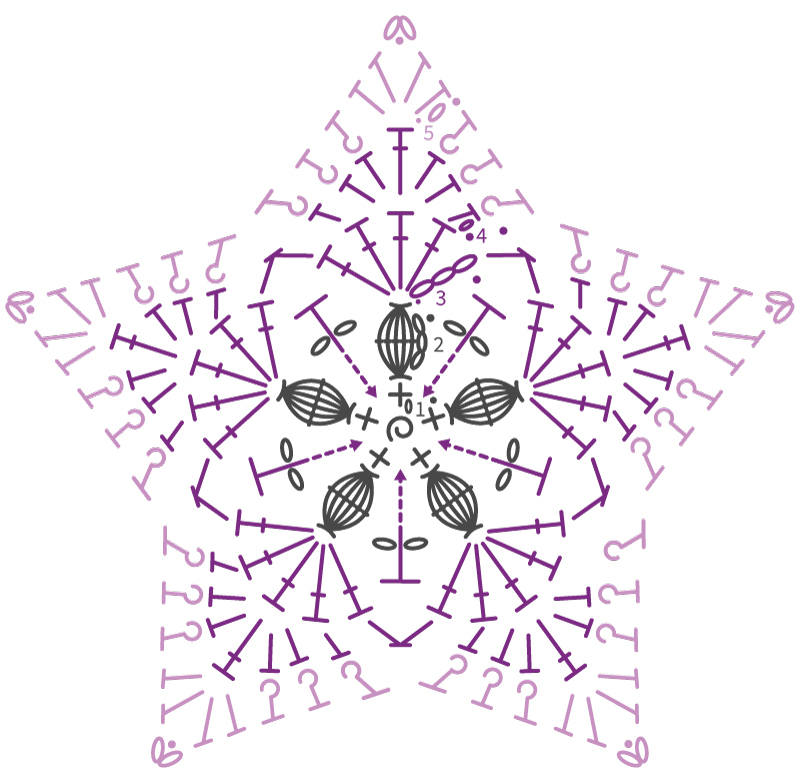
The star consists of a popcorn centre. Over the popcorns, you'll crochet dropped stitches. In the rounds thereafter you'll define the star shape a bit more, and crochet back post stitches.
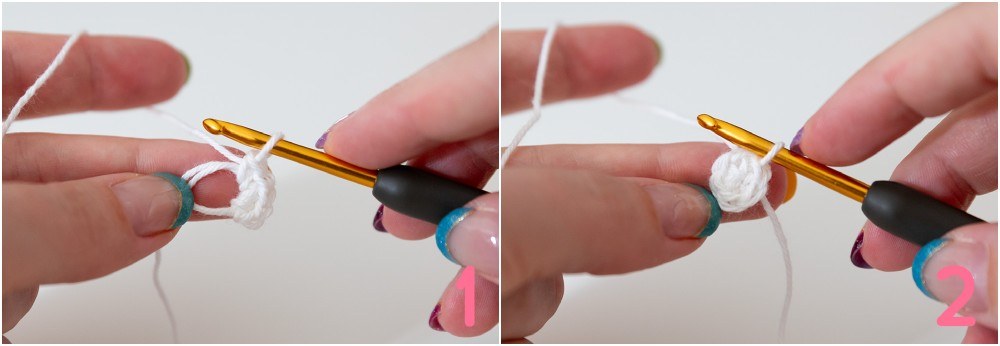
Start with a magic loop. Crochet 5sc in the loop, and pull it tight. Then join with a slip stitch to the first sc (photos 1-2).
Popcorns (Round 2)
The first popcorn is slightly different from the others. Start with 3 chains, and then crochet 5 more dc in the same stitch. This makes 6 dc (photo 3). Remove your hook from the loop, and insert it through the top of the 3rd chain. Pick the loop back up (photo 4), and pull it through to close the popcorn (photo 5).
Next, chain 2 and make a regular popcorn by crocheting 6 dc in the next stitch, and repeating the closing as mentioned above. Make five popcorns separated by two chains each. After your final ch2, close with a ss in the top of the first popcorn, and cut your yarn (photo 6).
Dropped half double crochet (Round 3)
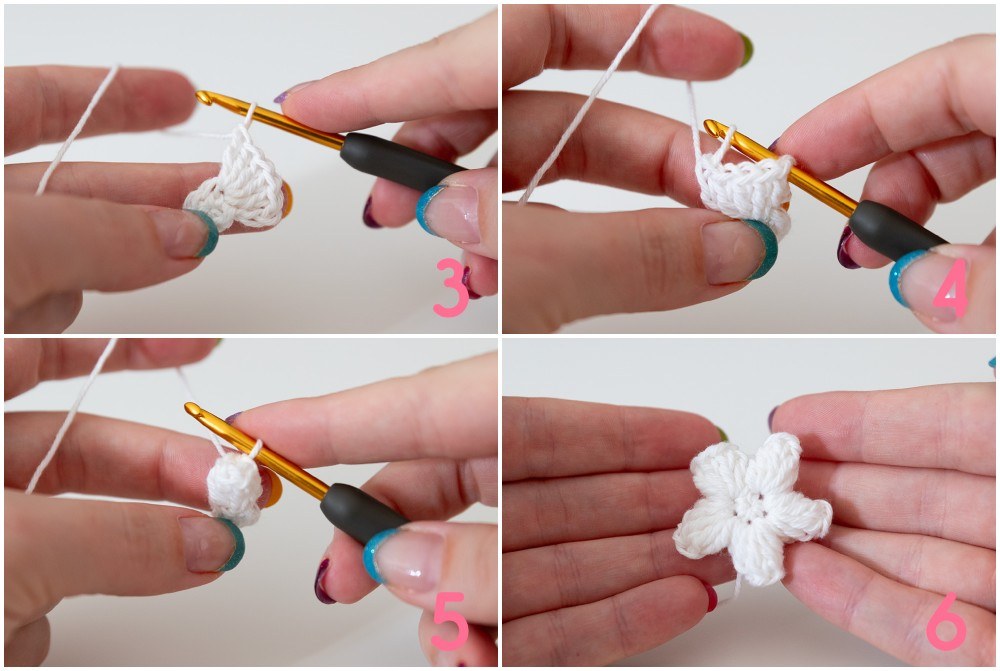
Join your new colour with a ss at the top of any popcorn. Crochet 3 chains that count as a first dc, then make 4 more dc in the same space, for 5 dc total (photos 7-8).
You're now going to make your dropped half double crochet. It's different from a regular hdc because you don't insert into the top of the stitch from the previous round, but into a round below. So yarn over, and insert your hook in the sc at the base of the popcorn you're working in (photo 9). Yarn over, pull up a loop to the height of your current round and pull through all loops to finish your dropped hdc (photo 10). Make sure to pull it up to the height of your current round so it doesn't look 'cramped'.
Make 5dc in the top of the next popcorn, and then make another dropped hdc in the sc of the next popcorn. Continue like this around and join with a ss (photo 11). Don't cut your yarn.
Defining star shape (Round 4)
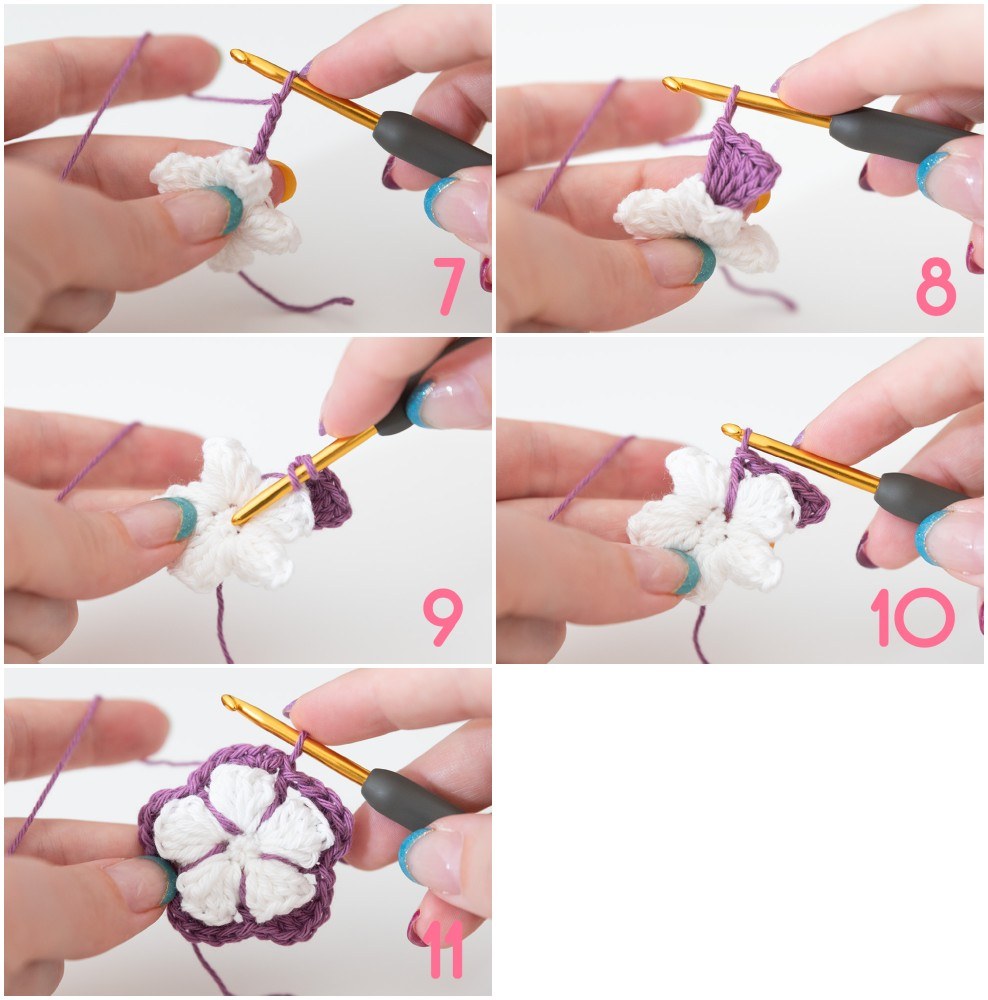
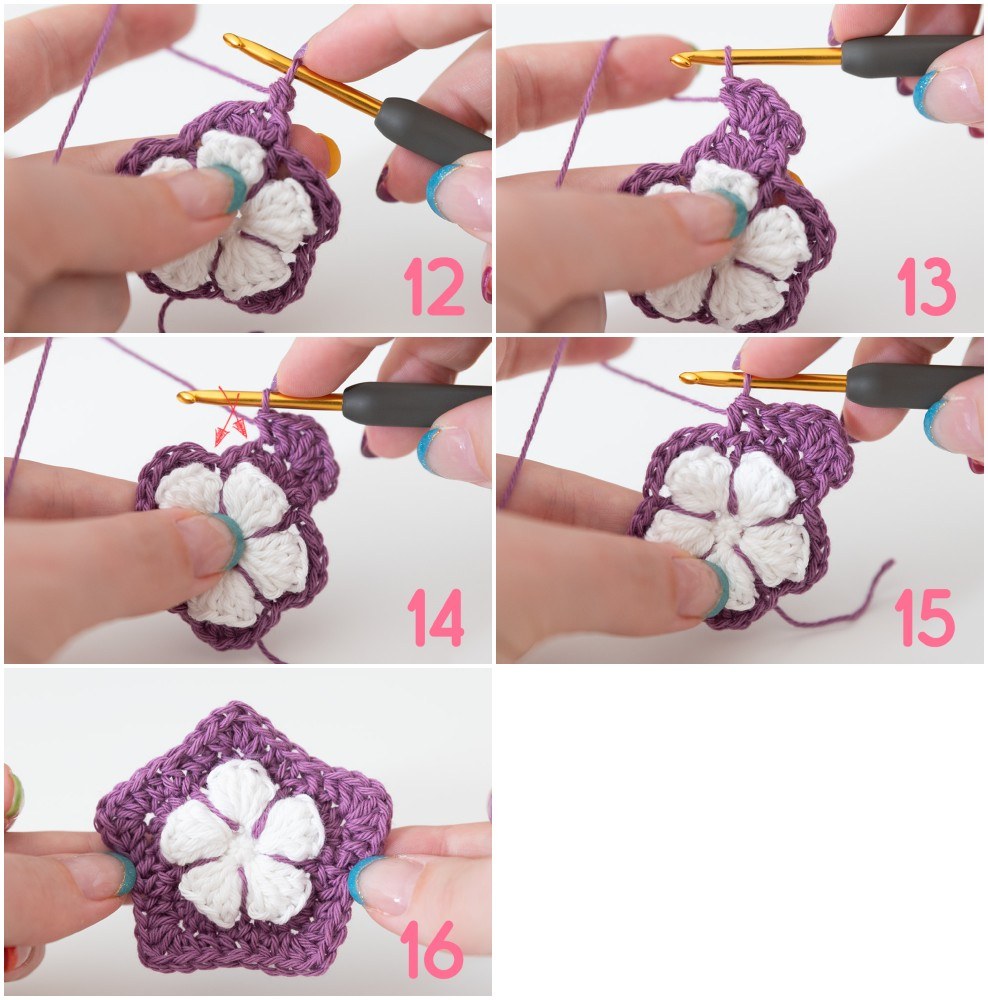
Make 1 loose ss in your next stitch, and then ch1 (photo 12). Make 1 hdc in the same stitch, and then make (2hdc, 1dc, 2hdc) in the next dc to form a point (photo 13). Make 1hdc in the next stitch.
We're now going to create a dimple by making a hdc2tog and skipping the dropped stitch. So make 1 leg of the hdc2tog in the next stitch, then skip the dropped stitch, and make another leg in the next stitch (photos 14-15, red arrows indicate the stitches you work the hdc2tog in). Make 1 hdc in the next stitch, and then continue with the next point. When you work all the way around, close with a slip stitch (photo 16). Cut your yarn.
Back Post hdc (Round 5)
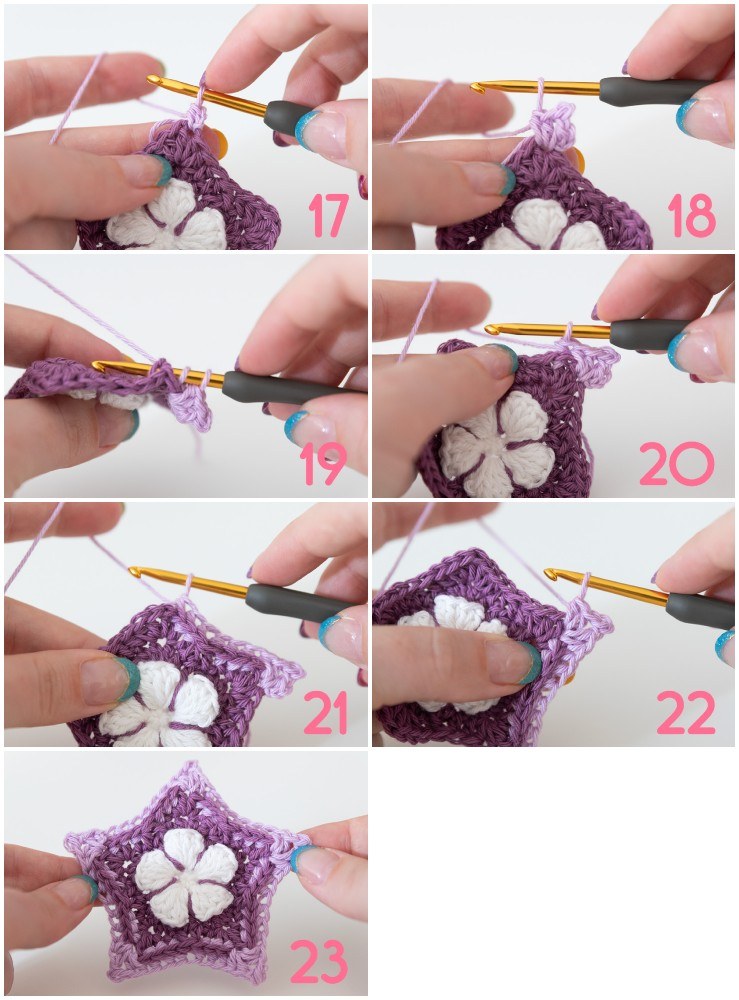
Join your next colour with a ss in a dc in a point. Ch1 (photo 17), and in the same stitch, make 2hdc, 1 picot, and 2hdc (photo 18). To make a picot, make 2 chains, then insert your hook into the first chain. Yarn over and pull through all loops on the hook, effectively slip-stitching the chains together. This creates a pointy stitch.
Continue by making a BPhdc in the next 3 stitches. Make a BPhdc by yarning over, inserting your hook from the back to the front and back to the back around the stem of the stitch, yarning over again, pulling up a loop to the back of the work and pulling through all loops on hook to finish your hdc (photos 19-20). Skip the hdc2tog, and make 3 BPhdcs on the other side of the dimple (photo 21). In the point, make (2hdc, picot, 2hdc) again (photo 22). Continue like this all the way around, and close with a ss in the first st. Cut your yarn and weave in your ends. Your star will now look like photo 23!
Crochet pattern
Star
Make two stars of each colour combination.
Start with a magic loop.
For the next round, I prefer to make a standing dc to join the new colour. If you know how to make one, replace the ss-join and ch3 with a standing stitch. If not, follow the instructions below.
In the next round, we’ll skip the dropped stitch when making an hdc2tog. You’re working the hdc2tog in stitches on both sides.
You could use a standing hdc to join the colour in the next round. In that case, replace the chain and first hdc in Round 5.
Joining the stars
Sewing motifs together
Take any two motifs that belong together, and cut a piece ~120 cm (47 in) long in the colour of the final round. Weave one end a couple of stitches back and forth through the WS of one motif to secure it. Next, put the two motifs WS together and sew them together through the opposing inner loops of opposite stitches.
Once you’ve fastened 4 of the star’s points, add a bit of filling and fill the star. Ensure it’s puffy, but avoid overfilling. When you close the final point, add a bit more filling to fill it in. Weave in the end of your thread to close.
Sew on beads
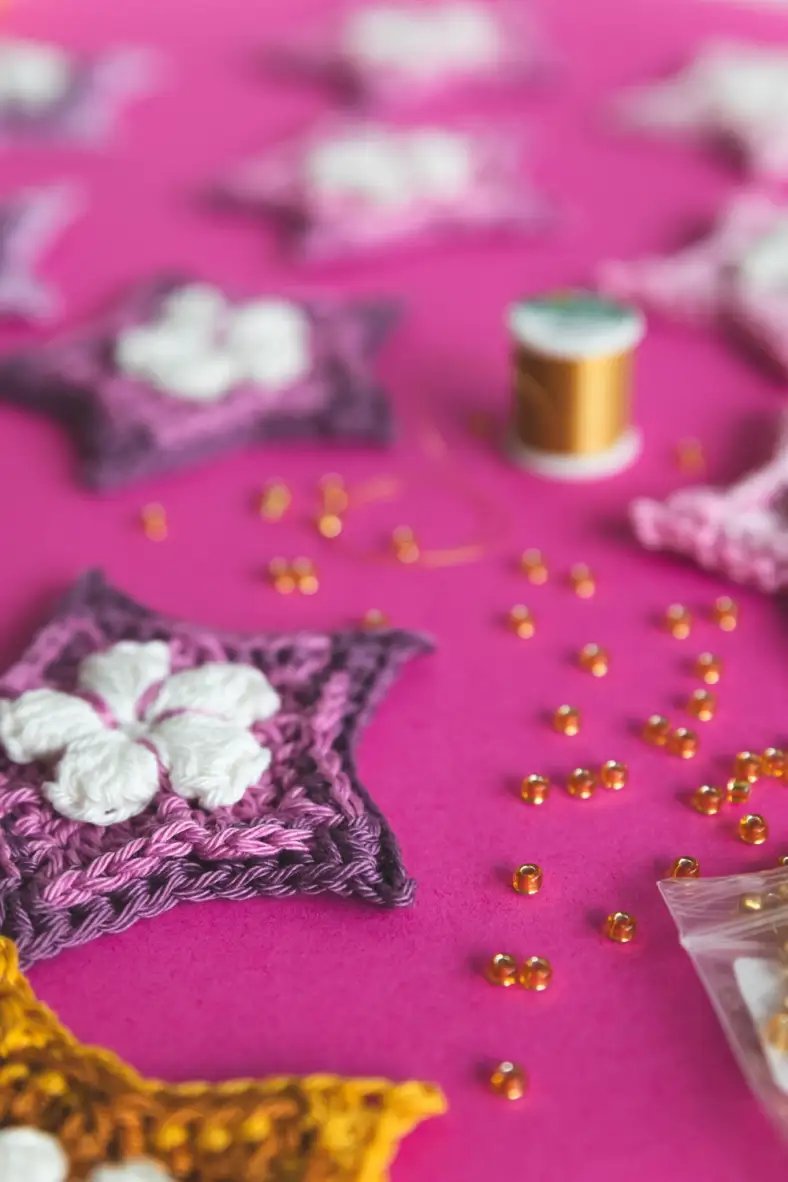
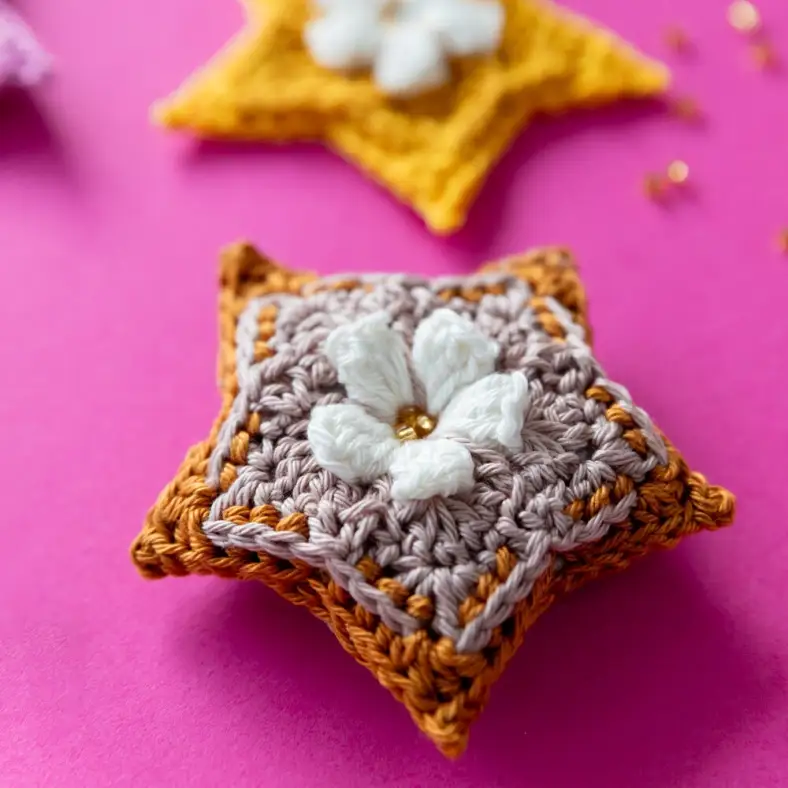
With your jewellery thread, sew on three of the seed beads on each side in the centre. Pull the thread tight so the centre of the star forms a little dimple for the seed beads to nest in. Knot the thread and weave in the ends.
Assembly
Ring
Take Colour A and your hanging ring. Insert your hook through the ring, pick up a loop of Colour A, pull the loop back through the ring, pick up another loop, and pull it through the first loop to fasten the yarn around the ring (basically slip-stitching it in place). Crochet 30sc around the ring, and ss to the first sc. I crocheted over the loose end so I wouldn’t have to weave it in later. Leave a tail of ~150 cm (59 in) (or the desired length of your garland, plus a bit to spare) and cut the yarn. Pull the loose yarn end through the ss to secure your ring stitches.
Beading and stars
Thread the yarn end onto a needle. Thread a large bead, a small one and a medium one in this order. Take your first star and insert your needle from the point (that will be the top of your star) to the dimple between two points on the other end. Pull the yarn through, making sure the star’s top point stays pointy and isn't pressed against the beads. It should resist the thread and not sag immediately.
Next, pick up 5 medium beads and 4 small beads in an alternating fashion (starting and ending with a medium bead), and string the next star. If necessary, knot the yarn below each section of beads. You can use the beads to ‘push up’ against the star’s centre dimple for a more pronounced star shape.
Repeat this for all the motifs and weave the yarn back through the last beads. Secure and fasten off.
Tassel
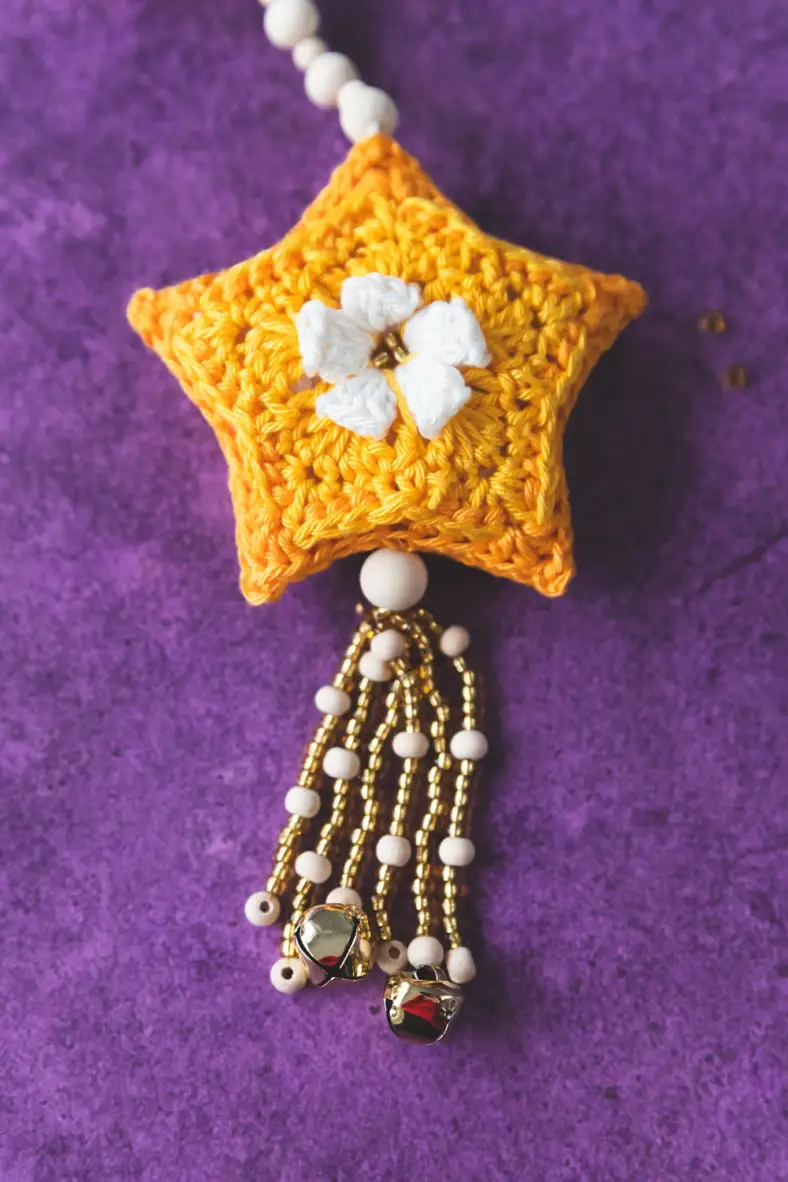
I created a small tassel from three ~10 cm (4 in) lengths of jewellery thread, my remaining golden seed beads, and some small wooden beads. Attach two golden bells to one string. Using a 20 cm (8 in) length of jewellery thread, tie the seed bead strings halfway to create six strands. Thread a large bead onto the top of the tassel to hide any knots, and use the thread to attach the tassel to the bottom of your last star. Weave in any remaining ends.
Not a fan of tassels? A couple of wooden beads would also look great as a finishing touch. If you want to hang the garland between two points, I think it’s smart to get another ring and crochet around it, just like you did at the start. It’s an elegant way to finish a garland!
Adjusting the garland size
Adjusting the size of this garland is easy: change the number of motifs or the spacing between them. You can also stuff the motifs with more filling to make them appear fuller and therefore slightly bigger.
Diagrams
You might also like
Comments
Be the first to comment to this post!