

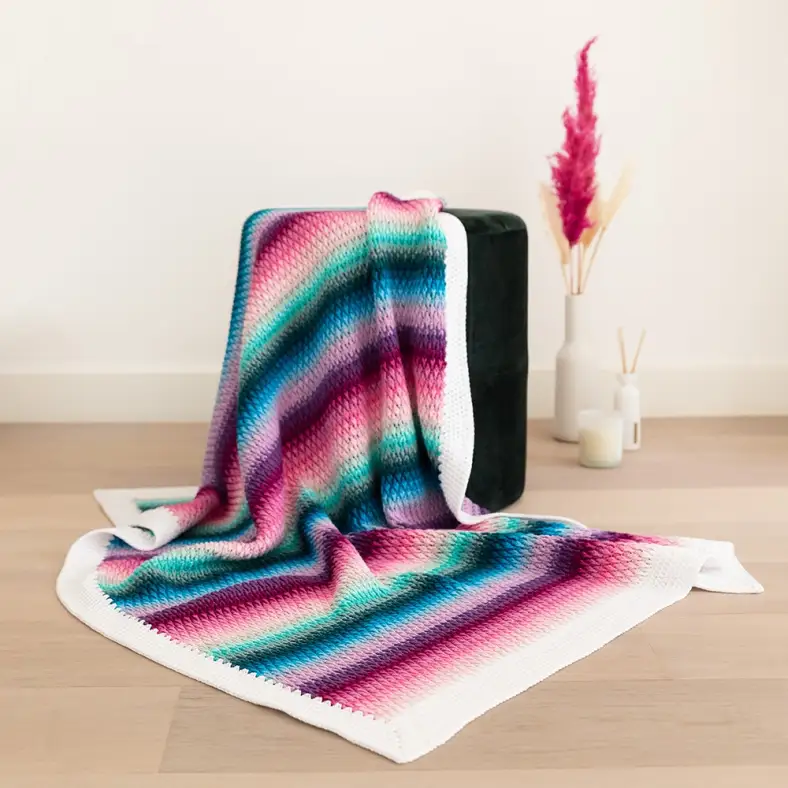
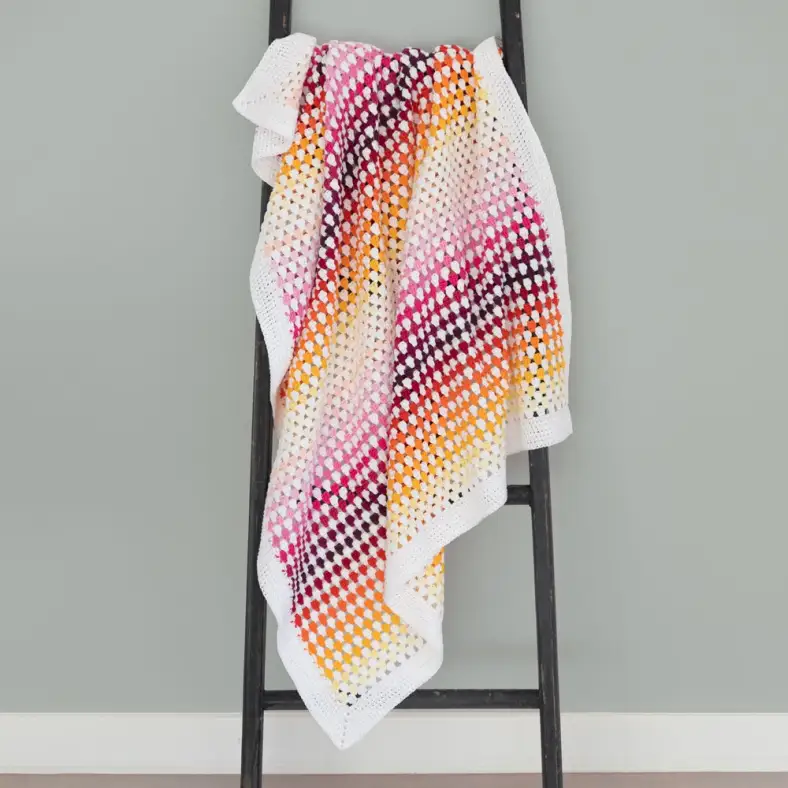
A beautiful texture and captivating colour gradient: what more could you want in a blanket? The Alpine Stitch Blanket helps you master this delightful stitch that could be a cornerstone of your future projects.
The pattern includes written instructions, a photo tutorial and schematics. It’s suitable for the adventurous beginner and is written in US terms.
Materials and preparation
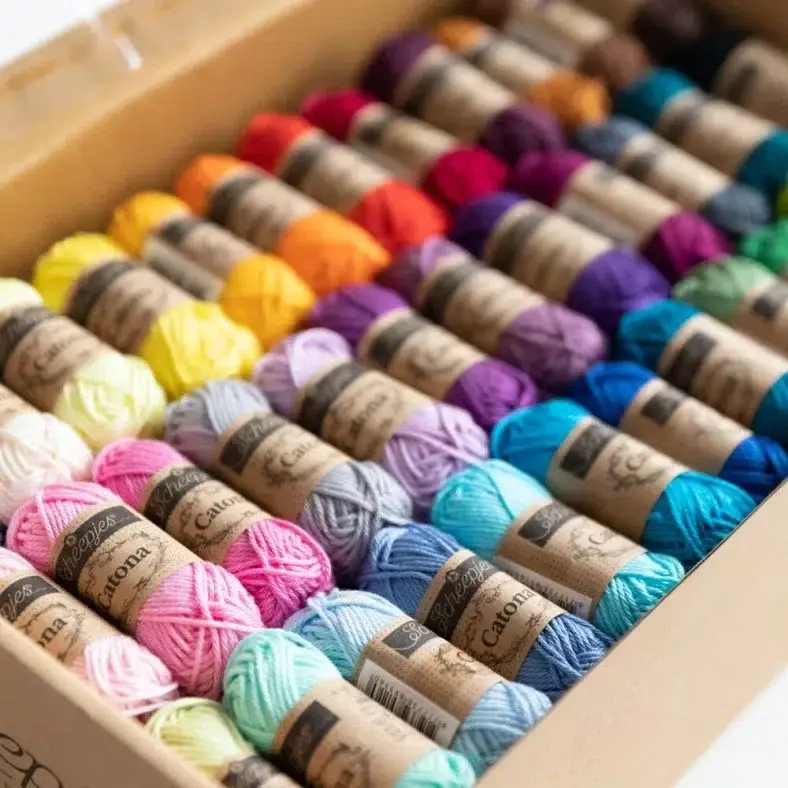
Yarn
| Label | Colour name | Code | Amount |
|---|---|---|---|
| Colour A | Snow white | 106 | 3 balls |
| Colour B | Light silver | 172 | 1 ball |
| Colour C | Crystalline | 385 | 1 ball |
| Colour D | Tropic | 253 | 1 ball |
| Colour E | Silver blue | 528 | 1 ball |
| Colour F | Deep Ocean | 391 | 1 ball |
| Colour G | Dark Teal | 401 | 1 ball |
| Colour H | Petrol Blue | 400 | 1 ball |
| Colour I | Vivid Blue | 146 | 1 ball |
| Colour J | Sky Blue | 510 | 1 ball |
| Colour K | Lilac Mist | 399 | 1 ball |
| Colour L | Light Orchid | 226 | 1 ball |
| Colour M | Lavender | 520 | 1 ball |
| Colour N | Delphinium | 113 | 1 ball |
| Colour O | Ultra Violet | 282 | 1 ball |
| Colour P | Tyrian Purple | 128 | 1 ball |
| Colour Q | Garden Rose | 251 | 1 ball |
| Colour R | Coral Rose | 398 | 1 ball |
| Colour S | Fresia | 519 | 1 ball |
| Colour T | Tulip | 222 | 1 ball |
| Colour U | Icy Pink | 246 | 1 ball |
| Colour V | Powder Pink | 238 | 1 ball |
Shop the yarn
You can find Scheepjes Catona at your local Scheepjes retailer, or online via:
Crochet hook
3.5mm (US size E/5)
Measurements
110x90cm (43⅓ x 35½in).
Gauge/tension
Not critical for this project. Make sure not to use more than 12.5g of each 50g ball per 2 rows. I used a little over 10g per 2 rows for this blanket.
Abbreviations (US terms)
- ch
- chain
- dc
- double crochet
- hdc
- half double crochet
- hdc2tog
- hdc 2 stitches together: (yarn over, insert hook in st, yarn over, pull up loop) twice, yarn over, pull through all loops on hook
- FPdc
- Front Post double crochet: yarn over, insert hook from front to back and back to front around the stem of indicated stitch yarn over, pull up loop, yarn over, pull through 2 loops, yarn over, pull through remaining loops
- RS
- Right side
- sc
- single crochet
- ss
- slip stitch
- st(s)
- stitch(es)
- WS
- Wrong side
Repeat formats
- *….; rep from * once/twice/3x — Crochet the instructions after * and then repeat that section a further number of times as indicated.
- (…) once/twice/3x — Crochet the instructions between brackets the total number of times indicated.
- […] — Indicates the amount of stitches at the end of a row or round.
- (…) in same st/sp — Indicates that all instructions between brackets are worked in the same stitch or space.
Techniques
Alpine stitch
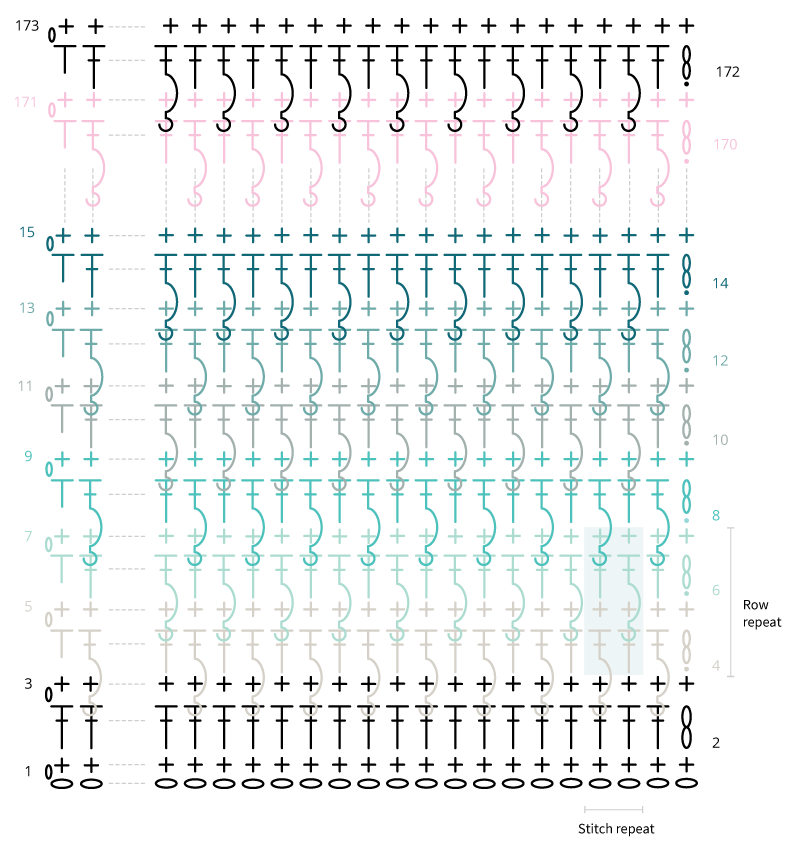
The Alpine stitch is a beautiful textured stitch. It's quite simple to make once you break it down to its basic stitches: Front Post double crochets and single crochets.
The stitch comprises two rows: One row on the right side consists of alternating FPdcs and regular dc's. The other row is an sc-only row on the wrong side. The following two rows repeat this with a slight offset so the FPdcs fall neatly between the previous FPdcs. These four rows together form the pattern and can be repeated indefinitely.
Video tutorial: Alpine stitch
First Alpine stitches
Please note: this tutorial starts in row 4 of the pattern. In this tutorial, I used different colours from the pattern to increase the contrast between rows.
To start with the Alpine stitch, join your new colour with a ss in the first stitch (photo 1). Ch2, these two chains are your first dc (photo 2). You'll now make a FPdc around the dc stem two rows below. To do so, yarn over, insert your hook from the front to the back and to the front again, around the stem of the dc. Yarn over again and pull up a loop. Yarn over again and pull through the first two loops. Finally, yarn over and pull through all loops on hook (photos 3-10).
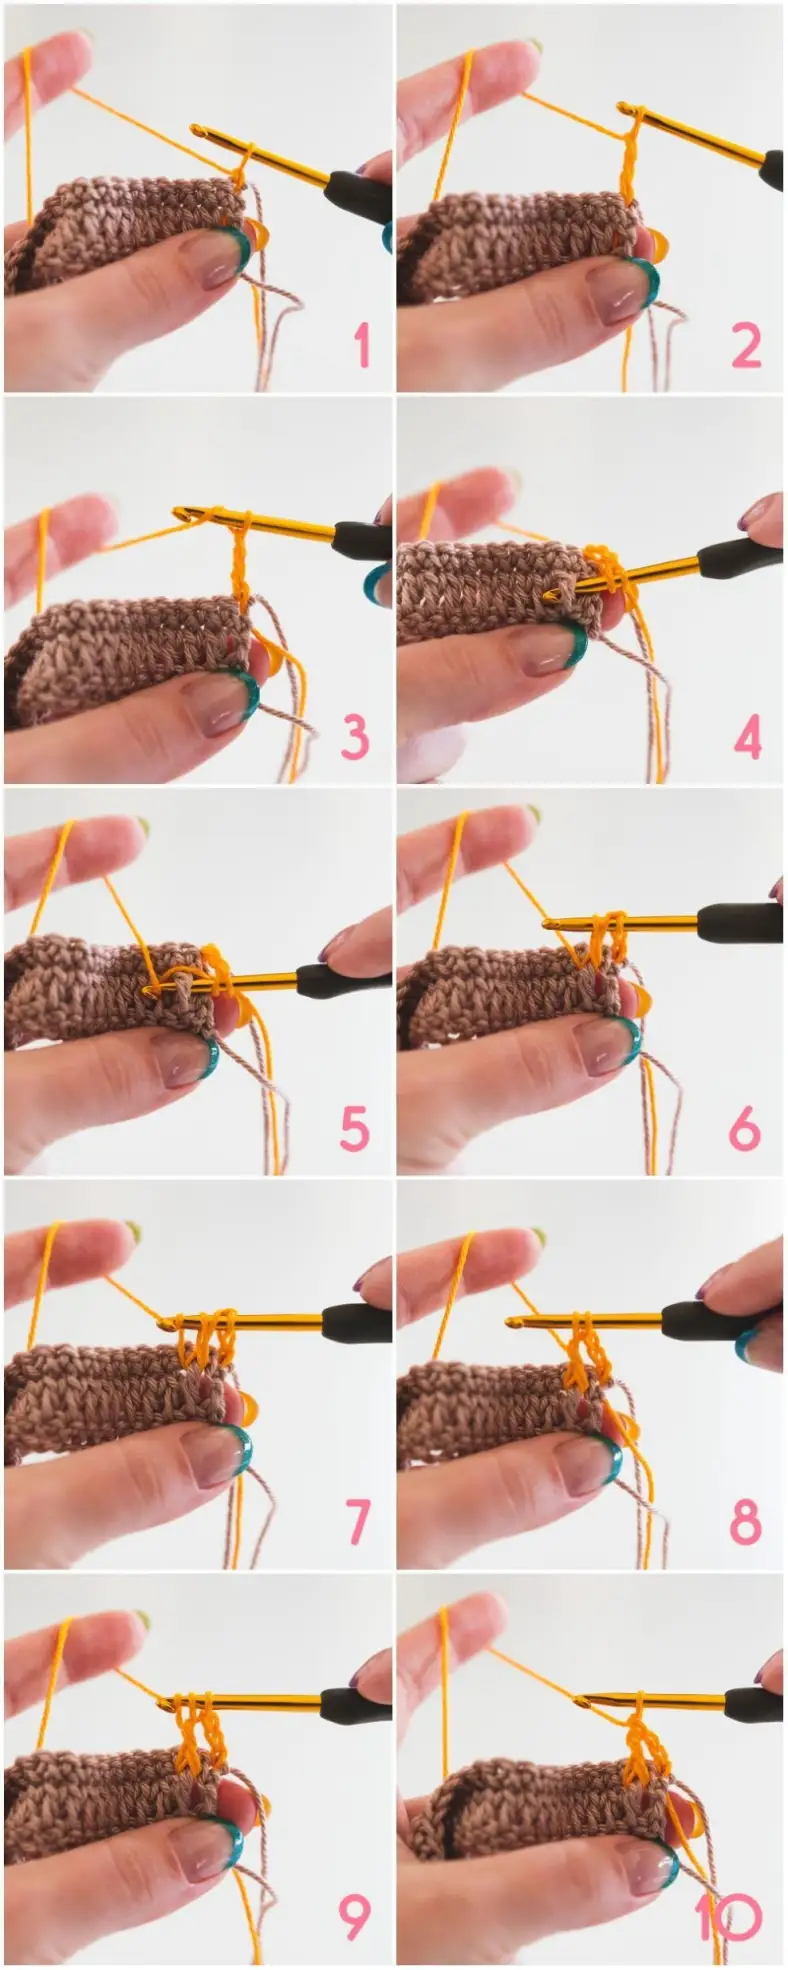
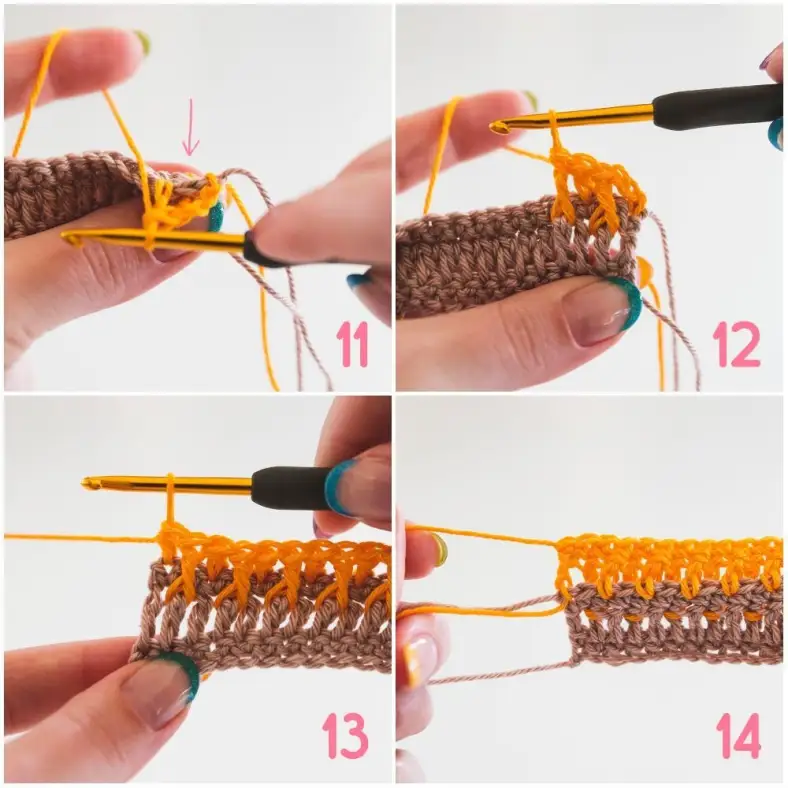
Once you've made the first FPdc, make a regular dc in the next stitch. Be sure to skip the stitch on the original row behind the FPdc (photo 11, indicated by the arrow). Next, make a FPdc in the dc right below the next stitch (photo 12). See how you're alternating stitches? Continue like this until you're at the end of the row. In the final stitch, work a hdc (photo 13). This helps to prevent a puckering edge.
Ch 1, turn the work, and crochet 1 sc in each stitch to the end of your row (photo 14). You can now cut the yarn and turn the work again.
Offset Alpine stitches
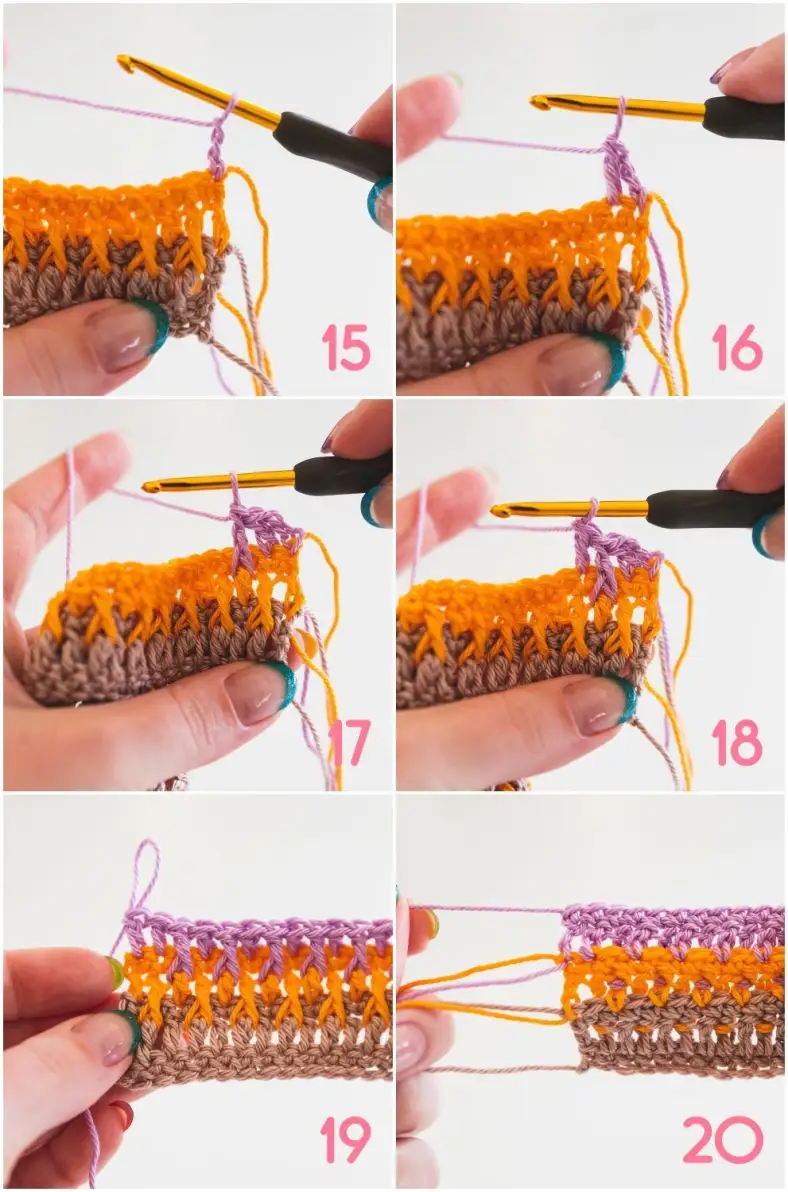
You'll work the next two rows almost identical to the previous two. Join the new colour with a ss in the first stitch, then ch2, which counts as the first dc (photo 15). Crochet a regular dc (photo 16), followed by a FPdc in the dc two rows below the next stitch (photo 17). By offsetting the FPdc pattern by one stitch (the first regular dc after your ch2), the FPdc's fall between each other. Continue alternating dc's and FPdc's until the end of row, and make a dc in the second-to-last stitch and a hdc in the final stitch (photos 18-19).
Ch 1, turn the work, and crochet 1 sc in each stitch to the end of your row (photo 20). You can now cut the yarn and turn the work again.
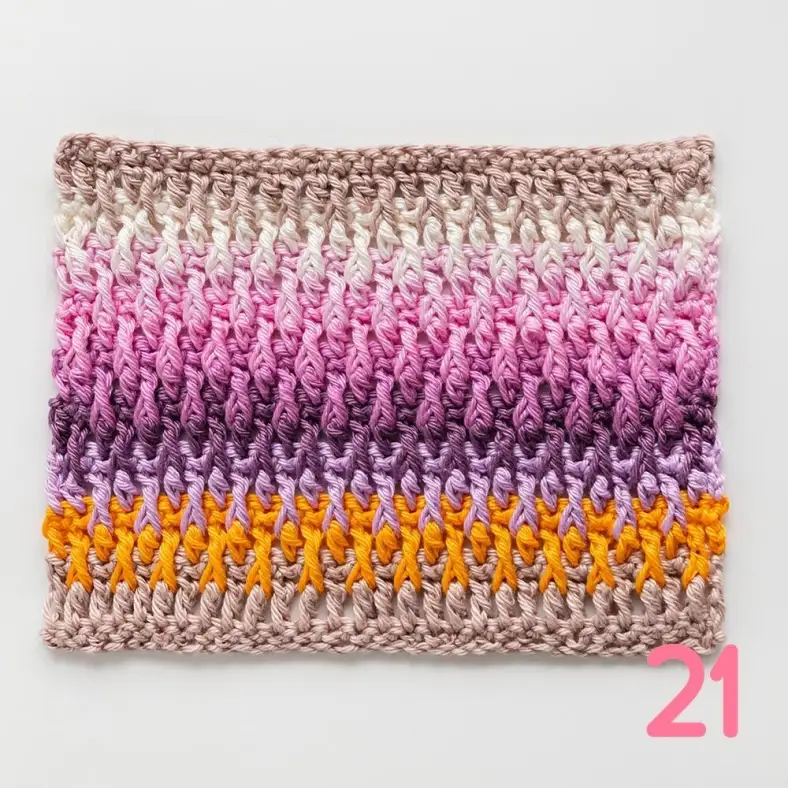
That's all! The texture pattern becomes clearer as you go along, and after a while, your fingers will know what to do.
Crochet pattern
Blanket
With Colour A, ch158.
We’re now going to start with the actual Alpine Stitch rows. The Alpine Stitch consists of two rows: one row on the RS with FPdc, and one row on the WS with sc’s.
Don’t skip the sc in the final stitch of Row 5 and 7 (the top of the ch2). It’s really easy to miss!
Rows 4-7 form the pattern repeat for this blanket. Rows 6-7 are offset from Rows 4-5 so the FPdc’s fall in between the previous FPdc’s.
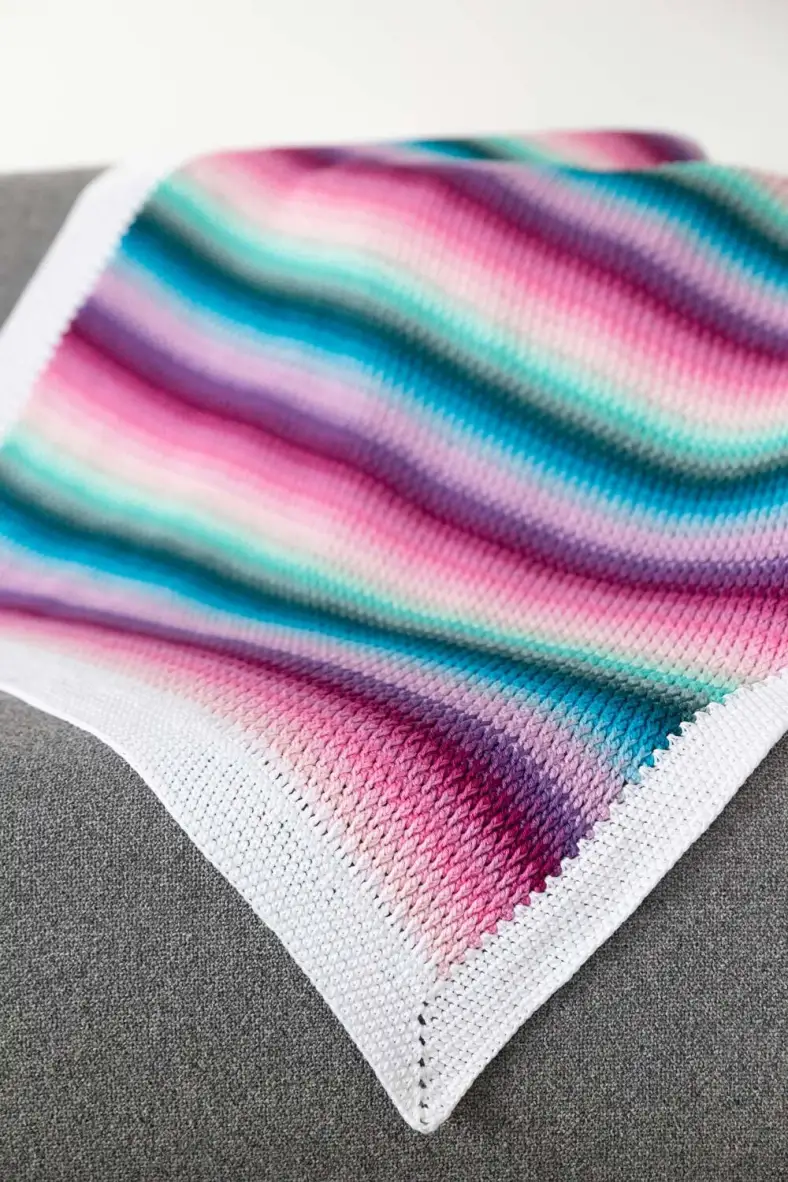
Repeat Rows 4-7 with Colours B-V in alphabetical sequence, 4 times in total. This brings your total number of rows to 171. Note that you're not using Colour A in this repeat sequence.
We’re now going to work one last Alpine Stitch row in Colour A, to mirror the beginning of the blanket.
Border
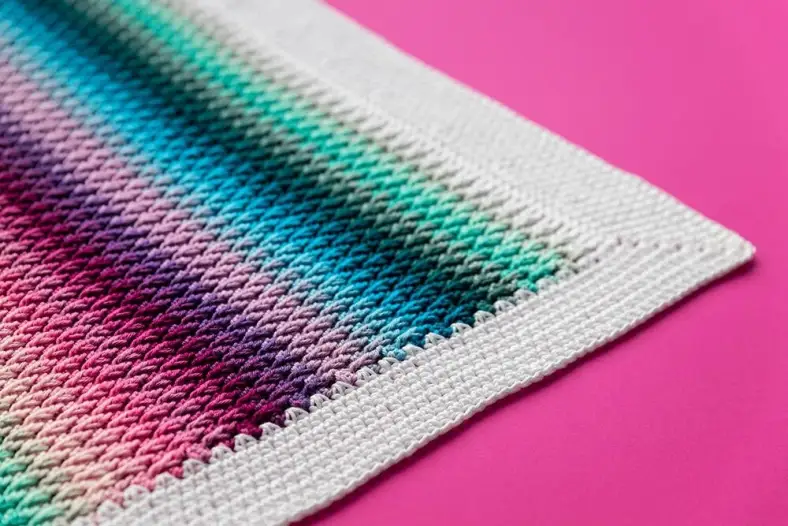
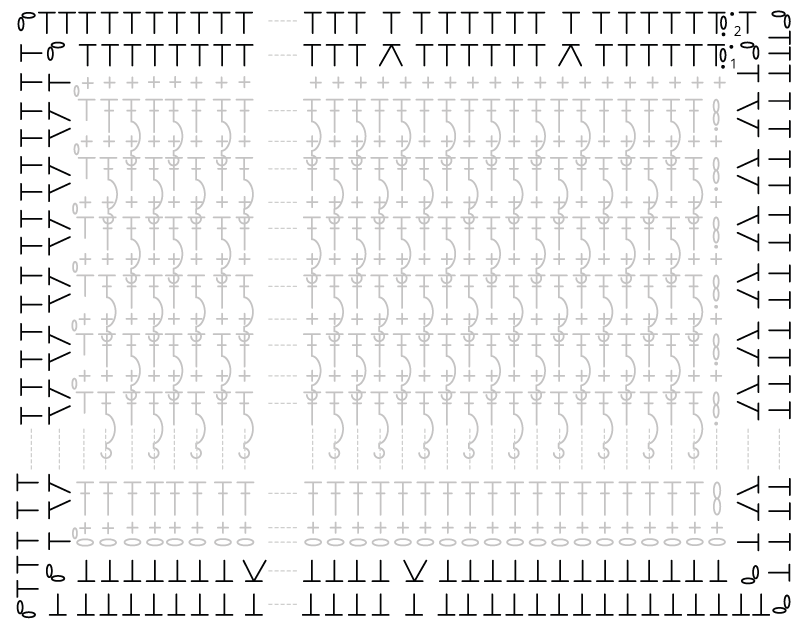
This stitch tends to pull slightly inwards on the short sides. To still get a straight edge, we’re going to decrease the number of stitches on the short sides compared to the starting chain.
You're making 2hdc on one side of the corner, and 1hdc on the other side. The reason for this is that when you work in Rounds, the slanting of stitches causes the corners to look slightly crooked. By working 2hdc we're offsetting this slant and making perfectly square corners. Trust me, it works!
Fasten off, block to size.
Adjusting Measurements
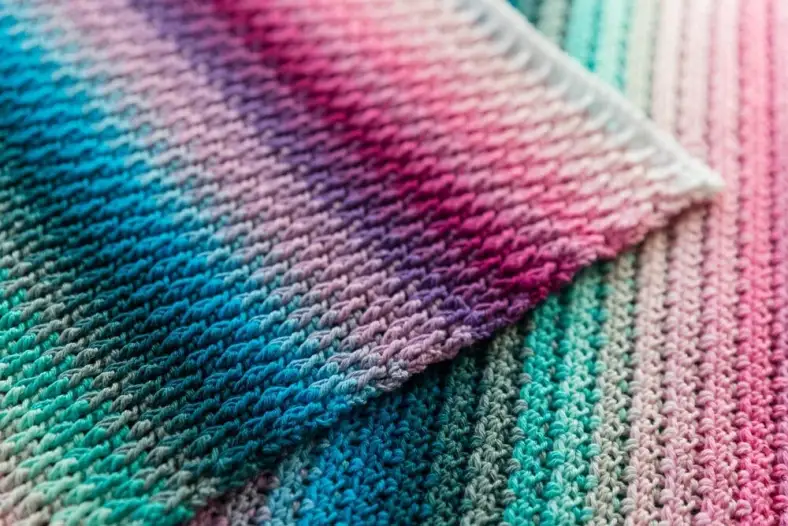
If you want to adjust the measurements, you can simply add or remove repeats of Rows 4-7 (or stop a pattern repeat after Row 5). To make the blanker wider, simply add more chains to your beginning chain. The pattern has a stitch multiple of 2, so if you crochet an even number of chains you can follow the pattern. Keep in mind that the number of repeats in a pattern row differs if you change the number of starting chains.
One row of Alpine stitches (so a Row 4-5 repeat) measures 1.4cm (½in) in height. Two Alpine stitches next to each other (2 FPdc, 2dc) measure 1cm in width (0.4in).
Diagrams

You might also like
Comments
Lorraine Cooper
December 04, 2021 11:30
Sharadamba C
July 15, 2022 09:22
Kirsten
April 12, 2026 11:22
Kirsten
April 12, 2026 11:22
Kirsten
April 12, 2026 11:24
Kirsten
April 12, 2026 11:24