

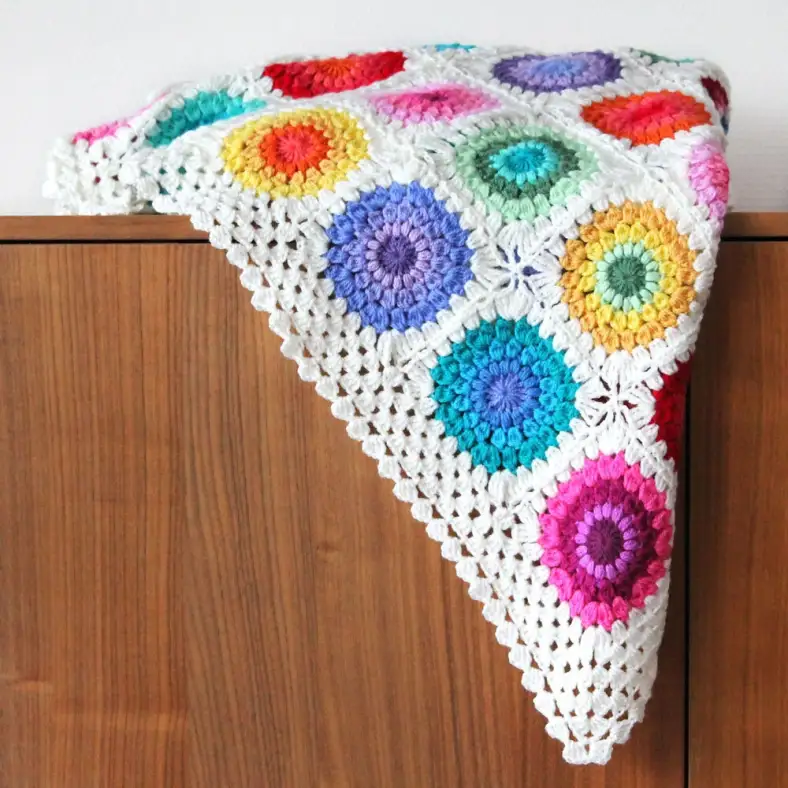
Use all the colours you have at your disposal to create this riot of colour. The motifs blend like in a colour wheel, and are crocheted together with a pristine white.
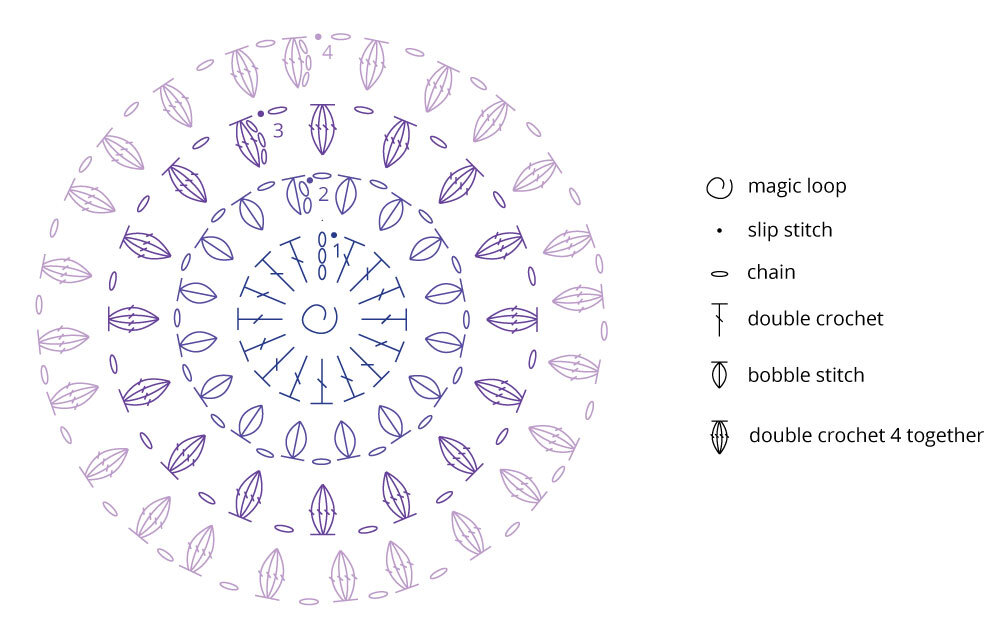
The pattern is suitable for advanced beginners. The written instructions step you through the pattern, with an accompanying diagram that shows the construction of the motif.
Materials and preparation
Yarn
| Label | Colour name | Code | Amount |
|---|---|---|---|
| Colour A | Maastricht | 1246 | 1 ball |
| Colour B | Tilburg | 1083 | 1 ball |
| Colour C | Leek | 1132 | 1 ball |
| Colour D | Leeuwarden | 1711 | 1 ball |
| Colour E | Gouda | 1081 | 1 ball |
| Colour F | Leerdam | 1263 | 1 ball |
| Colour G | Almelo | 1316 | 1 ball |
| Colour H | Enschede | 1824 | 1 ball |
| Colour I | Eelde | 1422 | 1 ball |
| Colour J | Bastogne | 2015 | 1 ball |
| Colour K | Den Helder | 1068 | 1 ball |
| Colour L | Middelburg | 1003 | 1 ball |
| Colour M | Zwolle | 1082 | 1 ball |
| Colour N | Rhenen | 1188 | 1 ball |
| Colour O | Heerlen | 1432 | 1 ball |
| Colour P | Amstelveen | 1277 | 1 ball |
| Colour Q | Meppel | 1061 | 1 ball |
| Colour R | Hengelo | 1084 | 1 ball |
| Colour S | Kortrijk | 2009 | 1 ball |
| Colour T | Luik | 2006 | 1 ball |
| Colour U | Den Bosch | 1241 | 1 ball |
| Colour V | Amersfoort | 1390 | 1 ball |
| Colour W | Tiel | 1023 | 1 ball |
| Colour X | Roermond | 1123 | 1 ball |
| Colour Y | Barneveld | 1005 | 5 balls |
Shop the yarn
You can get Scheepjes Colour Crafter from Scheepjes retailers, such as:
Crochet hook
5.0mm (US size H/8)
Measurements
The blanket measures 1.30m by 1.50m (51 by 60in). With the listed skeins you can easily make more motifs, I used approximately 50g of each 100g skein. You will need more of the Barneveld colour to join more motifs though.
Gauge/tension
One motif measures 10 cm (4 in) in diameter
Abbreviations (US terms)
- bobble st
- bobble stitch (*yo, pull up loop* 3 times, yo, pull through all loops on hook)
- ch
- chain
- dc
- double crochet
- dc3cl
- dc3cluster (indicated in pattern)
- dc4tog
- double crochet 4 stitches together: (yo, pull up loop, yo, pull through first 2 loops on hook) 4 times, yo, pull through all loops on hook
- sp(s)
- space(s)
- ss
- slip stitch
- tr
- treble
- yo
- yarn over
Repeat formats
- *….; rep from * once/twice/3x — Crochet the instructions after * and then repeat that section a further number of times as indicated.
- *…; rep to end — Crochet the instructions after * and then repeat that section to the end of the row or round.
- (…) once/twice/3x — Crochet the instructions between brackets the total number of times indicated.
- […] — Indicates the amount of stitches at the end of a row or round.
- (…) in same st/sp — Indicates that all instructions between brackets are worked in the same stitch or space.
Colour layout
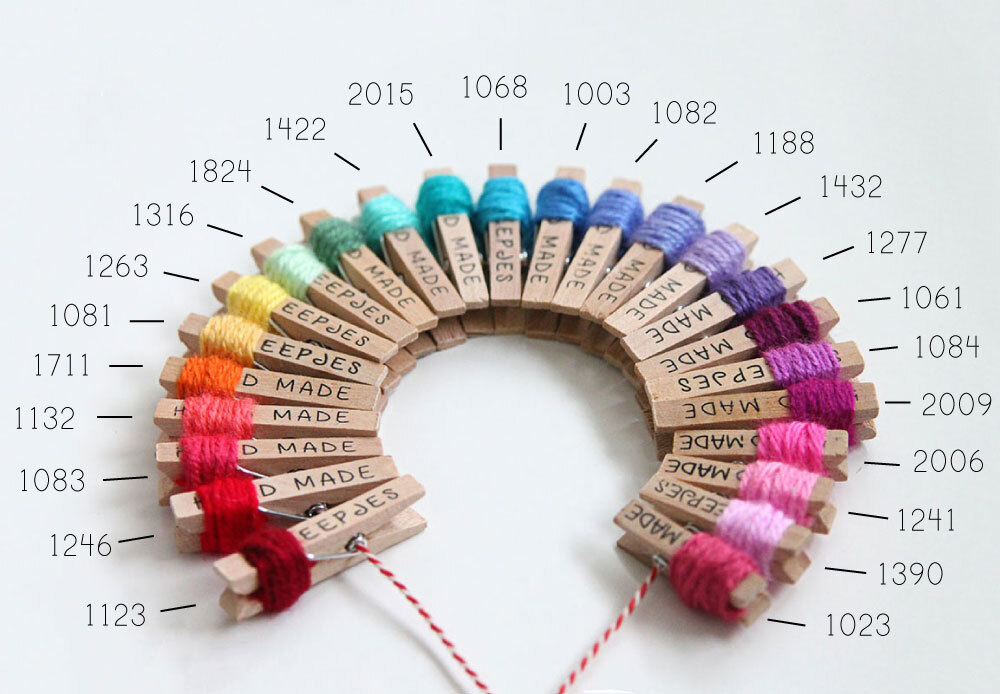
I’ve used a set sequence of colours to create a unique rainbow effect. I kept track of my sequence by using small pegs on a string as in the next picture, I suggest you do the same. Arrange your pegs in a rainbow sequence. When you’re creating a motif, start with a colour and either pick the 3 colours to the left or 3 colours to the right to make the subsequent motif rows. For example:
- Colour 1: 2015
- Colour 2: 1068
- Colour 3: 1003
- Colour 4: 1082
Or another example:
- Colour 1: 2009
- Colour 2: 1084
- Colour 3: 1061
- Colour 4: 1277
Crochet pattern
Motif
With your first colour make a magic ring.
Colour sequence of rows
For this blanket, I came up with a semi-randomized way to get that great rainbow feeling. This method might seem a bit strange at first but it works, trust me! First I made a batch of motifs, completely random (but following the rainbow sequence I made at the start!). So I had a couple of green squares, a couple of blue/purple, pink, yellows etc.
I divided these motifs into two stacks: intensely coloured motifs (with strong colours such as the bright red or the deep purple) and others. Next, I laid them out in rows. To prevent parts of the blanket being too strong in colour I avoided having 2 intense motifs next to each other, I made sure to have at least 3 or 4 other motifs in between. To see if I liked the colour distribution I squinted with my eyes and just checked if I felt like a certain colour was missing in a part of the blanket. If I liked it, I joined the rows. Then I repeated the whole process over again for the next couple of rows.
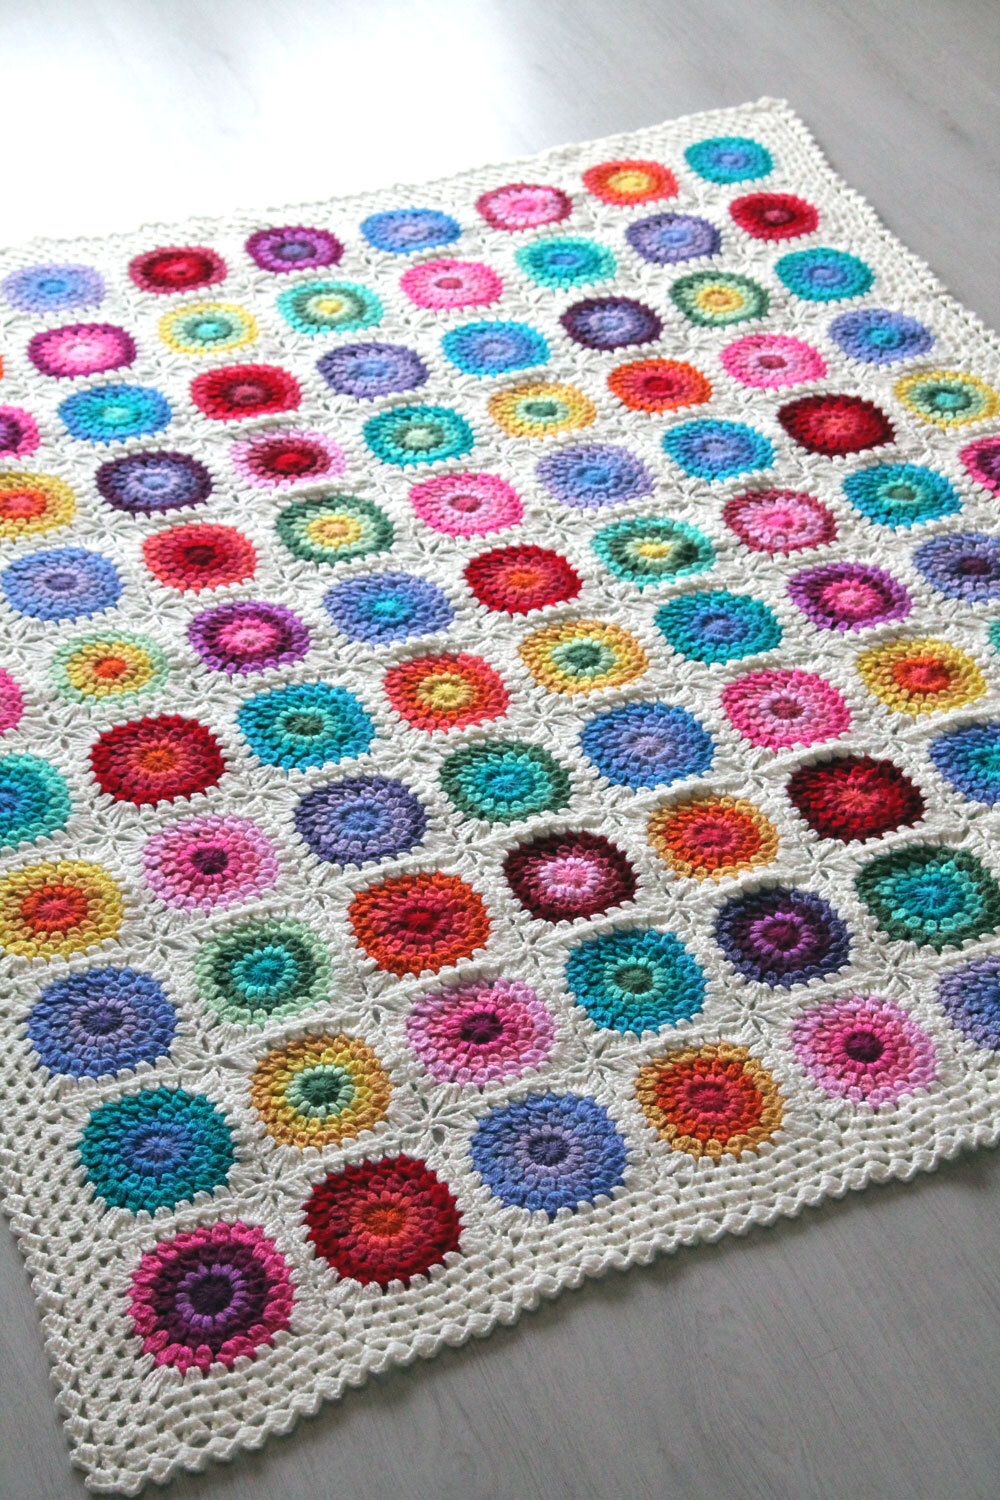
I highly recommend trying this method with your own colours. If you rather have an example of my blanket, have a look at the picture below. Because I have a lot of blue and purple shades, those colours are more present. More sparingly used shades are yellow, for example. I tried to distribute the yellow a bit more evenly and used the blue and purples as filler motifs.
I made 11 x 9 = 99 motifs.
Joining motifs
First motif
With Colour Y, join in any dc4tog space, ch3, 2dc in same sp (counts as first dc3cl), dc3cl in each of next 4 sps, (3tr, ch2, 3tr) in next space, *dc3cl in each of next 5 sps, (3tr, ch2, 3tr) in next sp; repeat from * another 2 times, join with ss in first dc3cl. Cut yarn.
Subsequent motifs
Pick your subsequent square and work the joining round, attach the square with a ss in each dc3cl sp and in the ch2 of the 3tr-corners of adjacent squares.
Border
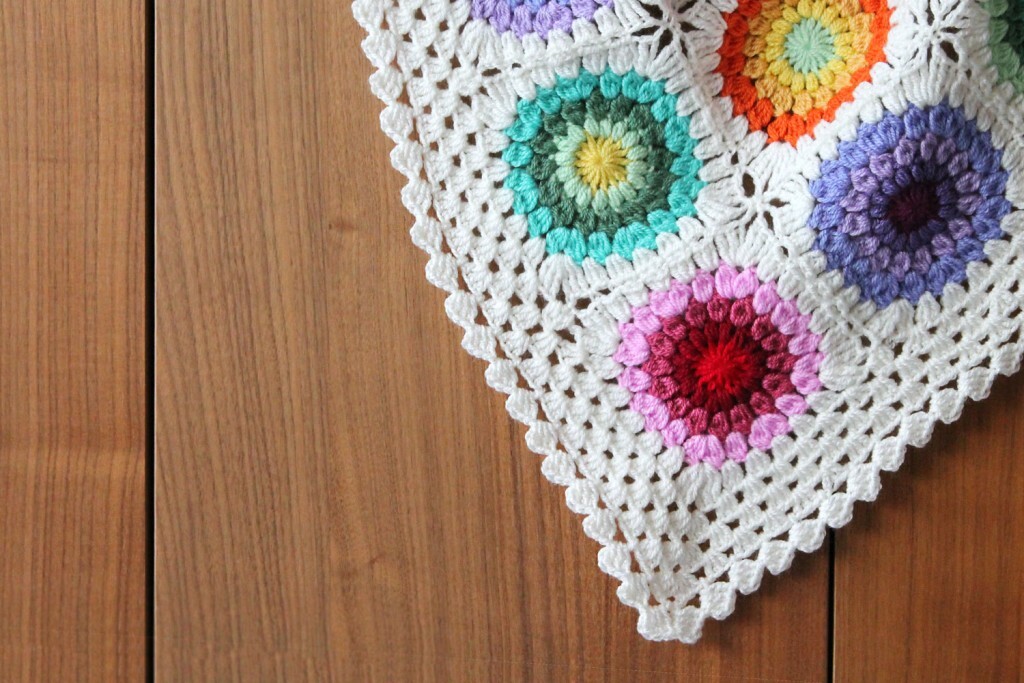
For more clarification on Round 4, see this link: Block edging.
Diagrams
You might also like
Comments
Grace
April 03, 2022 22:35