

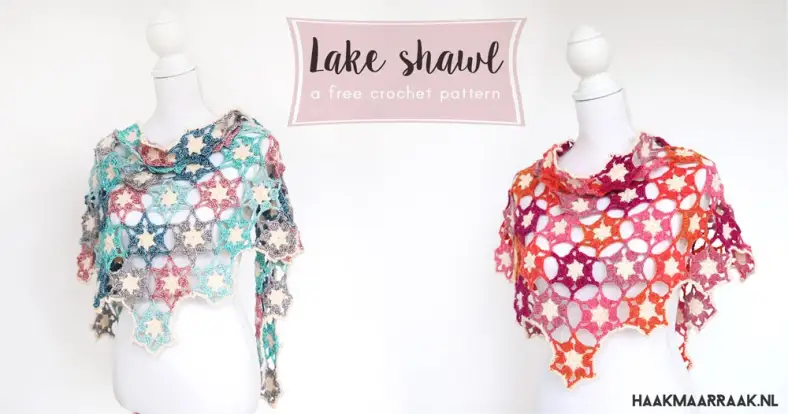
The lake shawl is inspired by pictures of beautiful sunsets on the great lakes of the world! The motif creates a star shape and triangles when joined in the corners. The shawl is approximately 170cm (67in) wide and 60cm (22in) high after blocking. The crochet pattern is suitable for all skill levels and is written in US terms. On the left you see the Stone Washed version, and on the right you see the River Washed version. Special thanks go out to my testers Anci and Marieke, who tested the pattern thoroughly!
Materials and preparation
Yarn
| Label | Colour name | Code | Amount |
|---|---|---|---|
| Colour A | Pink Quartzit | 821 | 2 balls |
| Colour B | Amazonite | 813 | 1 ball |
| Colour C | Green Agate | 815 | 1 ball |
| Colour D | Corundum Ruby | 808 | 1 ball |
| Colour E | Blue Apatite | 805 | 1 ball |
| Colour F | Smokey Quartz | 802 | 1 ball |
| Label | Colour name | Code | Amount |
|---|---|---|---|
| Colour A | Pink Quartzite | 821 | 2 balls |
| Label | Colour name | Code | Amount |
|---|---|---|---|
| Colour B | Nile | 944 | 1 ball |
| Colour C | Mississippi | 946 | 1 ball |
| Colour D | Mekong | 943 | 1 ball |
| Colour E | Steenbras | 942 | 1 ball |
| Colour F | Ganges | 945 | 1 ball |
Shop the yarn
You can find this yarn via Scheepjes retailers such as:
Crochet hook
4.0mm (US G/6)
Measurements
170cm (67 in) in length and 60cm (22 in) in width
Gauge/tension
motif measures 10 cm (4 in) in diameter using a 4.0 mm hook
Abbreviations (US terms)
- beg-ch
- beginning chain
- ch
- chain
- ch sp(s)
- chain space(s)
- dc2tog
- double crochet 2 stitches together (*yarn over, draw up loop, yarn over, pull through first 2 loops on hook; repeat from * once more, yarn over, pull through all loops on hook)
- dc3tog
- double crochet 3 stitches together (*yarn over, draw up loop, yarn over, pull through first 2 loops on hook; repeat from * 2 twice more, yarn over, pull through all loops on hook)
- sc
- single crochet
- ss
- slip stitch
Repeat formats
- *….; rep from * once/twice/3x — Crochet the instructions after * and then repeat that section a further number of times as indicated.
- (…) once/twice/3x — Crochet the instructions between brackets the total number of times indicated.
- […] — Indicates the amount of stitches at the end of a row or round.
Notes
- Colours B through to F are referred to as contrast colour.
- Make 68 motifs: 13 motifs each in Colour B and C, and 14 motifs each in Colour D, E and F.
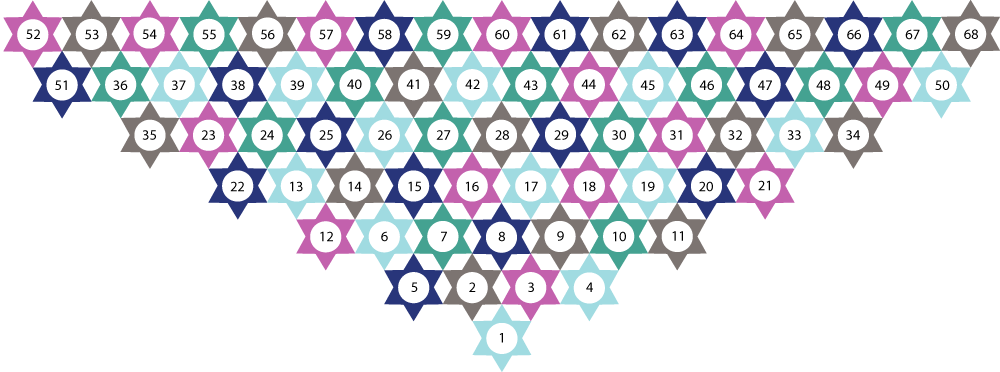
- The shawl uses the join-as-you-go method. Start with the motif in the bottom point, and work up row by row. The most left motifs of each row are made after the row is complete. For clarification, see the colour placement diagram.
Colour layout
Colour Placement Stone Washed version
Colour Placement River Washed version
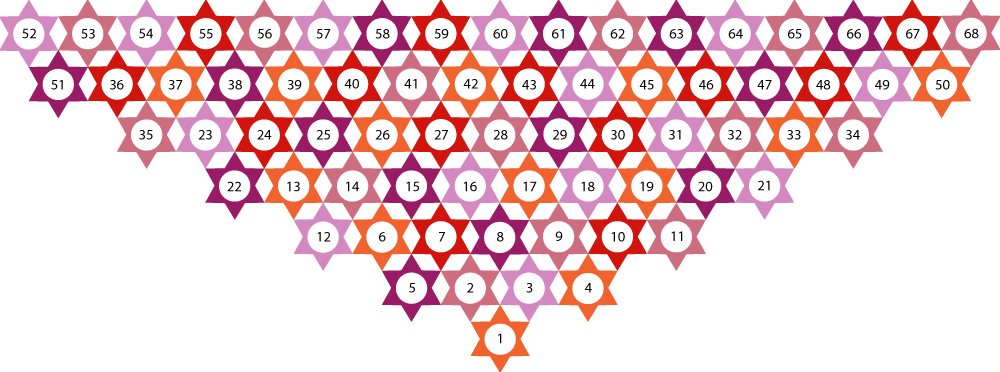
* The numbers in the stars represent the order in which they are joined. Start with 1 on the bottom of the triangle shape. Next, join 2, 3, 4, 5 and so on. Pay special attention to where star 5, 12, 22 etc. is located (i.e. most left star in a row).
And here is the colour placement chart again, if you prefer tables:

Crochet pattern
Single Motif
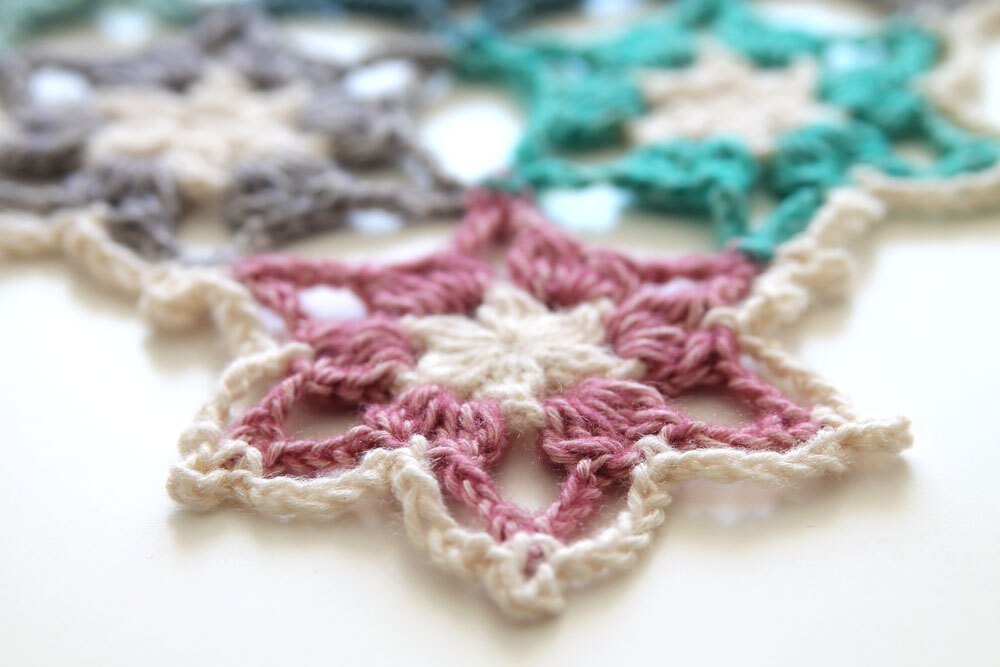
With Colour A, make a magic ring.
Joining
Repeat motif pattern for all next motifs. The colours are distributed semi-random. For guidance, see the colour placement diagram below. Join motifs in rows from left to right, but keep in mind that the most left motif in a row is joined last, because otherwise there won’t be any ch3-sps to join to. For clarification, see the number sequence in the colour placement diagram.
You are joining your motifs in the ch3-sps that are made in each corner. To join, follow the instructions for Round 2 of the motif. Whenever you reach a corner that needs to be joined to another corner replace ‘ch6, ss in 3rd ch of 6ch’ with ‘ch4, ss in ch3-sp of adjacent motif(s), ch2, ss in 2nd ch from hook’ to form a join to other motifs and create the ch3-sp in the motif you’re working on. This might look tedious at first but will become easier once you continue your shawl. For joining points, see the border diagram. Join ss are represented as big dots between motifs corners.
Edging
Fasten off. Weave in all ends and block to size.
Diagrams
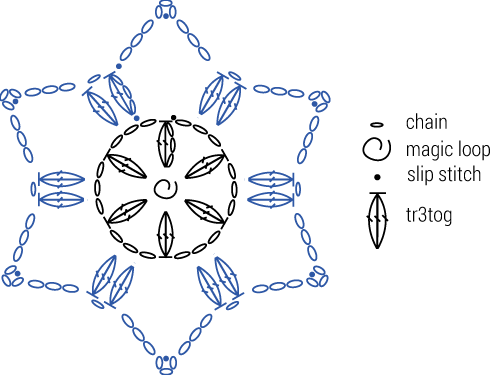
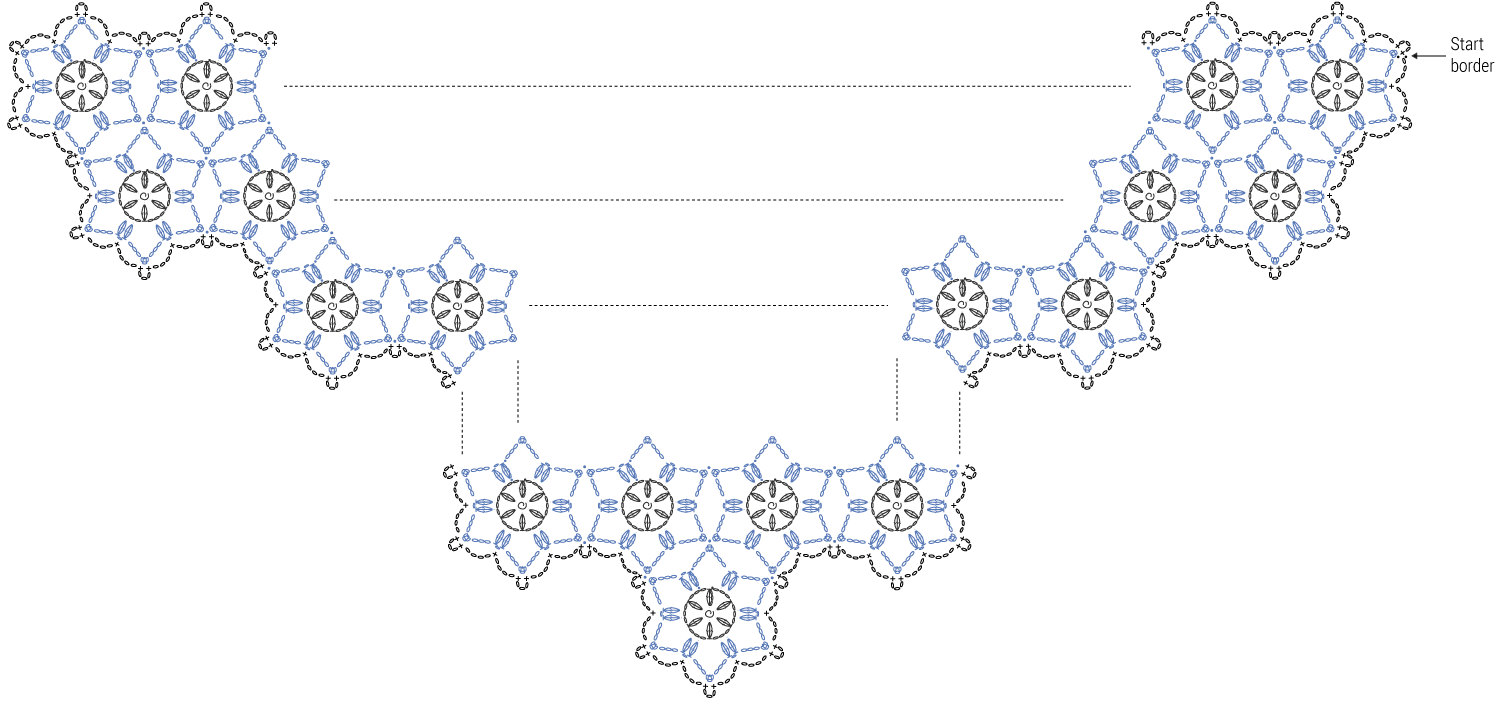
You might also like
Comments
Be the first to comment to this post!