

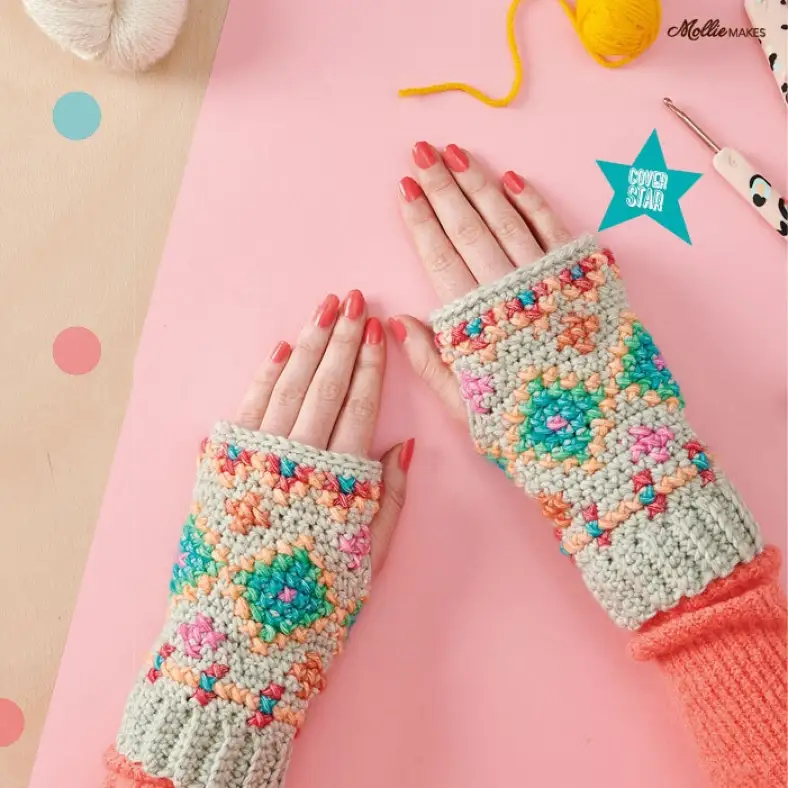
The Hygge wristies are an accessible introduction to cross stitch on crochet. The technique is easy to master, with a wonderful result. And if you enjoy these wristies, you might give the Hygge CAL a try too! The Hygge wristies have been featured in Mollie Makes issue 115, and are now available for you to work your magic on. A suitable pattern for the colder winter months ahead!
Materials and preparation
Yarn
| Label | Colour name | Code | Amount |
|---|---|---|---|
| Colour A | Crystal Quartz | 854 | 2 balls |
| Colour B | Coral | 856 | 1 scrap |
| Colour C | Red Jasper | 847 | 1 scrap |
| Colour D | Morganite | 874 | 1 scrap |
| Colour E | Fosterite | 866 | 1 scrap |
| Colour F | Turquoise | 864 | 1 scrap |
| Colour G | Tourmaline | 876 | 1 scrap |
Shop the yarn!
You can find Scheepjes Stonewashed XL at Scheepjes retailers, such as:
Crochet hook
5.0mm (US size H/8)
Measurements
16 cm in height (6.3 in), 20 cm in circumference (7.9 in)
Gauge/tension
14 sc and 17 rows measure 10 x 10cm over a 5.0mm hook
Abbreviations (US terms)
- BLO
- work stitch through back loop only
- ch
- chain
- sc
- single crochet
- sc2tog
- single crochet 2 together: (insert hook in next st, yarn over and draw up a loop) 2x, yarn over and draw through all 3 loops on hook
- ss
- slip stitch
- st(s)
- stitch(es)
Repeat formats
- […] — Indicates the amount of stitches at the end of a row or round.
Notes
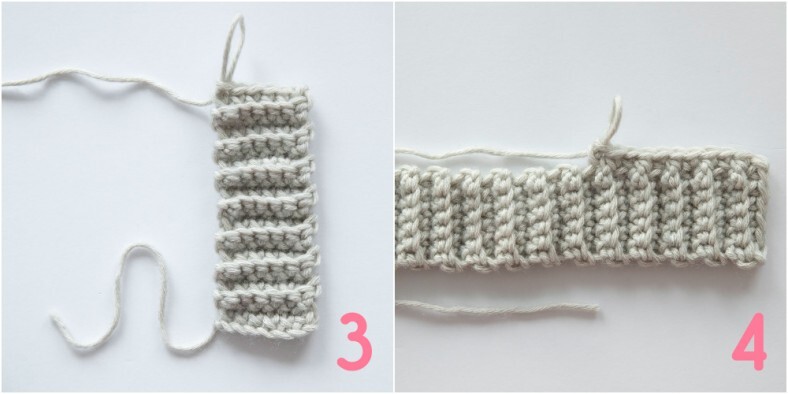
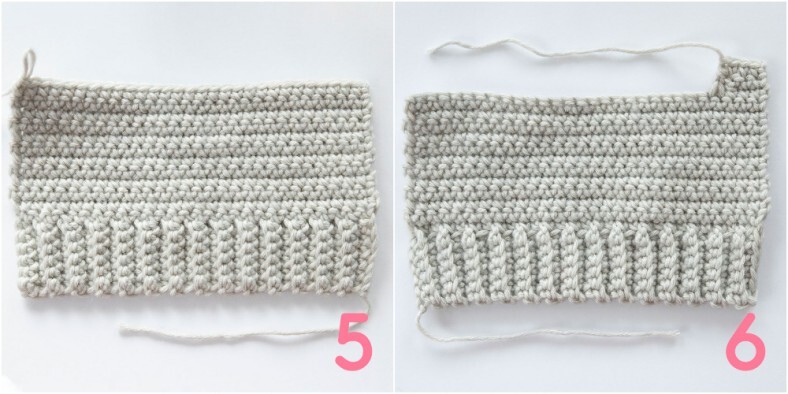
- The wristies are made from the bottom up. You start with the ribbing and continue working your way in sc upwards the wristie towards the thumbhole. For the thumbhole, your work is split into two separate sections that are each worked in rows. Once you reach the top of the thumbhole, the pieces are crocheted together again into one continuous row. After finishing the wristie you will embroider the pattern on the wristie. After embroidery, you’ll sew the sides of the wristie together to form a tube. The seam will be on the palm-side of your wristie.
- Depending on your tension, the edging round on the top can be used as a tightening round to make sure your wristies are snug against your knuckles.
Crochet pattern
Wristie (make 2)
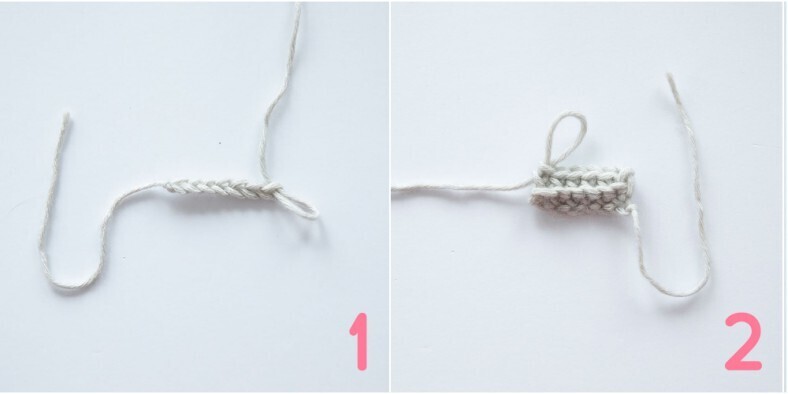
With Colour A, ch7 (photo 1).
Thumbhole
Note: because you're splitting your work here to create a thumbhole, each row has two sections: a short section (before thumbhole) and a long section (after thumbhole). The sections on each corresponding rows are designated as ‘a’ and ‘b’.
In the next row, you will crochet in Row 43 of both the short and the long section to create one continuous row again.
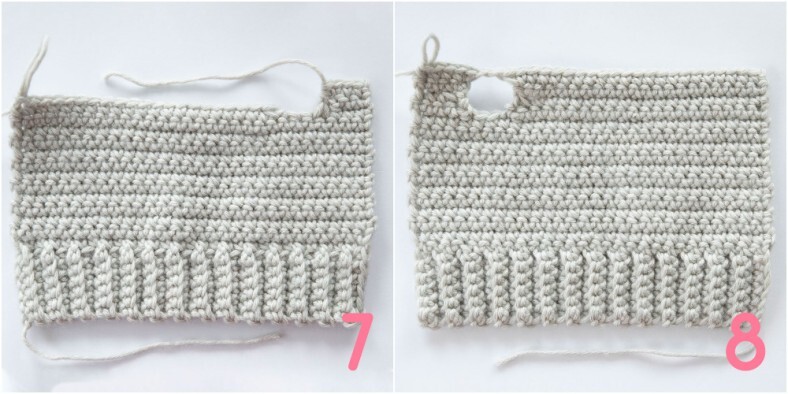
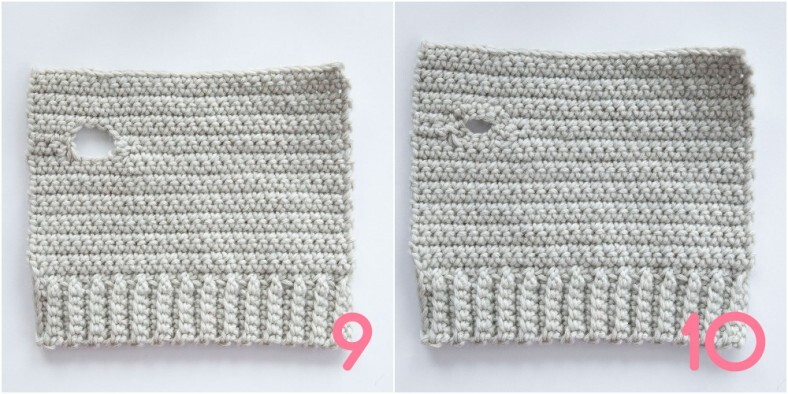
Finishing thumbhole
Embroidery
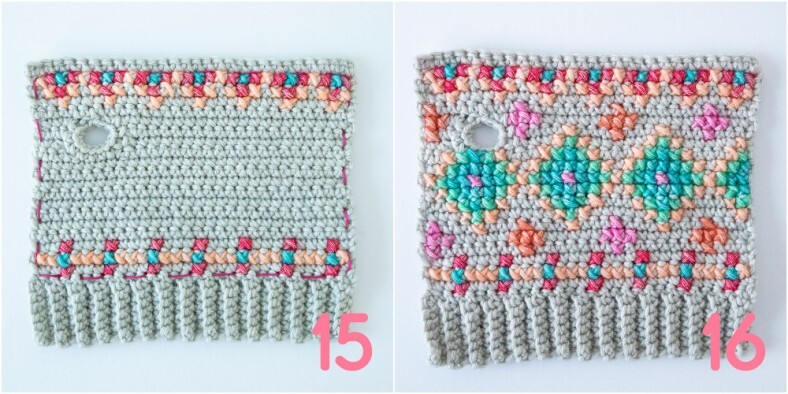
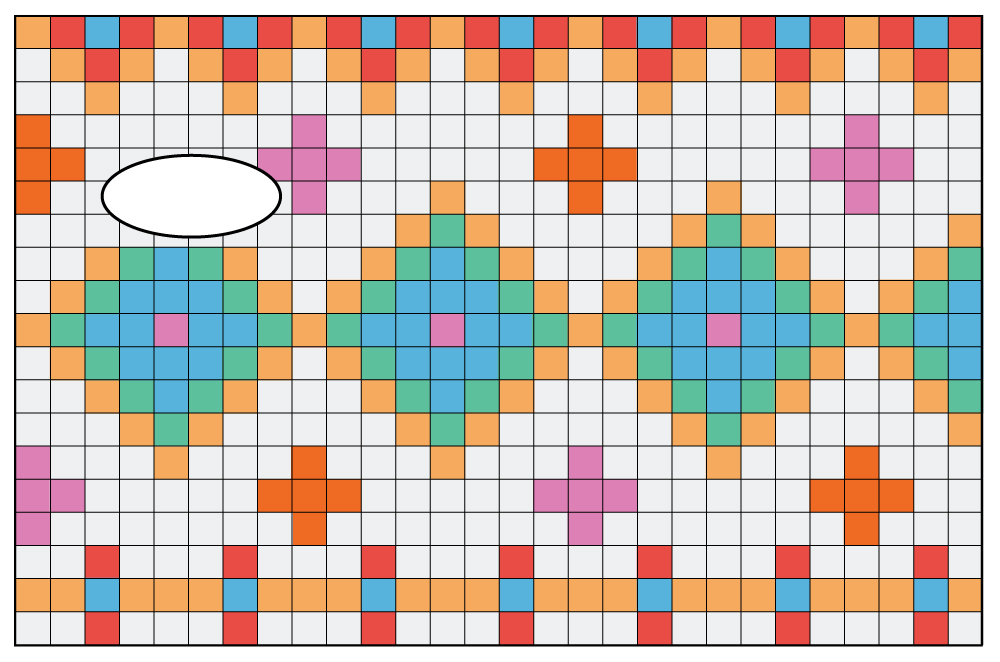
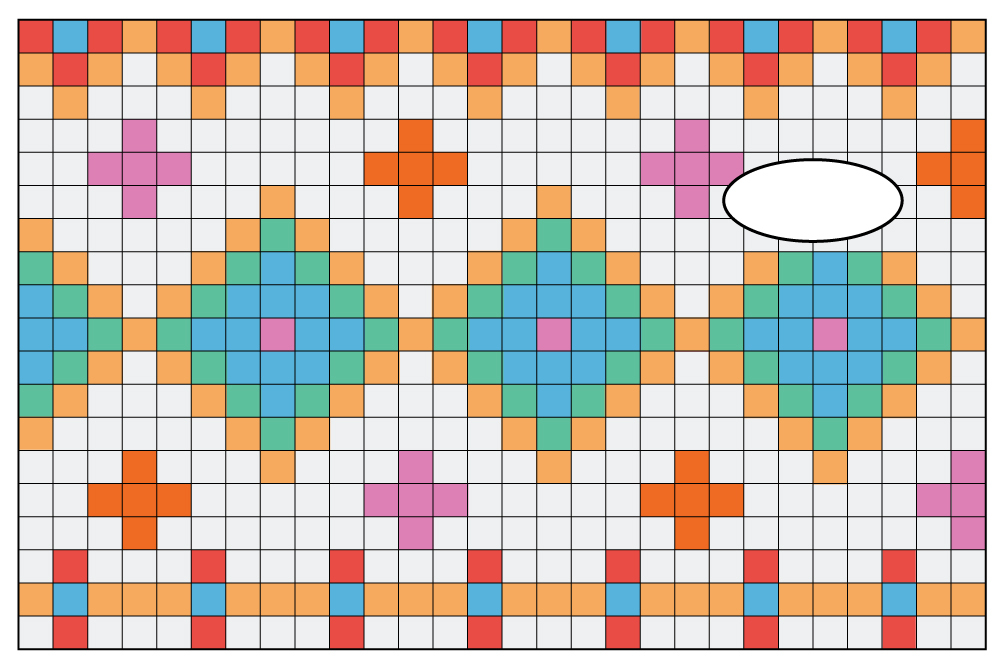
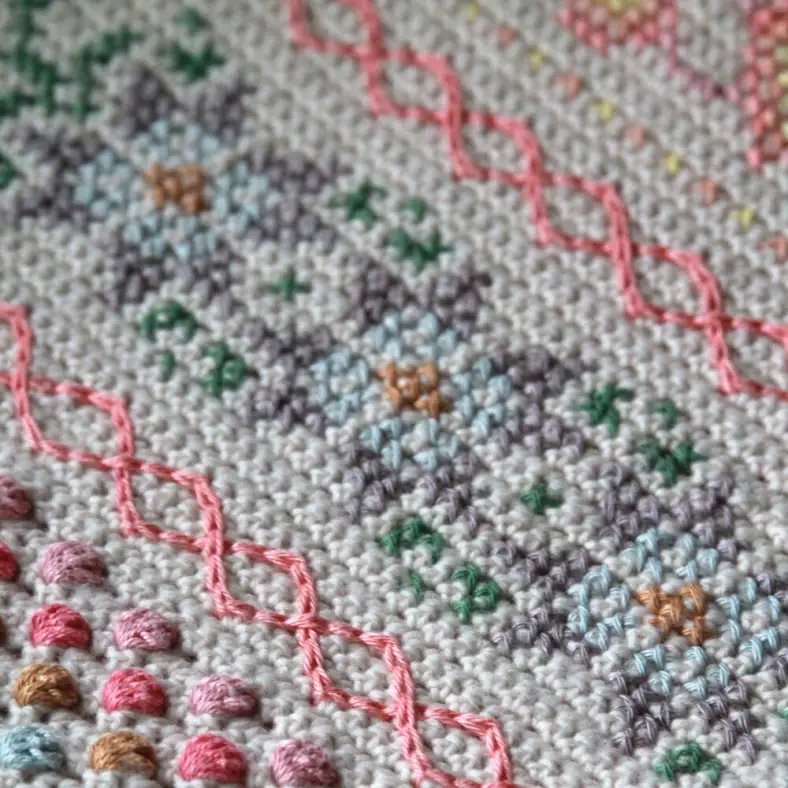
Please note that because your wristies are reversible, you’ll embroider one wristie on the one side, and one wristie on the other side of the fabric to create both left and right wristie. If you need any help visualizing the embroidery area, use a contrasting yarn to create a grid. You will work the embroidery in the centre of your wristie, over Rows 30-48 (photo 11). See the diagrams for the cross stitches below the pattern.
The cross stitch charts show which stitches to cross stitch over in the sc-section above the ribbing. When you look closely at your fabric, you will see that each stitch has a hole in each corner, much like actual embroidery fabric.
To make a cross stitch, insert your needle from the back to the front in the right upper corner of the stitch, then insert your needle from front to back through the lower left corner. Come back up to the front via the upper left corner, and insert your needle again from front to back through the lower right corner to complete the cross stitch.
Don’t pull too tight on your yarn to keep your cross stitches plump and fluffy. Work with lengths of ~50cm of yarn to avoid tangling. If you run out of yarn before completing your stitches with that particular colour, weave in the ends and continue with a new length of yarn (photo 12-16).
If you are skipping multiple sc’s to embroider a different section of the wristie in the same colour, make sure to weave your yarn through the backside of the stitches. This way, your hands and nails will not snag on the yarn.
Once you finish your embroidery, remove any contrasting yarn, weave in all ends and block your wristies to size.
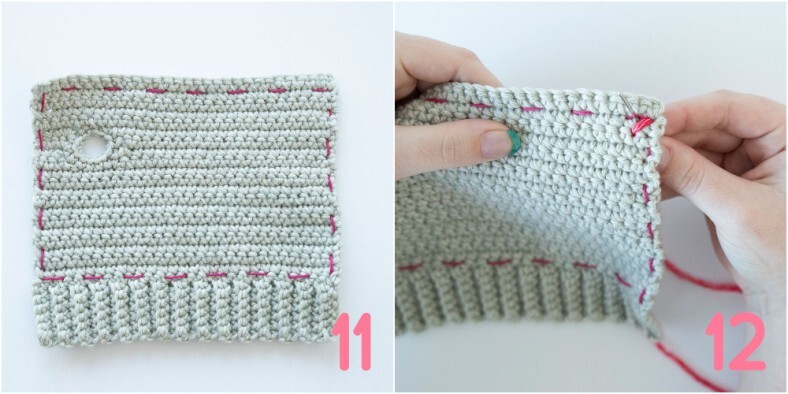
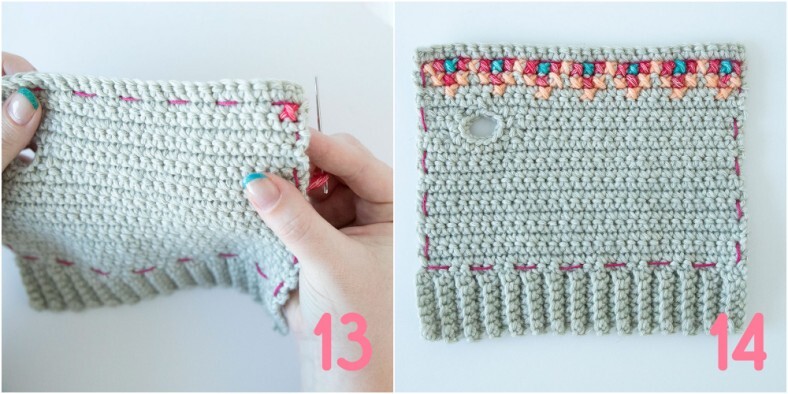
To finish
Sewing sides together
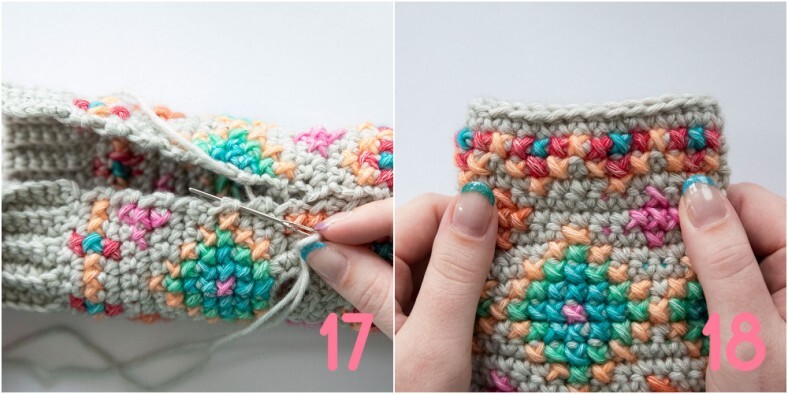
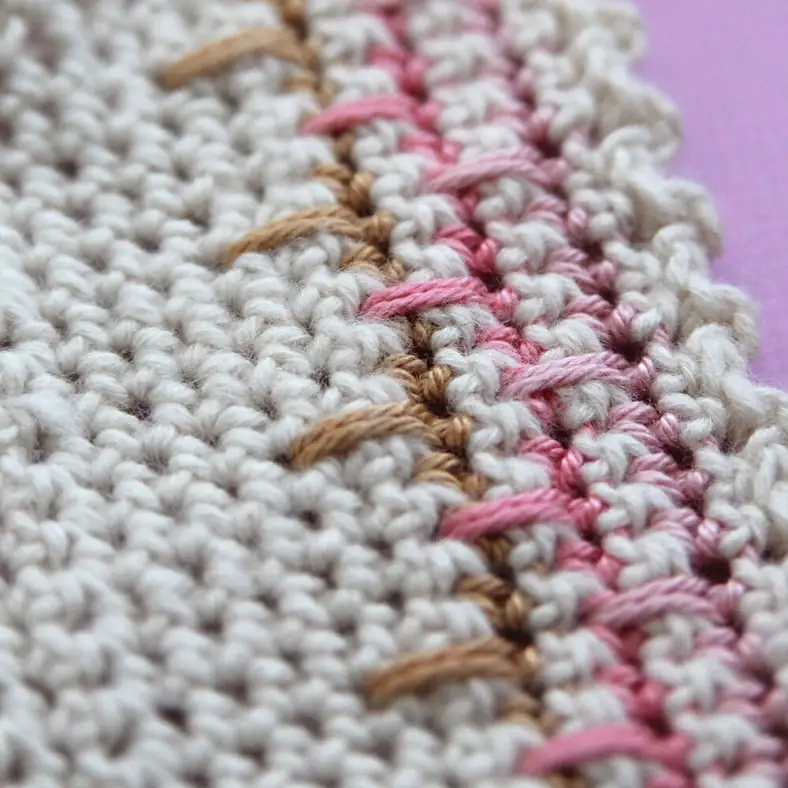
Take a 75cm strand of Colour A and a sewing needle, sew the sides of the wristie together through the outermost stitches on both sides. Fasten off, weave in all ends (photo 17).
Diagrams
You might also like
Comments
Be the first to comment to this post!