Rainbow Sampler Blanket 2 (Part 12)
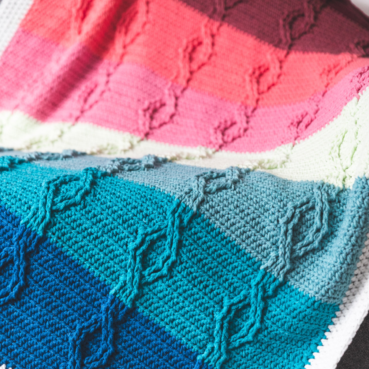
14.Dec.23 / Kirsten BalleringAre you ready to continue your Sampler adventure? The Rainbow Sampler Blanket 2 features more stitches, vibrant colours, and a sprinkle of yarn magic.
Designed for adventurous beginners who want to take their crochet skills to the next level, this blanket teaches you everything you need to know about more advanced stitch patterns.
Other pattern parts can be found here:
Materials and preparation
Yarn
Original Colours
Scheepjes Colour Crafter (100% Premium Acrylic, 100g/300m)- Colour A: 1001 Weert x 6 balls
- Colour B: 1132 Leek x 1 ball
- Colour C: 1083 Tilburg x 1 ball
- Colour D: 1123 Roermond x 1 ball
- Colour E: 2004 Brussel x 1 ball
- Colour F: 1277 Amstelveen x 1 ball
- Colour G: 1432 Heerlen x 1 ball
- Colour H: 1130 Sittard x 1 ball
- Colour I: 1241 Den Bosch x 1 ball
- Colour J: 1821 Terneuzen x 1 ball
- Colour K: 1725 Ameland x 1 ball
- Colour L: 1422 Eelde x 1 ball
- Colour M: 2009 Kortrijk x 1 ball
- Colour N: 2006 Luik x 1 ball
- Colour O: 1068 Den Helder x 1 ball
- Colour P: 1034 Urk x 1 ball
- Colour Q: 2015 Bastogne x 1 ball
- Colour R: 1114 Eindhoven x 1 ball
- Colour S: 1263 Leerdam x 1 ball

Shop the yarn!
If you're looking for Colour Crafter, you can find it at your local retailer or online through one of these links:
Crochet hook
5.0mm (US size H/8).
Measurements
The blanket measures 170 x 210cm (67 x 82 ½in) after blocking.
Gauge/tension
See pattern of part 1 for gauge information.
Notes
- This week you will need only 231 g of Colour A.
- In most rows, you’ll make a ch1 before turning your blanket. This is a turning chain and does not count as a stitch. If you find a ch1 is too small, you can also make a ch2. This depends on how tight you crochet.
Abbreviations (US terms)
- begin-bobble: ch2, (yarn over, insert hook in stitch, yarn over, pull up loop, yarn over, pull through two loops on hook) 5x in the same stitch or space, yarn over, pull through all loops on hook
- begin-puff stitch: ch1, (yarn over, insert hook in stitch, yarn over, pull up loop) 3x in the same stitch, yarn over, pull through all loops on hook
- BLO: back loop only
- bobble: (yarn over, insert hook in stitch, yarn over, pull up loop, yarn over, pull through two loops on hook) 6x in the same stitch, yarn over, pull through all loops on hook
- ch: chain(s)
- dc: double crochet
- dc2tog: double crochet 2 stitches together to decrease the stitch count by 1: (yarn over, insert hook in stitch, yarn over, pull up loop, yarn over, pull through first two loops on hook) once in each of two stitches, yarn over, pull through all loops on hook
- dc3tog: double crochet 3 stitches together to decrease the stitch count by 2: (yarn over, insert hook in stitch, yarn over, pull up loop, yarn over, pull through first two loops on hook) once in each of three stitches, yarn over, pull through all loops on hook
- dc7tog: double crochet 7 stitches together to decrease the stitch count by 6: (yarn over, insert hook in stitch, yarn over, pull up loop, yarn over, pull through first two loops on hook) once in each of seven stitches, yarn over, pull through all loops on hook
- FL: front loop
- FPdc: front post double crochet: Yarn over, insert your hook around the post of the stitch indicated in the pattern, yarn over, pull up a loop, yarn over, pull through first two loops on hook, yarn over, pull through all loops on hook
- hdc: half double crochet
- hdc2tog: half double crochet 2 stitches together to decrease the stitch count by 1: (yarn over, insert hook in stitch, yarn over, pull up loop) in each of two stitches, yarn over, pull through all loops on hook
- popcorn: 6dc in same stitch, remove hook from loop, insert hook from front to back through first dc, pick up loop, pull through dc to close popcorn
- puff stitch: (yarn over, insert hook in stitch, yarn over, pull up loop) 4x in the same stitch, yarn over, pull through all loops on hook
- RS: right side
- sc: single crochet
- ss: slip stitch
- s(ts): stitch(es)
- tr: treble crochet
- wrapped st: wrapped stitch: (yarn over, insert hook in stitch, yarn over, pull up loop to working height) 2x in same space, yarn over, pull through all loops on hook
- WS: wrong side
Repeat formats
- *….; rep from * once/twice/3x Crochet the instructions after * and then repeat that section a further number of times as indicated.
- *…; rep to end Crochet the instructions after * and then repeat that section to the end of the row or round.
- (…) once/twice/3x Crochet the instructions between brackets the total number of times indicated.
- […] Indicates the amount of stitches at the end of a row or round.
- (…) in same st/sp Indicates that all instructions between brackets are worked in the same stitch or space.
Colour layout

Crochet pattern
Countering flaring or pulling sections
The instructions for the edge contain many tips and explanations, as the edge is usually the part of a blanket where tension issues tend to reveal themselves. Luckily, it’s also the most forgiving when fudging. So I’m giving you many tips to professionally fudge the edge to your style. Read them before starting, and see which tips are useful for you!
When we’re making the edging, if you encounter a section that you wrote down, do one of two things:
- When it flares out, crochet a sc or even ss instead of a hdc.
- When it pulls inwards, crochet a dc or even a tr instead of a hdc.
The height difference in these stitches helps to fill up any gaps or bumps in the side. The aim is to have a smooth, straight edge. If one row doesn’t fix it, do the same in subsequent rows until the edge is straight.

Edge foundation for long sides
I really like a border that’s equally wide on all sides, and since the top and bottom row already have three rows of white hdc’s each, I want to add three rows of hdc on both long sides as well before going all the way around the blanket.
A note before we start: The stitch count on the long sides is less important than to have the edge lay flat. I personally find that you can better have too few, than too many stitches in your edge. If you have too few stitches, the remaining stitches tend to stretch out to ‘just enough to lay flat’, but if you have too many stitches the edge will definitely start to ruffle. To check, simply lay the section(s) flat and smooth with your hands. It’s okay if there’s a bit of tension in the edge, as long as your blanket doesn’t curl up on itself.
The perfect amount of stitches for the edge depends on how long your blanket ends up after blocking, but a great rule of thumb is to crochet 1 hdc in the side of each sc and hdc row, and 2 hdc’s in the side of each dc row.
Foundation right long side
Row 1 (RS) For the right side, start at the bottom right side with RS facing you. Join Colour A with a ss in the starting chain, ch1, 1hdc in same stitch, 2hdc in side of next 2 rows. From here on, work your way up alongside the side of the blanket, following the rule of thumb and tips above. I ended up with 246 hdc on the long side. Ch1, turn.
Row 2 (WS) 1hdc in every stitch to end of row, ch1, turn.
Row 3 (RS) 1hdc in every stitch to end of row, cut yarn.
Foundation left long side
Row 1 (RS) Start at the top left side with RS facing you. Join Colour A with a ss in the side of the last hdc row, ch1, 1hdc in side of row, 2hdc in side of next 2 rows. From here on, work your way down the side of the blanket. Try to make the same amount of stitches as you have on the other long side. Ch1, turn.
Row 2 (WS) 1hdc in every stitch to other side, ch1, turn.
Row 3 (RS) 1hdc in every stitch to other side, cut yarn.
I ended up with 246 hdc on both long sides.
Fudging the numbers
If you don’t have the same amount of stitches on both sides, you can always add a little ‘2hdc in one stitch or ‘hdc2tog’ here and there. It’s not strictly necessary, but it just works easier in the final round of the edging. This is also the remedy if you find that your blanket has too many or too few stitches in the first round and you want to tweak a little bit without frogging the rows.
Edging Rounds
We will work around the blanket as a whole for the final couple of rounds.
Round 1 (RS) Join Colour A with a ss in the top-right corner. Ch1, (1hdc, ch2, 1hdc) in corner stitch, 1hdc in each of the next 2 row-ends, 1hdc in each st to end of side, 1hdc in each of the next 2 row-ends, (1hdc, ch2, 1hdc) in side of corner-stitch, rotate blanket 90 degrees.
1hdc in each st along long side, (1hdc, ch2, 1hdc) in side of corner-stitch, rotate blanket 90 degrees.
1hdc in each of the next 2 row-ends, 1hdc in each st to end of side, 1hdc in each of the next 2 row-ends, (1hdc, ch2, 1hdc) in side of corner-stitch, rotate blanket 90 degrees.
1hdc in each st along long side, join with ss in first stitch, turn. [223 hdc on short sides, 246 hdc on long sides].
Again, stitch counts on the long sides are not as important as the fact that it lays flat.
Round 2 (WS) Ch1, *1hdc in each st to end of side, (1hdc, ch2, 1hdc) in corner-space; repeat from * another 3 times, 1hdc in each st to beginning, join with ss in first stitch, turn. [225 hdc on short sides, 248 hdc on long sides]
I have thought about the border for a long time, but in the end I decided that I really liked a simple, big white border best. The beauty is, you don’t necessarily have to agree with me. If you rather have a coloured edge, have a look at the edge I used for my first sampler blanket. The crab stitch works for every stitch count, so you can follow those instructions for this blanket too. You need around 25-30 grams of colour per round.
Do you like the pristine white border? Then simply follow the instructions below.
Repeat Round 2 another 4 times, giving you six full edge rounds in total. If you stick to the stitch counts given in Round 2, you end up with a stitch count of 233 hdc on the short sides and 256 hdc on the long sides. Cut yarn, and weave in all your ends.
You can now block your blanket again following the instructions in Part 11. And don’t forget to take a moment and pat yourself on the back - you made it to the end of this big, big project!
Diagram
Chart Part 12

Key (US terms)


Comments
Be the first to comment to this post!