We've all been there. For a beginner crocheter, a classic Granny Square pattern can be quite complicated. But it's such a wonderful pattern, and a great way for a beginner to learn! Before you know it, you will crochet blankets or some other larger crochet project, and it all starts with this basic "how to crochet a granny square" pattern.
You can start out with the basic motif, and expand on your knowledge as your skills grow. These crochet squares lend themselves to all types of projects. Coasters, potholders, blankets, pillows, clothing and pretty much anything you can imagine.
If only I knew how easy crocheting Granny Squares is! They are a basic block, but they lend themselves to all types of projects.
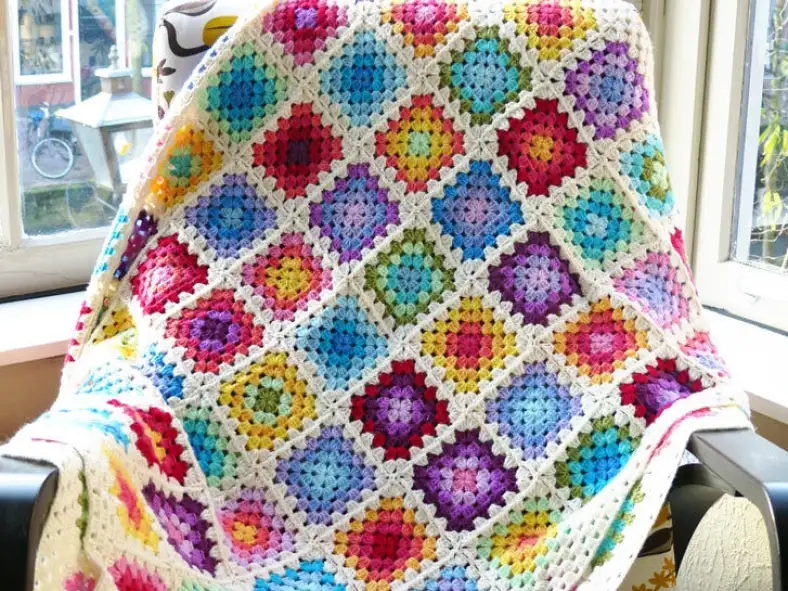
They're the perfect crochet square for a beginner crocheter because changing up the colour can already make a huge difference: If you like a traditional granny, you can make it with black joining. But if you are more into colour, you can use the same pattern to create something colourful, like the Colourful Rainbow Granny blanket (a free crochet pattern, by the way)!
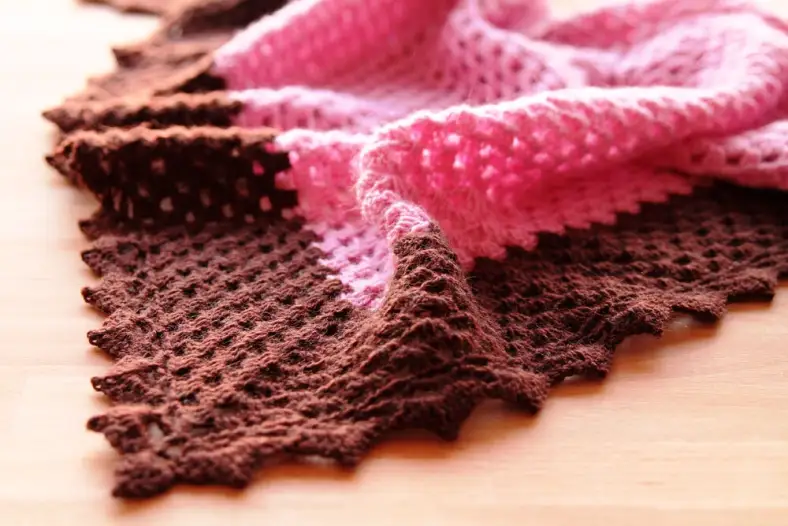
Or the Vintage sweet shawl, which is a great way to vary on granny squares: granny rows!
What is a granny square?
A granny square crochet pattern is a name for a motif that’s worked in granny clusters. A granny cluster is a group of 3 double crochets (or in UK terms, trebles). All three double crochets are worked in one chain space. In every row, you crochet granny clusters in the spaces between the previous row's clusters.
Clusters can be worked in the round to make a square pattern, or in rows to vary in shape. If you work in the round, you will increase the number of granny clusters in each round to make your granny square larger and larger.
If this all sounds complicated, don’t worry. It’s all best explained in pictures, so I’ve made a video tutorial for you.
What yarn do I need to crochet a simple granny square?
You can use any yarn! I recommend using a lightly coloured thread that doesn't split easily, especially if this is your first time crocheting a granny square. You want to see your stitches clearly, and dark, splitting yarn doesn't help.
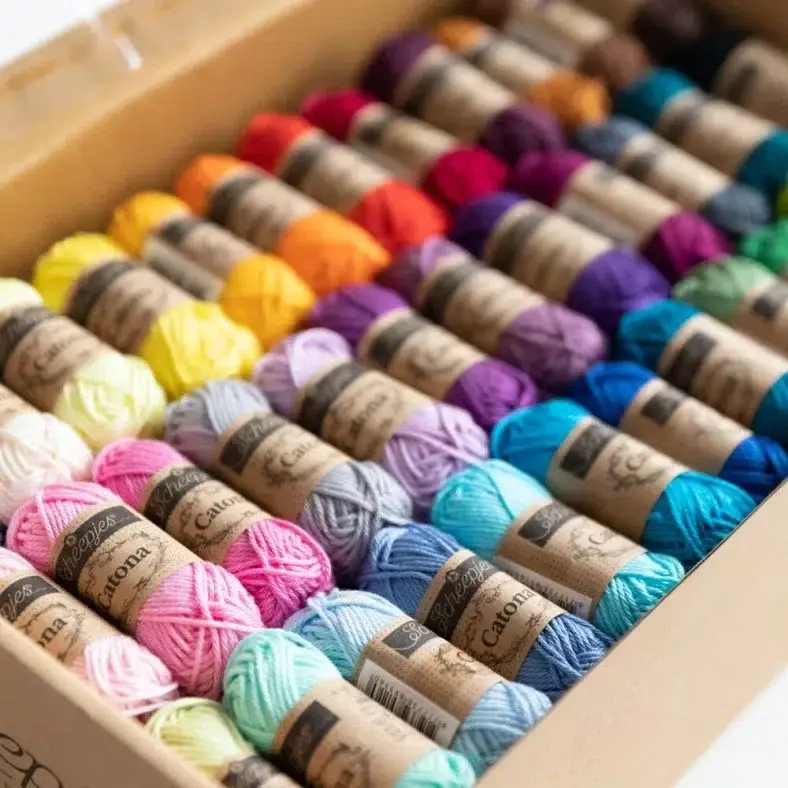
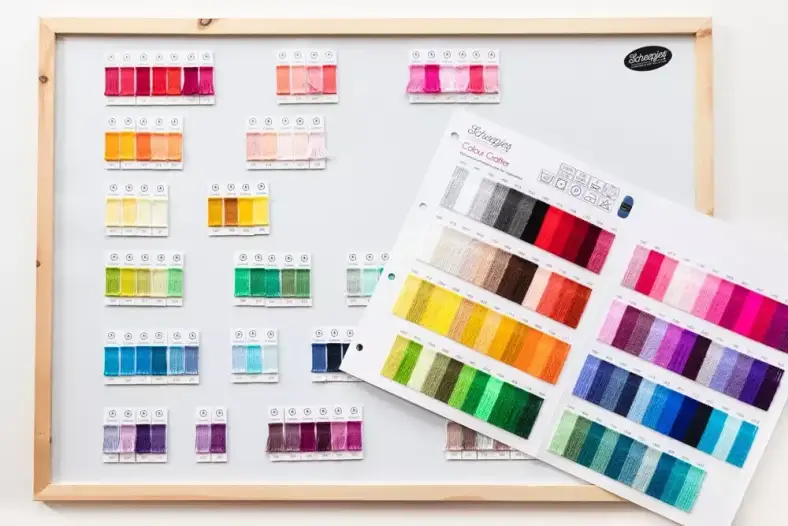
I recommend a 100% cotton yarn such as Scheepjes Catona, which is mercerised to prevent splitting and is available in 119 colours. If you choose Scheepjes Catona, use a 3.5mm hook (US size E/4). For other yarns, check out the yarn label for the correct size crochet hook.
Where can I buy yarn for Granny Squares?
I recommend a non-splitting, 100% cotton such as Scheepjes Catona. You can find Catona in the following webshops:
Learn how to crochet a Granny Square
This granny square tutorial is written in US terms. If you prefer UK terms, simply substitute every double crochet (dc) with a treble (tr). This tutorial is made for absolute beginners and contains a lot of photos and explanations. If you’re looking for a written pattern, scroll to the bottom of this tutorial for the free crochet pattern.
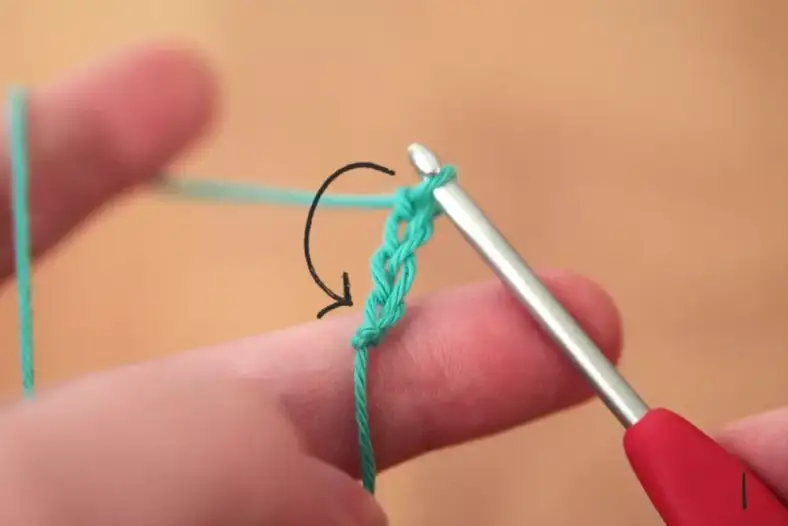
Getting started (photo 1)
Chain 4, then slip stitch the last chain to the first chain (photo 1). This creates a ring for you to crochet your granny clusters into. Alternatively, if you’ve mastered the magic ring, you can use that as a substitute for this step.
Round 1 (photos 2-6)
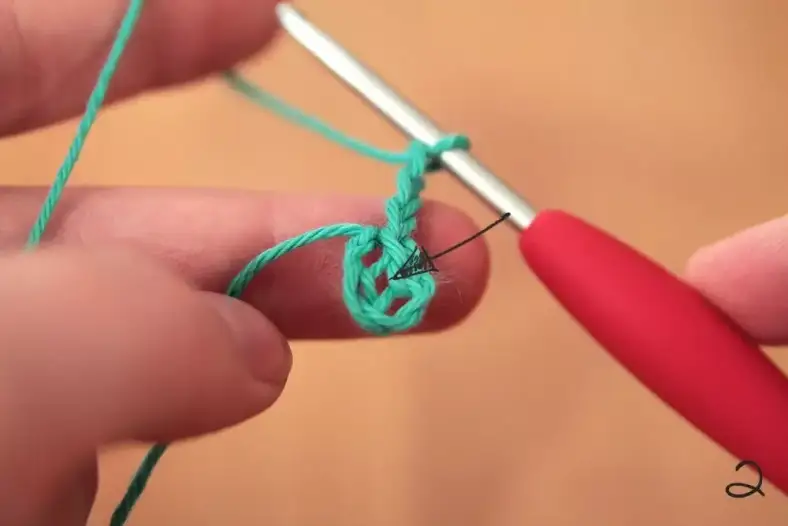
Chain 3. These three chains will count as your first double crochet, which I will abbreviate as dc from now on. Do you see the ring you’ve created by chaining the first and last ch together? The arrow in photo 2 indicates the centre hole. That’s where you are going to crochet your first round.
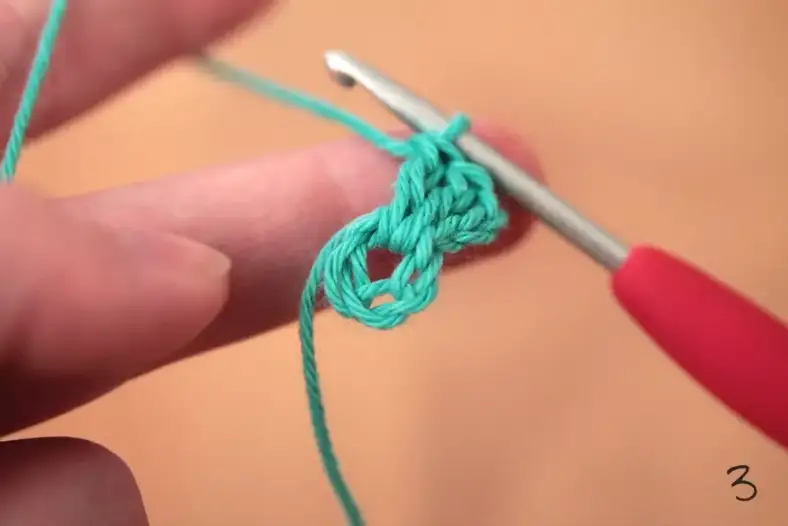
Make 2 more dc in the ring indicated by the arrow in photo 2. You just made your first granny cluster (photo 3)! Chain 2. Those two chains you just made form your first corner. Crochet 3dc in the ring again. You have now made two granny clusters and one corner, all in the same ring (photo 4). You might already see part of a square forming.
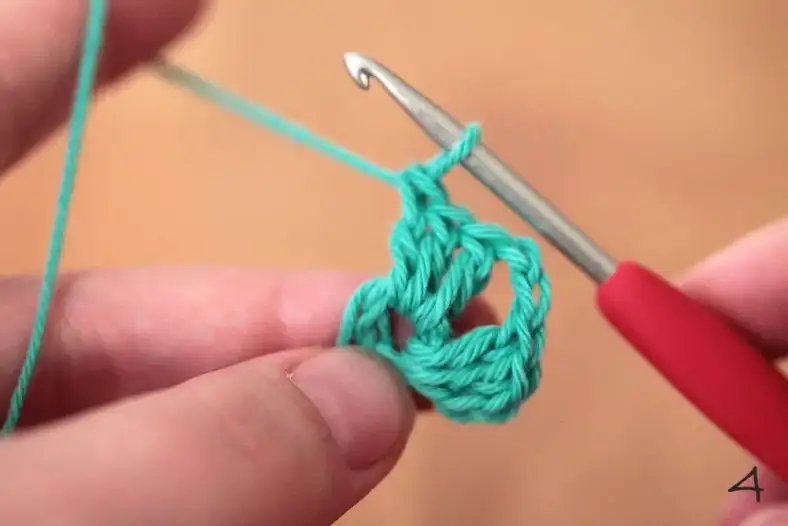
Now repeat the instructions "chain 2, 2dc in ring" 2 more times, to create two more granny clusters and corners. Finally, chain 2 more for your last corner. Your work will now look as in photo 5.
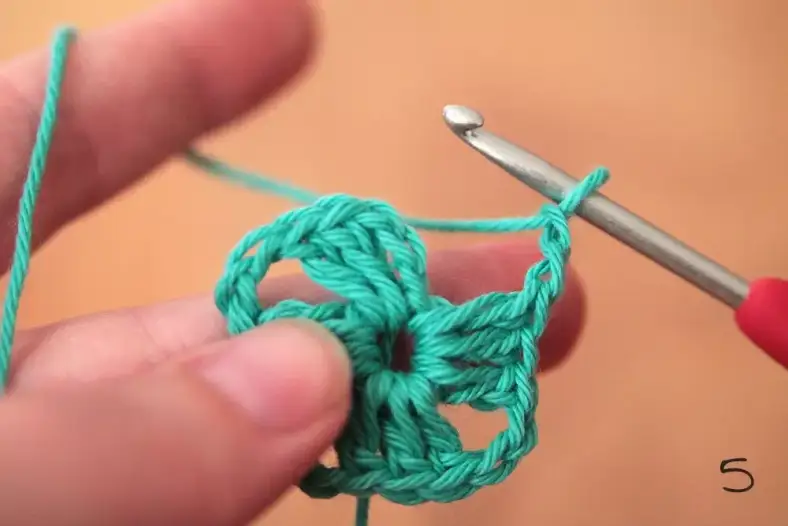
Now you will close your round. Do this by slip stitching the last chain into the third chain of the chains you’ve started your round with (photo 6). This closes your round and brings you back to the starting point.
As you might have noticed, I crocheted over the loose end of my yarn. I do this because it saves me an end to weave in later. If you're not comfortable doing this, then leave the loose tail at the back of your work to weave in later.
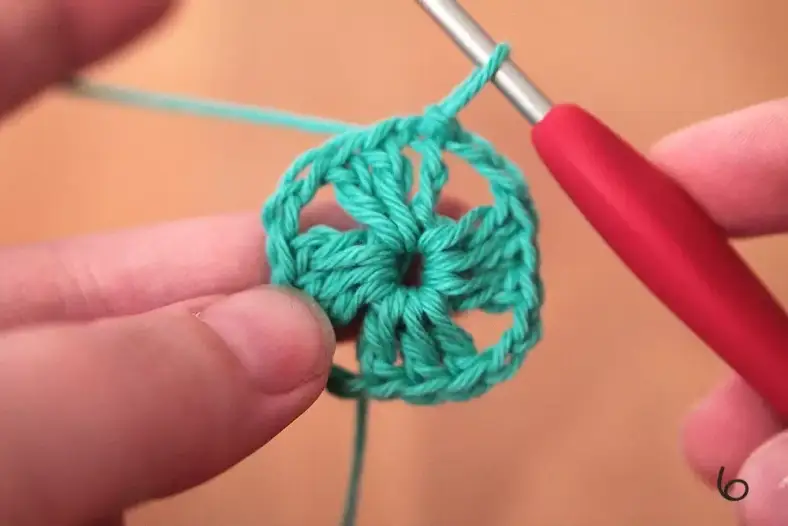
You just made the first round of your traditional Granny square. This row includes all the basic stitches, and from here on, it doesn't change much. You can stop here, or change to a new colour if you like, but I’ll continue with the same colour for a solid granny square in this tutorial.
Round 2 (photos 7-11)
You’re now going to start your next round. Your first cluster will be a special one: normally, you work your clusters in the chain spaces that you created between clusters in the previous row. However, because you crochet from right to left, there is no space for your other stitches in this round: your cluster from the previous round is in the way! That’s why we’re breaking up this cluster and finishing it in the final stitches of this round. Follow the steps below, and it will make sense!
Chain 3. This will count as your starting dc again (photo 7).
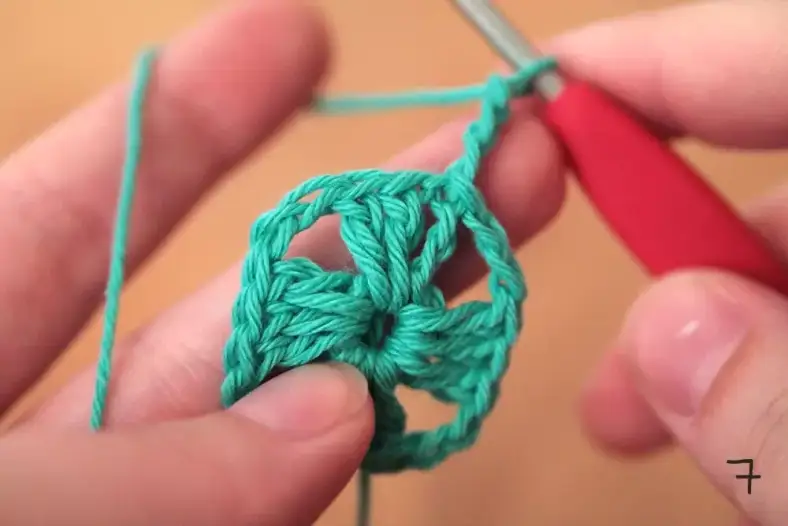
Chain 1 more. You have now made a dc (your first three chains) and an extra chain for a chain space. Remember, you only need one chain in between clusters on the same side, and two chains if you’re crocheting a corner.
In the corner space of the previous round, crochet 3dc (photo 8). Do you see what’s happening? You’re going to make a new corner in the corner space of the previous round.
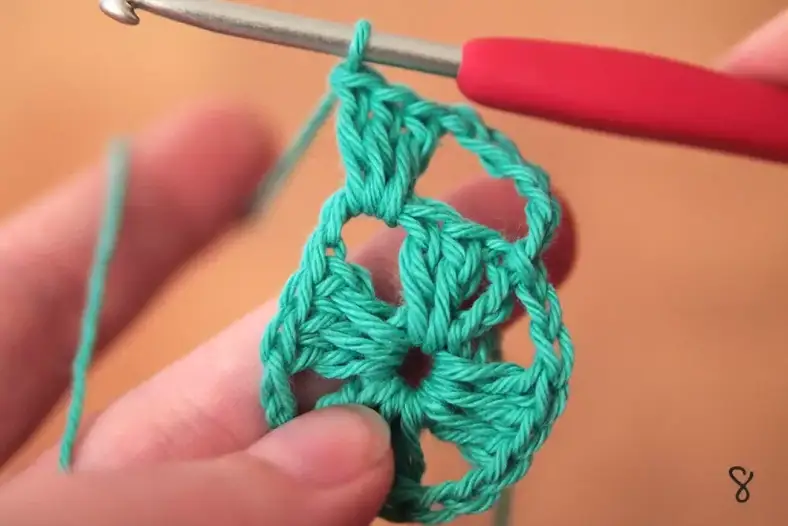
Chain 2, and then make another 3dc in the same corner space (photo 9).
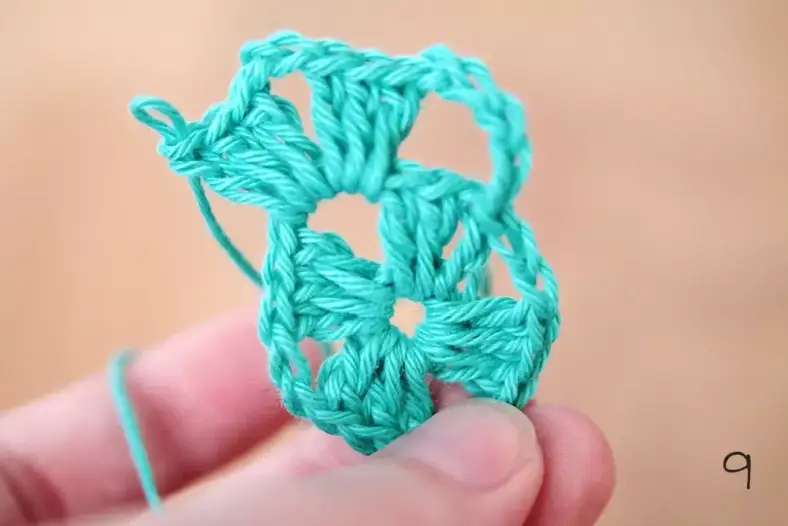
You’re going to continue like this around your square. Chain 1 to create a chain space. Next, crochet (3dc, 2 chains and 3dc) in the same corner space. Repeat this until you end up on the side where you started. In your final corner, be sure to crochet 2dc instead of 3dc (photo 10). Why? Because we started the round with our special ‘broken up’ cluster. We made three chains, and those counted as our first dc. So now we add two at the end of the round to complete the granny cluster. Does it make sense now?
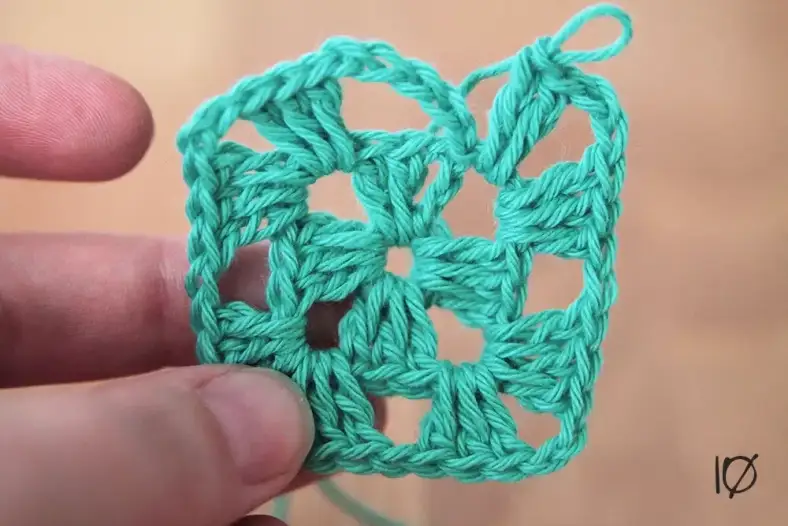
Slip stitch your last dc to the third chain of your first three chains, and you’re done with this round as well (photo 11)! It’s starting to look like a proper granny square, doesn’t it?
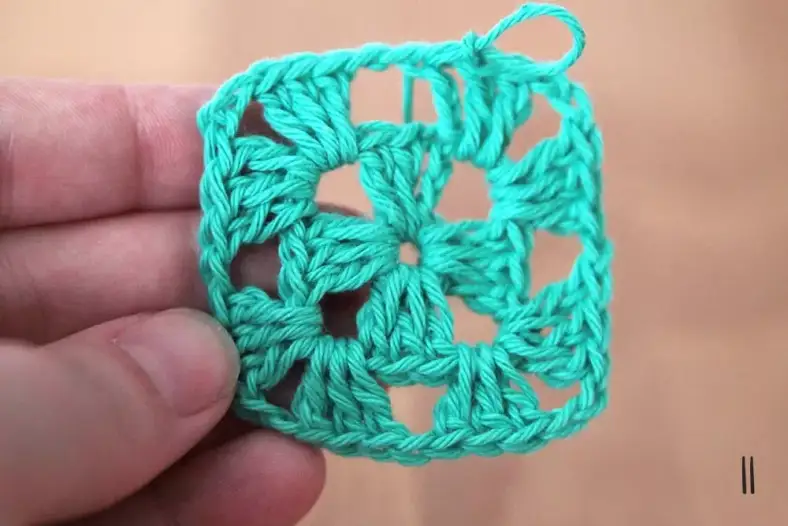
Round 3 (photos 12-13)
Chain 3, those will count as your starting dc. As you can see, this time you’re on the ‘right’ side of the previous round cluster. Therefore, there’s no need to break up your first cluster, as you did in the previous round. Crochet 2 more dc in the chain-space (photo 12).
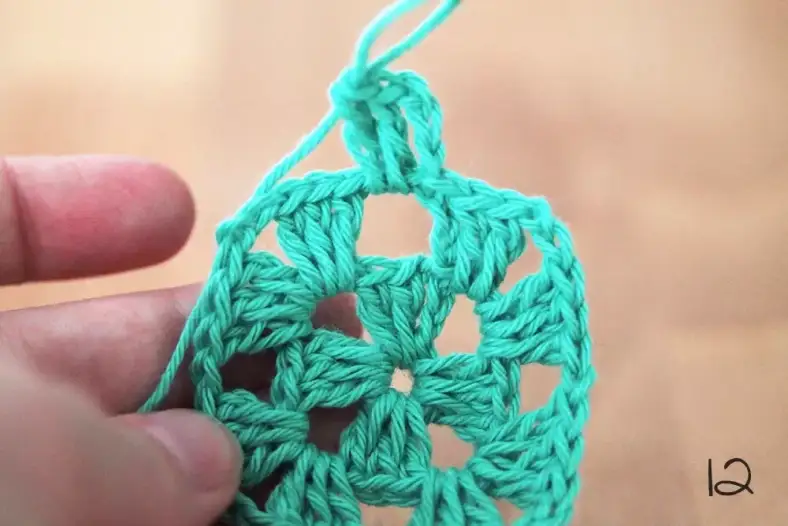
You’re now ready to crochet a corner again, so repeat what you did in the last round. Make 3dc, 2 chains and 3dc in the same corner space. Chain 1 to create a chain-space, and crochet 3dc in the next chain-space of the previous round. Now you’re ready at your next corner!
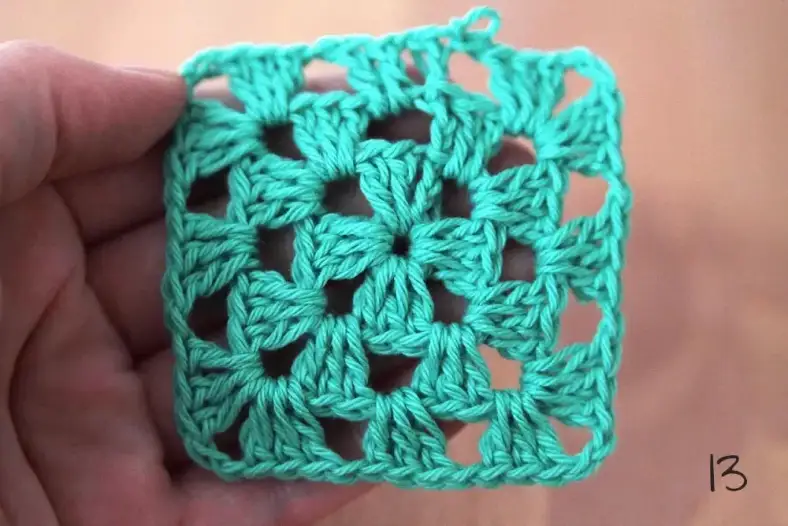
Continue like before, making corners and granny clusters in between. Finally, close the round with a slip stitch in the third chain of your starting three chains (photo 13).
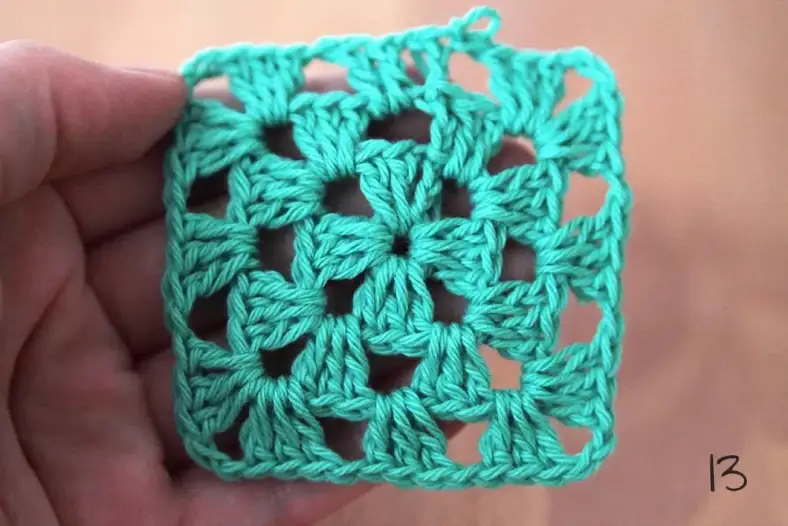
Do you see a pattern emerging? Because you make two granny clusters in each corner space, you increase the number of chain spaces each round. That means each round, you can make one extra granny cluster in between, helping your granny square grow larger and larger. This is how you create a classic granny square.
I hope you have seen that the granny square is no mystery to those who’ve followed a step-by-step tutorial! I’ve also written this pattern in the ‘regular’, condensed crochet format.
Written basic granny square pattern
Abbreviations (US terms)
- beg: beginning
- ch: chain
- ch-sp: chain-space
- dc: double crochet
- ss: slip stitch
Basic crochet pattern
Ch4, join with ss in first ch to close ring.
Round 1 Ch3 (counts as first dc), 2dc in ch-sp, (ch2, 3dc in ch-sp) 3 times, ch2, join with ss in 3rd ch of beg-ch.
Round 2 Ch4 (counts as first dc + ch 1), *(3dc, ch2, 3dc) in corner ch-sp, ch1; repeat from * 2 more times, (3dc, ch2, 2dc) in corner ch-sp, join with ss in 3rd ch of beg-ch.
Round 3 Ch3 (counts as first dc), 2dc in ch-sp, ch1, *(3dc, ch2, 3dc) in corner ch-sp, ch1, 3dc in next ch-sp, ch1; repeat from * 2 more times, (3dc, ch2, 3dc) in corner ch-sp, ch1, join with ss in 3rd ch of beg-ch.
Continue as in Round 3, but crochet 3dc and ch1 in each ch-sp between corner spaces. This will grow your granny square motif to the desired size.
Remember: if you’re ready for the real work, my Rainbow Granny Square Blanket is perfect for practising your Granny squares!
Granny Square Inspiration
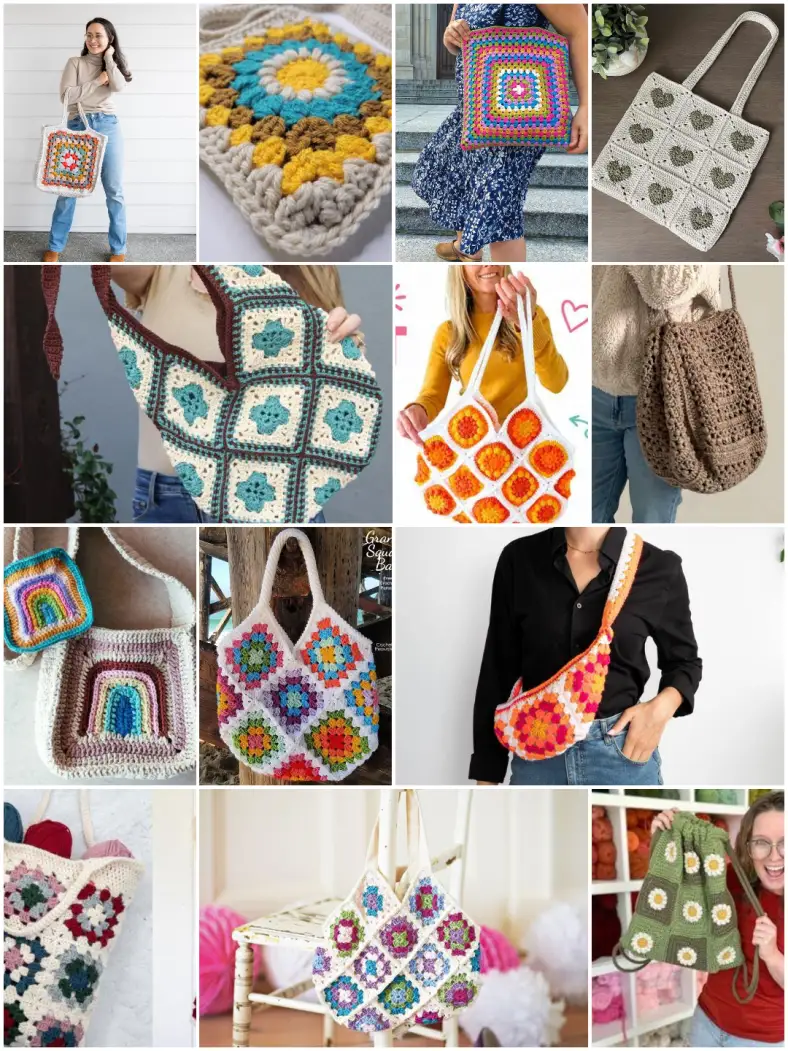
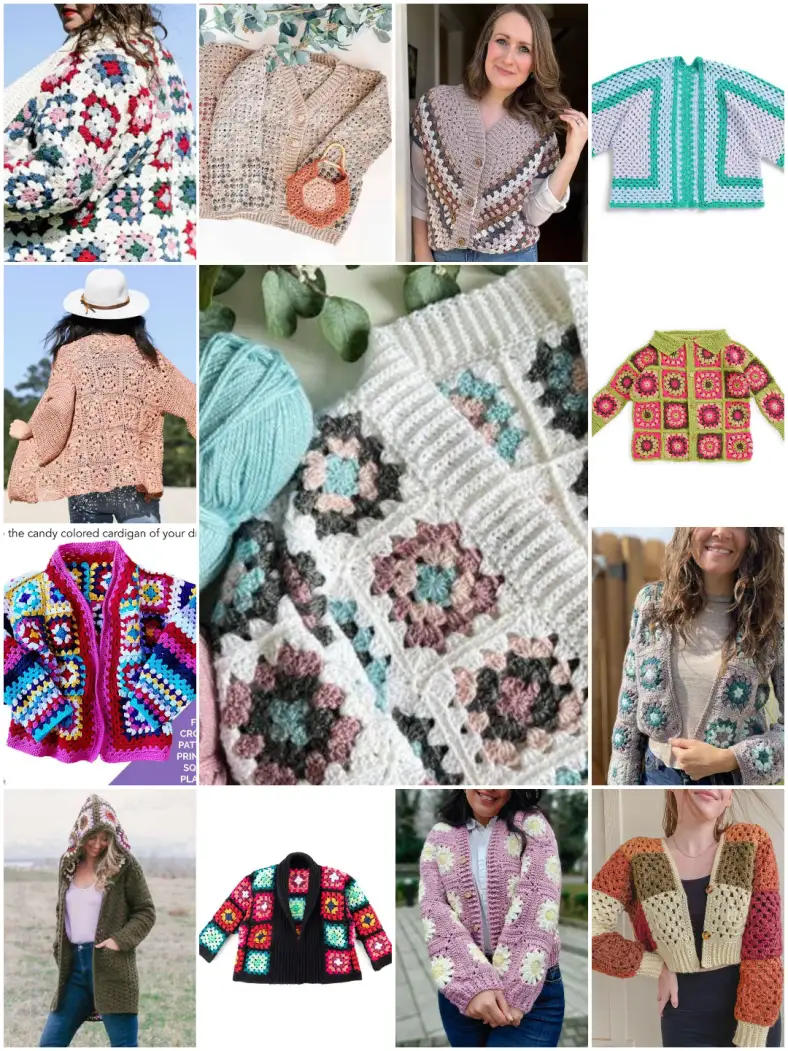
I've created several roundup posts with granny square designs. They vary from a solid granny square to more intricate patterns and square variations. Most of these patterns include schematic drawings and step-by-step instructions, tailored to your skill level. Some even have a video tutorial. Practising is the best way to learn a new skill, so dive into these patterns and learn something amazing:
Comments
Dani
September 01, 2016 01:04
Doomkitty13
December 28, 2017 03:14
Anaida
June 25, 2017 15:23
Doomkitty13
December 28, 2017 03:12
Judy Shanklin
January 03, 2018 05:09
Saskia
February 27, 2018 22:27
veronica
April 24, 2018 10:36
Melanie
February 24, 2019 23:08
Kirsten
February 25, 2019 10:13
Mary
December 07, 2019 00:50
Tracey
July 04, 2020 11:50
Misty Michell Gardner
August 30, 2020 23:13
Kirsten
August 31, 2020 07:48
b
October 02, 2021 08:24
b
October 02, 2021 08:24
Kris
January 29, 2022 03:06
Kirsten
July 03, 2022 21:33
Odette
July 03, 2022 20:12
Toddbucks
November 24, 2022 23:11
Christine
April 28, 2023 15:36
Kirsten
September 04, 2026 12:40
Iona
January 07, 2024 19:59