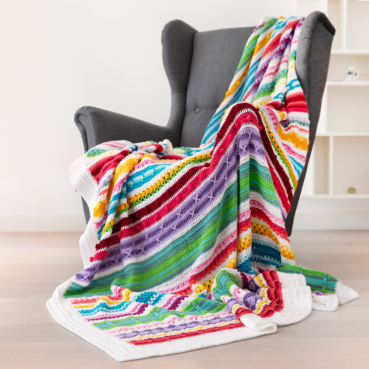
Rainbow Sampler Blanket (Part 10)
08.Jul.20 / Kirsten BalleringMaterials and preparation
You can find all information about yarns and hook sizes in the pattern of week 1.
Yarn
Shop the yarn!
You can find Scheepjes Colour Crafter via your local Scheepjes retailer or order online in these webshops:
Notes
- You can find general information and the patterns for the previous parts for this CAL here.
- Yarn amounts used in Part 10 are below. please note: these are my yarn amounts. I'm a loose crocheter. If you need less, that's perfectly fine as long as the blanket looks and feels good.
- Colour A: 36g
- Colour D: 23g
- Colour M: 12g
- Colour N: 12g
- Colour S: 44g
- Colour X: 16g
Abbreviations (US terms)
- ch: chain
- hdc: half double crochet
- RS: Right Side
- sc: single crochet
- ss: slip stitch
- WS: Wrong Side
Repeat formats
- *….; rep from * once/twice/3x Crochet the instructions after * and then repeat that section a further number of times as indicated.
- (…) once/twice/3x Crochet the instructions between brackets the total number of times indicated.
- […] Indicates the amount of stitches at the end of a row or round.
- (…) in same st/sp Indicates that all instructions between brackets are worked in the same stitch or space.
Techniques
Star Stitch
The Star Stitch is, together with the Catherine Wheel, one of the complicated stitches in this blanket. But it’s oh-so-pretty if done right!
Stitch repeat in blanket: Multiples of 2 + 2 stitches in the original stitch, we use a multiple of 2+1 stitch.
A full Star Stitch is made in two rows. In the first row, you’ll create the bottom ‘spokes’ by crocheting stitches together. On the second row, you’ll create the top ‘spokes’ of the star. In terms of techniques, it resembles the Catherine Wheel!
Join your colour with a ss in the first stitch. Crochet four ch, counting as dc and one ch (photo 1). Insert your hook in the second ch from hook, yarn over and pull up a loop (photo 2). This might be a bit fiddly but rest assured, it’s only for the first stitch. Insert your hook in the next ch, yarn over and pull up a loop (photo 3). Insert your hook in the first stitch where you’ve also made the ss, yarn over and pull up a loop (photo 4). Do the same for the next two stitches (photo 5). You now have six loops on your hook. Yarn over once more and pull through all loops on hook (photo 6). Work a ch to create the ‘eye’ of the star (photo 7). This is your first Star Stitch!
In this blanket, we’ll work chains between the Star Stitches, to make it slightly more supple. So crochet one chain (photo 8). You’ll now start your second Star Stitch.


Insert your hook in the eye of the previous star, yarn over and pull up a loop (photo 9). Insert your hook IN the spoke of the previous star, yarn over and pull up a loop (photo 10). Insert your hook in the stitch where the last spoke of the previous star is located, yarn over and pull up a loop (photo 11). Do the same for the next two stitches. You now have six loops on your hook. Yarn over, and pull through all loops on hook, and work a ch to create the eye. That’s your second Star Stitch done! Finally, work one more ch (photo 12).
Follow the instructions for the second Star stitch to the end of the row, with chains in between. Once you’ve finished your final Star Stitch, crochet one hdc in the same stitch (photo 13). We need this stitch for a better edge later on. You won’t notice this in your blanket. Turn your blanket. Your backside will look like photo 14.
Now you’ll be crocheting the top spokes of each star. They’re relatively easy: Crochet two chains. Skip the first hdc, and crochet two hdc in the eye of each star across. Once you reach the beginning, work one hdc in the final stitch (which is the third ch of your begin-chains) (photo 15). The full Star Stitch looks like photo 16.
There’s this nifty thing about Star Stitches: you know you’re working them correctly if they line out precisely on top of each other. If they aren’t, you have missed a stitch somewhere.


Crochet pattern
Stripes section 3 (Rows 157-170)
Just like the previous stripes section, this will be a nice part for TV crochet. Just 241 hdc’s, every row!
Row 157 (RS) Join Colour S with a ss in first st, ch1, 1hdc in same st, 240hdc, ch1, turn. [241 hdc]
Row 158 (WS) 241hdc, ch1, turn. [241 hdc]
Row 159 (RS) 241hdc, cut yarn, turn. [241 hdc]
Row 160 (WS) Join Colour D with a ss in first st, ch1, 1hdc in same st, 240hdc, cut yarn, turn. [241 hdc]
Row 161 (RS) Join Colour S with a ss in first st, ch1, 1hdc in same st, 240hdc, cut yarn, turn. [241 hdc]
Row 162 (WS) Join Colour D with a ss in first st, ch1, 1hdc in same st, 240hdc, ch1, turn. [241 hdc]
Row 163 (RS) 241hdc, cut yarn, turn. [241 hdc]
Row 164 (WS) Join Colour S with a ss in first st, ch1, 1hdc in same st, 240hdc, ch1, turn. [241 hdc]
Row 165 (RS) 241hdc, ch1, turn. [241 hdc]
Row 166 (WS) 241hdc, cut yarn, turn. [241 hdc]
Row 167 (RS) Join Colour D with a ss in first st, ch1, 1hdc in same st, 240hdc, cut yarn, turn. [241 hdc]
Row 168 (WS) Join Colour A with a ss in first st, ch1, 1hdc in same st, 240hdc, ch1, turn. [241 hdc]
Row 169 (RS) 241hdc, ch1, turn. [241 hdc]
Row 170 (WS) 241 hdc, cut yarn, turn. [241 hdc]
Star stitch section (Rows 171-179)
The Star stitch (or Marguerite stitch) is a beautiful, modern addition to this blanket. It’s the final new stitch you are going to be doing in the body of this blanket. The stitch pattern is moderately challenging, but as we’re nearing the end of this blanket I’m confident that you can do this! The star stitch is made by pulling up loops from various stitches, including the ‘eye’ and ‘leg’ of the previous star stitch. This creates a very dense stitch. It’s also worked over two rows to create one star, just like the Catherine wheel stitch is. On the RS rows you will create the bottom ‘spokes’ of each star, and on the WS rows you will create the top ‘spokes’. The stitch also lines out neatly with the previous row of Star stitches instead of slightly shifting like other stitches tend to do. It’s a good check to see if you’re still crocheting in the right stitches!
Row 171 (RS) Join Colour X with a ss in first st, ch3 (counts as hdc + ch1), insert hook in second ch from hook, yarn over, pull up loop, insert hook in third ch from hook, yarn over, pull up loop, insert hook in stitch at base of ch3, yarn over, pull up loop, (insert hook in next stitch, yarn over, pull up loop) for each of the next two stitches, yarn over, pull through all loops on hook, ch1, (first star stitch made), ch1. *Insert hook in eyelet of previous star stitch, yarn over, pull up loop, insert hook in last spoke of previous star stitch, yarn over, pull up loop, insert hook in stitch at base of last spoke of previous star stitch, yarn over, pull up loop, (insert hook in stitch, yarn over, pull up loop) in each of next two stitches, yarn over, pull through all loops on hook, ch2; repeat from * another 118 times, 1hdc in same stitch as last spoke of last star stitch, ch2, turn. [120 Star stitches, 1 hdc, 3 ch, 242 stitches in total]
It’s important not to forget the extra chain in between Star stitches. That will help you keep this stitch as stretchy as the other parts of your blanket.
The final hdc that you crochet in the last star spoke is to give this row-end a foundation for the edging that we will work next week. Ideally you would have 240 or 242 stitches in this blanket to make the perfect star stitch row with the last hdc in a separate stitch, but we don’t. So we’re solving it this way! Don’t worry, you won’t see it in the blanket.
Row 172 (WS) Skip first st, (2hdc in eyelet of star) 120 times, 1hdc in third ch of begin-ch3, cut yarn, turn. [241 hdc]
Row 173 (RS) With Colour N, repeat Row 171. [120 Star stitches, 1 hdc, 3 ch, 242 stitches in total]
Row 174 (WS) Repeat Row 172. [241 hdc]
Row 175 (RS) With Colour M, repeat Row 171. [120 Star stitches, 1 hdc, 3 ch, 242 stitches in total]
Row 176 (WS) Repeat Row 172. [241 hdc]
Row 177 (RS) Join Colour A with a ss in first st, ch1, 1hdc in same st, 240hdc, ch1, turn. [241 hdc]
Row 178 ( WS) 241hdc, ch1, turn. [241 hdc]
Row 179 (RS) 241hdc, cut yarn. [241 hdc]
Weave in all ends.
The blanket now measures approximately 170cm in width and 174cm in height and should be quite stretchy. It’s okay if some rows pull slightly inwards or outwards more than others (like the Larksfoot section, Bobble section or the Star stitch section). We’ll fix that with blocking and the edging.
Continue with part 11 of the Sampler Blanket.
Diagram
Crochet chart week 10

Key week 10

Yarn colours


Comments