
Materials and preparation
See part 1 for yarn and hook requirements.
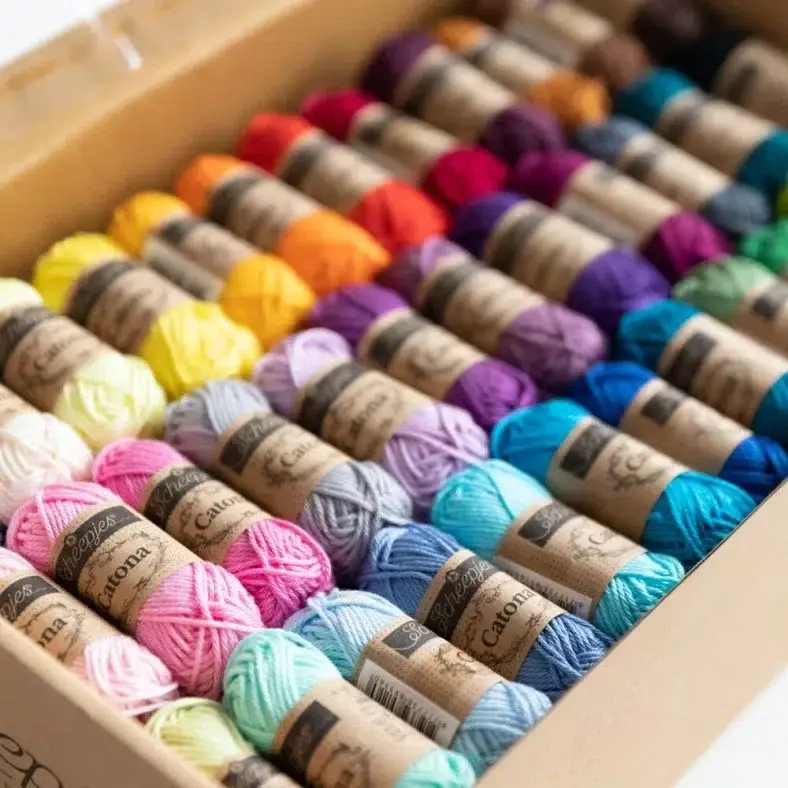
Shop the yarn!
You can find the yarn at online retailers such as:
Abbreviations (US terms)
- begin-puff stitch
- ch2, (yarn over, insert hook in stitch, yarn over, pull up loop) 3x in the same stitch, yarn over, pull through all loops on hook
- ch
- chain
- dc
- double crochet
- hdc
- half double crochet
- inversed popcorn
- 6dc in same stitch, remove hook from loop, insert hook from back to front through first dc, pick up loop, pull through dc to close popcorn
- puff stitch
- ch2, (yarn over, insert hook in stitch, yarn over, pull up loop, yarn over, pull through two loops on hook) 3x in the same stitch, yarn over, pull through all loops on hook
- RS
- Right side
- sc
- single crochet
- st(s)
- stitch(es)
- ss
- slip stitch
- WS
- Wrong side
Repeat formats
- *….; rep from * once/twice/3x — Crochet the instructions after * and then repeat that section a further number of times as indicated.
- (…) once/twice/3x — Crochet the instructions between brackets the total number of times indicated.
- […] — Indicates the amount of stitches at the end of a row or round.
- (…) in same st/sp — Indicates that all instructions between brackets are worked in the same stitch or space.
Notes
- Don't forget: Blue colour codes are for the Rainbow version!
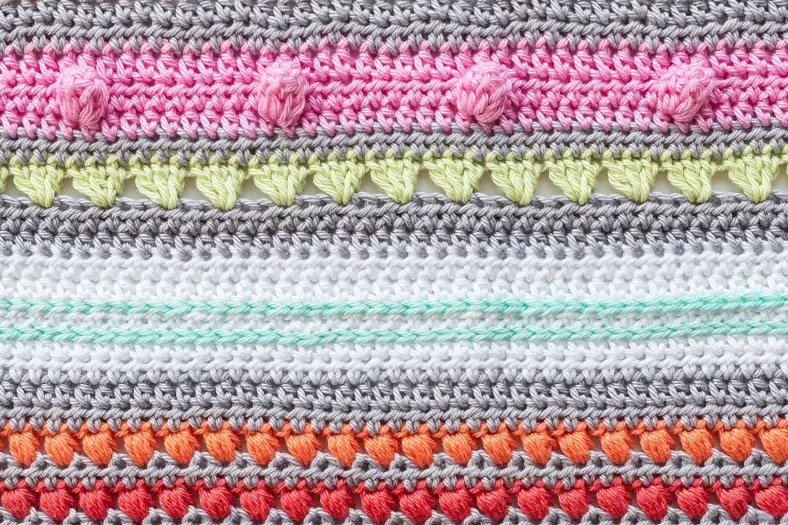
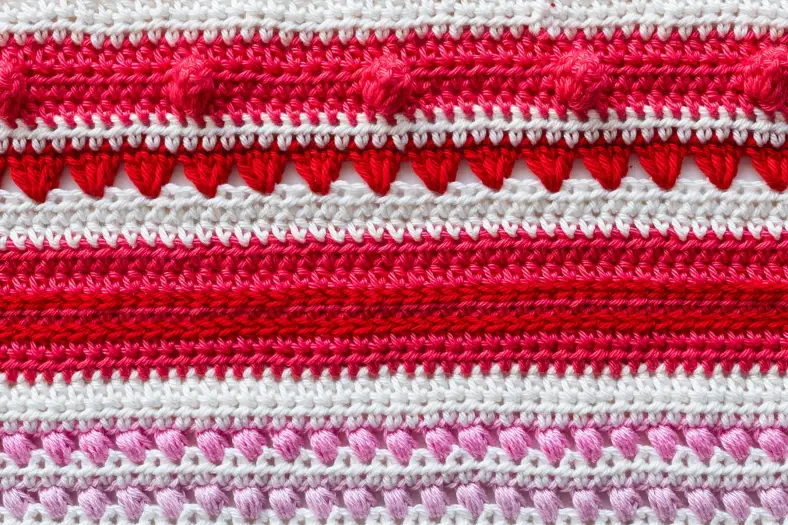
Colour layout
Techniques
Puff stitch
Click here for the tutorial about the puff stitch.
Surface crochet
Click here for the tutorial about the surface crochet.
Granny Clusters
Click here for the tutorial about granny clusters.
Crochet pattern
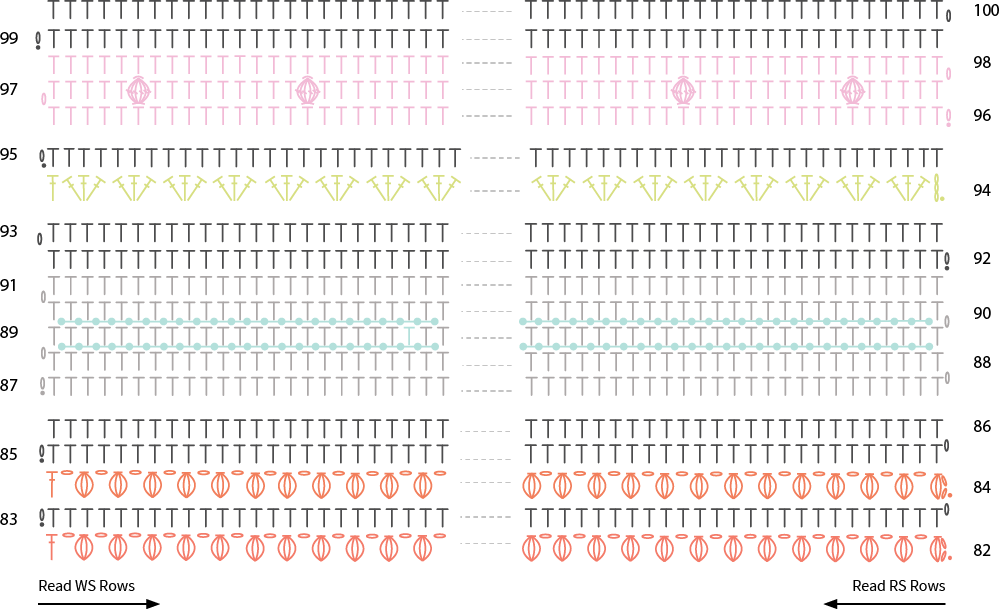
Puff Stitch section 3 (rows 82-86)
Another Puff stitch section. How I love these stitches!
If you look closely at your stitches, you can see that the chains you’re crocheting look like they’re laying on top of the puff stitches!
Surface crochet section (rows 87-93)
In this section, we’ll be working with a new technique: surface crochet. Surface crochet is special. It’s not worked on top of the stitches, but OVER the stitches (hence the name). It’s the perfect way to adorn a little piece of crochet you’ve made.
It’s also a versatile technique. While we’re only making straight rows in this blanket to keep it simple, you can also crochet shapes like the crossed rows in the Hygge shawl, or circles like in my Roller Coasters. You can go crazy with colours if the basics you’re working with are simple!
For surface crochet, you will need a basic crochet fabric to work on. That’s why we’ll be working a couple of rows of hdc only. You can surface crochet on any type of solid stitch though (sc’s, hdc’s, dc’s). If you want to make shapes that are worked over several rows, you’re going to want to stick with tight sc’s though. The height of a dc is just too big to cross with a single chain, as you can imagine.
Repeat the instructions above for the stitches in Row 89.
It’s important to check your surface tension throughout. You do this by stretching your fabric widthwise. If it is supple and stretches as much as your regular stitches do, you’re good. If you feel that your stitches are very tight and are impairing the stretch, redo this row and make sure to keep all loops very loose. If this is difficult for you, you can use a larger hook instead.
Granny Cluster Section 4 (rows 94-95)
I’m sure you know these stitches by heart!
Popcorn section 3 (rows 96-100)
This section might look like the previous sections, but it’s different in one way. You’re making the popcorns on a WS row. So in order to have the popcorns pop on the right side of the blanket (the RS), you’ll have to make inverted popcorns. Don’t worry, they’re not difficult.
Continue with part 8 of the pattern.
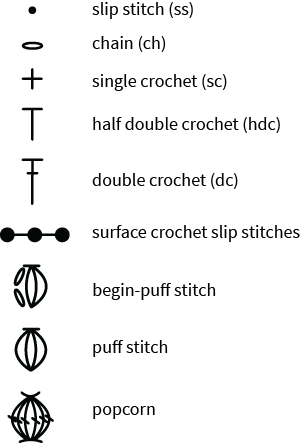
Diagrams
You might also like
Comments
Be the first to comment to this post!